
Besteck dekorieren. Mosaik Vorlage. Leather Passport. Schmuck-schule - Sie können es selber machen. Lucky Wishing Stars Tutorial. You’ve probably seen these little puffy origami stars before.
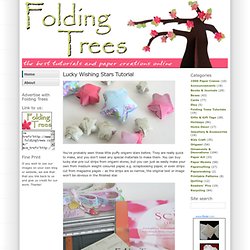
They are really quick to make, and you don’t need any special materials to make them. You can buy lucky star pre-cut strips from origami stores, but you can just as easily make your own from medium weight coloured paper, e.g. scrapbooking paper, or even strips cut from magazine pages – as the strips are so narrow, the original text or image won’t be obvious in the finished star. Anti-clockwise from top left: pre-cut strips, paper cutter, scrapbook paper, magazine page. Now on to the tutorial! Christmas tree ornament mobile. This year we decided to do something a little different with our tree and I created this Christmas tree mobile consisting of ornaments suspended on clear threads.

When I was shopping for ornaments to use found a lot on sale and went a little crazy. I decided it would be worth it to see how three different options would look. Hot Cocoa Kit. HOW-TO MAKE A HOT COCOA KITby Destri of The Mother Huddle There just isn't much that a three year old can create that isn't something only a mother would love.
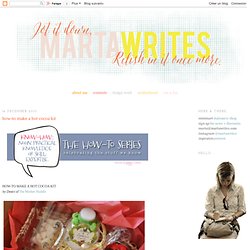
I thought and thought about what my little boy could make his friends for Christmas and finally came up with a Hot Cocoa Kit. Over the course of a week we worked on little projects to add to the kit, and I can't tell you how much fun we had with it. He got to mash things, melt things, sprinkle things, dip things, fill things....all sorts of sensory play. Photo Sun Catcher. DIY. DIY Braided Bead Bracelet. It’s been awhile since our last bracelet DIY.

I don’t know about you, but our wrists have been begging for another colorful addition for months now. So after playing with some materials that were already on hand, we’ve created a tutorial for a braided bead bracelet, which is a not so distant cousin of the hex nut and wrap bracelet. Because honestly, you can never have too many . . . You’ll need: Cut the waxed linen cord into a 26″ and 19″ piece. Tie a knot about half an inch down from the loops. Start braiding the strands. Push the bead against the base of the braid, and cross the left strand over the middle. Keep a finger at the base of the braid, holding the beads in their place and keeping the braid tight. Finish the bracelet with another inch of braided cord, measuring it against the wrist. Thread on a two hole button – two strands through one hole and one strand through another.
Trim the end. Your bracelet is finished! Villa Venga: Kreative Bezüge für Ikea-Möbel. Platform 21 - Flatpack re-arranged. Tutorials. Baby-Wickeltaschen - CAYS. Pop Art Poster: Become a pop icon! First time here?
Welcome! We have a lot of fun stuff to play with like ourMotivational Poster maker, Magazine Cover maker, Pop Art poster, and much more! Play as much as you like—everything is free. We also sell awesome custom-printed products. Origami School - Gibbon. Initiative Handarbeit. House diorama. Left: The actual house, Right: The paper diorama I always ALWAYS forget to photograph these before I put them under glass.
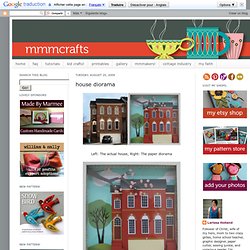
Then I have to deal with the ever present glare and reflection of myself in the glass. Erg. Sorry. Our wonderful friends, the Smileys, hosted our family last May at their house near Washington D.C. Kids’ Crafternoon Book Giveaway. I’m happy to be part of the blog tour for the new kids’ crafting books from Kathreen Ricketson of Whip Up.
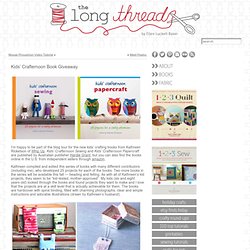
Kids’ Crafternoon Sewing and Kids’ Crafternoon Papercraft are published by Australian publisher Hardie Grant, but you can also find the books online in the U.S. from independent sellers through amazon. Kathreen compiled and edited this series of books with many different contributors (including me), who developed 25 projects for each of the books. Two more books in the series will be available this fall — beading and felting. As with all of Kathreen’s kid projects, they seem to be “kid-tested, mother-approved”.
My kids (six and eight years old) looked through the books and found projects they want to make and I love that the projects are at a skill level that is actually achievable for them. Workshop: Teeadventskalender. (studs and pearls) Rodgeblog. Mosaik aus Gips » unikatissimas. Häkelblumen - farbenmix-de. Welcome to the heart of Here you will find: basic sewing tips, step-by-step photo instructions to all of our farbenmix patterns, detailed sewing instructions, a lot of design examples and many more.
What is the best way to copy a pattern? Etsys Deutscher Blog. Ugly bunny pincushion and bag charm (with patterns) Making a pincushion is a delicate task.
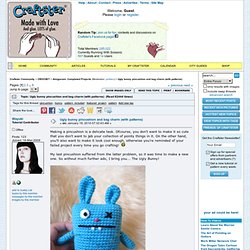
Ofcourse, you don't want to make it so cute that you don't want to jab your collection of pointy things in it. On the other hand, you'll also want to make it look cool enough, otherwise you're reminded of your failed project every time you go crafting! Espandrilles mal etwas anders @creadoo! Lifestyle, Dekoration, Basteln und mehr... Creative Studio. Download Projects for Cards, Games, Gifts & More.
Pipe Cleaner Creatures. Gehäkelte Pantoffeln für jeden in 2 Stunden @creadoo! Lifestyle, Dekoration, Basteln und mehr... Schleifen binden @creadoo! Lifestyle, Dekoration, Basteln und mehr... Tiny Polaroid Magnets. Hi there!
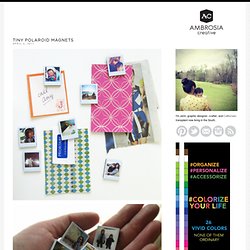
It’s felt like forever since I’ve last blogged, and has felt like an eternity since I’ve done anything crafty and nifty. Since my morning sickness has gone into full speed (yes, we’re expecting our third this fall!) I haven’t felt like myself. But nothing like inspiration to wake one out of a reverie — or nightmare, in my constantly sick state. I came across these DIY Pantone chip magnets on How About Orange and wanted to do something similar. You will need: Cardboard (mine was the backing of a sketchbook — much thicker than the back of a regular spiral bound notebook) or 2-3 sheets of white cardstock or poster board spray-mounted together to use as a sturdy backing to the magnetsOpaque white marker (necessary only if your cardboard is not white) Craft knife Metal straight edge/ruler Clear packing tape or frisk film.
Step 1: Download a Photoshop file of the Polaroid frames below. Step 2: Print out photos onto photo paper. Step 4: Trim out photos with craft knife. 487 Comments.