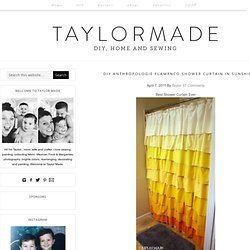

Taylor Made: DIY Anthropologie Flamenco Shower Curtain in Sunshine. I have been eyeing these from Anthropologie for years… But I have some problems: #1 I don’t want to spend $118.00 on a shower curtain #2 Those colors don’t match my room So what is a girl to do… how about make one.

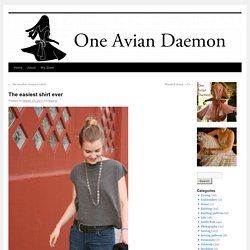
And I call mine “Sunshine”. Anthropologie’s Shower Curtain has ten “panels” of descending color. I could only find nine fabrics that I thought really worked so mine has nine. What you need: - 9 yards of solid fabric in a monochromatic color palate; light to dark - light colored shower curtain to cover - sewing machine - serger (optional but makes it 10x easier) Wash and iron all of your fabric I am going to call each color a “panel”. Now each panel has two sides, a top and a bottom. Now it is time for ruffles and who doesn’t love a good ruffle? Now we will sew the panels on to the shower curtain. Now do the same with the top panel. Now here are my lovely math skills… I’m sure there is a better way to do this but I like to eyeball. Felt Food. The easiest shirt ever. I thought this shirt was easy to make, but it doesn’t compare to the one I made for Isabel this weekend.

She started describing a shirt she’d seen: square, slightly cropped, very drapey. I asked her to draw a picture and she drew a rectangle. Yes, I can do that. We found the drapiest fabric in the house, a fairly loose knit left over from Rosie’s weekend project. I measured her, cut out two rectangles, sewed up the sides and shoulders, cut out the neckline, and 10 minutes after she asked for it, she had a new top.
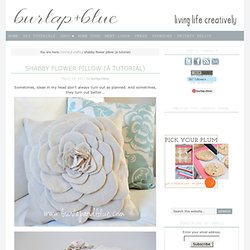
To make your own you will need half a yard of drapey knit fabric (a bit more if you want it longer). Decide where you want the sleeves to come to. Put the two rectangles together with the right sides of the fabric facing each other. You’re done! Shabby flower pillow (a tutorial) - StumbleUpon. Sometimes, ideas in my head don’t always turn out as planned.

And sometimes, they turn out better…. After running across Sweet Jessie’s Scalloped Garland tutorial a few months ago, I wanted to take the same technique and use it to make a shabby, fun, linen pillow. Here’s how I did it: Supplies Needed:fabric (I used linen)sewing machinezipper (if desired) Step 1: Create your “petals”. Step 2: Take sew petals and turn inside out. Step 3: Stitch petals down to fabric. Step 4: Continue creating petals and attaching them to pillow front. Step 5: Almost there! Step 6: Glue or stitch your flower’s center onto your pillow fabric. You Might Also Like: Bloom, Bake & Create & Blog Archive & Ice Fabric Dyeing. Did you say you don’t have snow and want to do some dyeing?

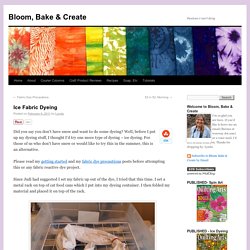
Well, before I put up my dyeing stuff, I thought I’d try one more type of dyeing – ice dyeing. For those of us who don’t have snow or would like to try this in the summer, this is an alternative. Please read my getting started and my fabric dye precautions posts before attempting this or any fabric reactive dye project. Since Judi had suggested I set my fabric up out of the dye, I tried that this time. I set a metal rack on top of cat food cans which I put into my dyeing container. Folded fabric on rack I topped the fabric with ice cubes.
Ice cubes on top of fabric I then sprinkled dye powder over the snow. Green, Raspberry and Yellow Dyes over ice cubes Follow procedures as other dyeing. After 24 hours Now to rinse, wash and dry. And this is what I got from this ice dyeing. Finished Ice Dyed Fabric I am so pleased with this piece. Join the Panels.