
1940s Hair Tutorial. Hello again, it’s Jessie from Sweet Thing!

40s hairstyles have been all over the fall runways and filling the pages of magazines, so I thought I would share an easy updated version of the 1940′s classic–the victory roll. I have bangs which makes this style a little tricky. I decided to do a side part and comb my bangs to one side, but this style can easily be done with a middle part if you prefer. 1. Start by wrapping your hair around a 1.5 inch curling iron, holding the ends of your hair out of the iron.
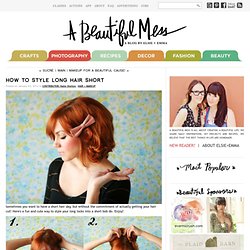
It’s as easy as that! How to tie a turban with a square scarf. How to style long hair short. Sometimes you want to have a short hair day, but without the commitment of actually getting your hair cut!

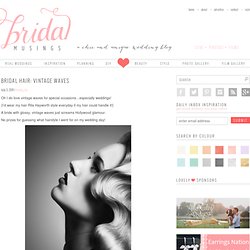
Here's a fun and cute way to style your long locks into a short bob do. Enjoy! 1. Divide your hair into two sections, from one ear to another. 2. Pin up the top section, just to keep it out of the way. 3. Thanks so much Katie! Bridal Hair: Vintage Waves. Oh I do love vintage waves for special occasions…especially weddings!

{I’d wear my hair Rita Hayworth style everyday if my hair could handle it!} A bride with glossy, vintage waves just screams Hollywood glamour. No prizes for guessing what hairstyle I went for on my wedding day! For the past few years, celebrities have really embraced vintage curls and waves on the red carpet. This look works best on mid length to long hair ~ shorter hair is best suited to Marcel waves which lie flat to the head. I personally feel that this style is so dramatic that it’s best to keep hair accessories simple ~ no big statement pieces. Birdcage or Mantilla veils would hide those beautiful, defined curls around the face so I’d go for a flyaway, pouffy veil or longer chapel veil ~ if any. Onto the tutorial… Here’s how to achieve this look at home ~ however, I’d always recommend having a trial with a professional, if you can. {Tutorial images via The Beauty Department} ~ Create a defined side parting. Recycled Magazine Page Nesting Bowls.
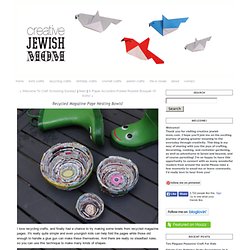
I love recycling crafts, and finally had a chance to try making some bowls from recycled magazine pages.

It's really quite simple and even youngish kids can help fold the pages while those old enough to handle a glue gun can make these themselves. And there are really no steadfast rules, so you can use this technique to make many kinds of shapes. And though I hesitate to mentions Passover cleaning, since it's still Purim in Jerusalem today, I thought I'd introduce this craft before some of you toss all the old magazines into the recycling bin!
You'll Need magazine or catalog pageshot glue gunbone folder or small ruler for scoring along edgesmodge podge or white glue/water How To: Fold magazine pages according to the following instructions: Fold page in half vertically, unfold and fold the two edges towards the center and score the edges.Fold those edges again towards the center, and score. To assemble bowl proceed as follows: