background preloader

Crafts

Facebook Twitter

25 Handmade Gifts Under $5. If your gift list is long and your budget is small here are some great Handmade Gifts that you can make. Keep in mind that handmade items are not just beautiful but special… I love to give them and I love to receive them. In my opinion they are the best! Jersey Knit Bracelet Lovely! This would make a perfect gift for any of your girlfriends.

You can choose the colors and recycle t-shirts that you have around the house. Cheap and cute! Tutorial Paper Clip Earrings Tutorial This is a brilliant idea… and the possibilities are endless. Love it! Printed Candles Who doesn’t love a candle? Think about how many different stamps you could use to customize this project. tutorial Hot Chocolate Art! What a great gift for neighbors and teachers… I am personally a hot chocolate lover so this would make a great gift for me tutorial Tile Coaster You can buy these plain tiles at Home Depot for under a dollar. I’ve seen them with family pictures also… Way cute! Tutorial Bow Belt I was amazed how easy this tutorial was.

So Pretty! Vintage Paper Wreath with Hymnal Sheets. My newest crafty idea. I LOVE making these! They aren't the easiest or fastest things I have ever made but I really enjoy the process, and they are so pretty to look at! I made one out of an old book and the others out of a vintage hymnal from my church's choir room. My honey scrounged around for one. But don't worry, it's ok, he has permission, he is the worship leader, I don't think he minds taking a book from himself for his honey and her crazy ideas!

I do have a few of these in my Etsy shop {Shameless, I know!} And because I am so behind from my move, I thought I would just share one little Christmas ornament I made. {{ It has come to my attention that there is a GREAT tutorial out there on how to make these ornaments. What items around your home have you found a new use for? Plastic Bag Iron-ons! Here is a super cool project where you can use all those plastic bags that you always seem to end up with - homemade iron on decals! You can use any kind of plastic bag or plastic table cloth with an image you like on it. Birthday party goody bags and storebags are great for this project. If you are super creative, you can even cut and design your own free form shapes. The decals should be permanent. Our first try at this peeled off by the end of the day.

It just needed a little more ironing. We love how all colors of shirts work with this project (this is a great way to cover up stains). What you need: plastic bagsironparchment paperscissors Turn on your iron to the cotton setting. Cover the image with a piece of parchment paper. Here's what happened when we tried to iron on a image that was too big. ...and ended up like this! Next we tried cutting out pictures from a plastic table cloth. Placed them on our shirt and ironed. Now Ben has a new custom shirt that he LOVES!!! A Tisket, A Tasket, A Paper Plate Basket! We saw this project over the summer for making Paper Plate Baskets for fruit and stored it away for future crafting. But, as usual, it got buried and forgotten about...until today! And though now may not be the right time to think about making fruit baskets, we think these simple and adorable baskets would be perfect for holding all yummy little goodies that we will be whipping up over the holidays!

What You Need: Paper PlatePencilScissors and/or Pinking ShearsRubber BandPaper ClipsRibbon Using your pinking shears (or any decorative scissors) cut roughly a 1/4" from around the edge of your plate. Our pinking shears have mysteriously disappeared, so we decided to just make a scalloped edge using regular scissors! Now flip your plate over and with a pencil draw out "tic-tac-toe lines" on the back, with the center square approximately in the middle of your plate. With your regular scissors, cut every other vertical line up to the edge of the center square. Fabric-Covered Bulletin Board. Always in need of organization, we had been wanting a bulletin board to post messages for a while. We had seen a few out there and realized that it would be easy (not to mention cheap!) To make one ourselves. Unfortunately we didn't take step-by-step pictures because we pretty much made it up as we went along and weren't sure how it would turn out!

We got an inexpensive bulletin board and took off the frame. We then found two fabrics: a brown one to cover the board in and a multi-colored one to make a coordinating pocket. But what about those adorable matching fabric-covered thumb tacks?? Stencil with freezer paper (harry potter tee)... - StumbleUpon. Yes, I am a nerd. I came up with a brilliant idea for a Harry Potter t-shirt and I couldn't resist. "Expecto Patronum! " However, you can make whatever kind of design you want with a freezer paper stencil. It doesn't have to be Harry Potter related. I learned about the joys of freezer paper back in my early college days. Basically, freezer paper is backed with a plastic coating that will stick to soft surfaces when ironed, but it peels off cleanly and easily.

To make a sweet t-shirt you will need: paper & pencil a t-shirt an iron a piece of cardboard or poster board fabric paint & brush Start by drawing your design on some regular old paper. My design kept getting bigger, so I taped two sheets together. Next, place your design underneath a sheet of freezer paper and trace it neatly with a sharpie. The marker gives your lines greater width making it easier to cut them out and paint them in later.

Now place a piece of cardboard under your freezer paper to protect your table while you cut. Celebrate the boy tutorial: basic boys wallet - StumbleUpon. I first want to say thank you to Dana and Rae for hosting such an awesome event. If you haven't been indulging in all the fun already, go check out both of their blogs for lots of great inspiration. There has already been so many great ideas! Today I'm sharing a basic boys wallet tutorial because... every boy needs a place to keep his stuff! So I know, you're probably thinking, 'What? It's a great time of year to make these wallets. Materials: 1/4 yard fall suiting fabric (tweed, plaids, etc., usually made from wool and/or synthetic materials)1/4 yard lining fabric scrap of leather (optional)rivets, grommet (optional)scrap of medium weight fusible interfacing {1/4" seam allowance throughout unless otherwise noted}Cutting the pieces: From the exterior wallet fabric cut one piece 8.5" wide by 4" tall.

Also from the lining fabric, cut one piece 8.5" wide by 10.5" tall (this is for the card holder slots) Assembling lining: To create the card holder pockets, take the 10.5" tall lining piece: How to Make a Fabric L:id for a Basket. I like many of you – am in super organizing mode. The New Year always deserves a fresh start and I am going through every room of my house purging all the clutter and organizing the rest. One way I try to tame what is left is to place the stuff into decorative baskets. I use them in my pantry, linen closet, office, and mud room. One of my favorite storage tips is basket lids. When I originally stacked the baskets they fell into each other and looked disheveled. By making basket lids out of cardboard and fabric, I created a way to stack basket on basket and still maintain order and beauty not only on my shelves, but as you can see from the photo above you can also make a unique nightstand or side table, too.

This photo is taken in my guest room. They also look pretty and add color and interest to a bookshelf. To learn how to make the labels – click over to my post entitled – How To Make Wipe-Off Labels for Organizing your Stuff How to Make a Lid For a Basket: supplies needed: 1. 2. 3. 4. 5. How to make an Outdoor Candle Lantern Inexpensively. Last week I made a candle chandelier for my deck. 
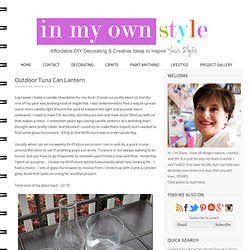
It looks so pretty when lit, but the rest of my yard was looking kind of neglected. I was determined to find a way to spread some more candle light around the yard to balance the light and provide more ambiance. I used to have Tiki torches, but they unravel and have to be filled up with oil that makes a mess. I remember years ago seeing candle lanterns at a wedding that I thought were pretty clever and decided I could try to make them myself, but I needed to find some glass hurricanes.

A trip to the thrift store was in order yesterday. Usually when I go on my weekly thrift store excursion I run in and do a quick cruise around the store to see if anything pops out at me. Treasure is not always waiting to be found, but you have to go frequently to stumble upon it every now and then. Total cost of my glass haul – $2.70. Here is what I made with the hurricane. It was very quick and easy to make. How to Make a Tuna Can Lantern All Done! How to Use Paint Chip Samples to Personalize a Rolodex | InMyOwnStyle.com. I am a visual girl…I like to see things, pretty things, tactile things, organized things. I love color, paint chip crafts, office supplies, stationery, and art supplies.

I am not a tech-ie and don’t want to have everything including the kitchen sink in my computer files. I like connection, hands-on to all my contacts, links, codes, passwords, URLs, user names, etc, etc, etc… I love the Rolodex system and this one I found on Brian and Kristen’s Photostream on Flickr makes my heart go pitter-patter. Oooohhh la la … I want it…BAD! I have always used a Rolodex, but since I started blogging, I needed a bigger one and found one that I think I can transform to look similar to the one I am drooling over above. I found this Rolodex at a local discount store. Here is what my new Rolodex looked like right out of it’s clam-shell packaging. This is the base that holds the cards. These are just your ordinary brown lunch bags that I ripped up to used to decoratively cover the base.

I am in love. Mason Jar Sewing Kit. This is a really fun way to reuse a mason jar and makes both a handy tool for your craft room or a fun gift! Keep reading to find out how to make your own mason jar sewing kit Clean mason jar (I used a small one but you can use any size)Any fabricGlue GunStuffingPencilScissors Using the lid of the mason jar, draw a circle onto the fabric about 1 inch wider than the jar lid. Cut out the circle. Place the lid bottom side up placed directly on top of the middle of the fabric, bottom side up. Continue in the same manner until only 1/4 of the lid is left as shown above. Stuff batting inside the top of the lid until it’s poofy and even Now seal up the last section of the fabric to the lid Make a line of glue along the inside of the outer lid piece Press the pin cushion lid inside the outer lid piece and let dry. Tinted Mason Jars in Rainbow.

I love using mason jars for decorating and a seemingly endless supply of craft projects. But rainbow tinted mason jars, just like the vintage ones you can never find anymore? This one might be my favorite project with mason jars yet! Mason Jars Mod Podge in Gloss (buy it here) Food coloring Ramekins to mix colors Newspaper or paper bag Mix food coloring with a T or so of water into individual ramekins. You can do any color combination you like. Add a couple T of mod podge into your mason jar Add one ramekin of color into the jar and stir to incorporate it all together With a bowl underneath, carefully twist the jar around coating the whole inside with the mod podge/food coloring mixture.

Let dry upside down on the paper Do the same with the other colors. Place the jars face down on top of wax paper and a cookie sheet into an oven, set on warm. When they're ready, they'll look clear and the mixture should lose most of its streaks. Make a Personalized Room Plaque with your Child.#more-32366. <div class="greet_block wpgb_cornered wpgb_shadowed"><div class="greet_text"><div class="greet_image"><img class="enable-pib-img-under" src=" alt="WP Greet Box icon" data-recalc-dims="1"/></div>Thanks for coming by! I try to feature a new creative tutorial every day -- and I'd love to have you follow along: <a href=" rel="nofollow"><strong>subscribe to my email updates</strong></a> or <a href=" rel="nofollow">come follow along on Facebook</a>.

<div style="clear:both"></div></div></div> Spring Break is coming up soon!! Here’s a fun kids’ craft your kids will love to make that I shared last week on Mom It Forward. It can be altered for any age — from small kids to teenagers. We used Mod Podge for this project from Plaid — can I just say that I am a huge fan of Mod Podge?? Kids Room Personalized Mod Podge Plaques My kids loved making this. Xoxo. EDDIE ROSS - No Wire Hangers! (Well, Maybe Just One) - StumbleUpon. Here's a Christmas wreath so darling and dear, even Miss Crawford would approve. Take one of these... and bend it into the form of a circle. Then, grab your glue gun and as many round ornaments in varying sizes as you can find. You'll need about 80 in all. Whenever I do my tree, I like the more unusual shapes, so it's always the round ones I have left over. Even if you don't, though, you can always find them for reasonable prices at a discount retailer, especially after the holidays.

To secure the metal cap to the ball, dab a little hot glue and press. Next, untwist the end of the hanger, then string one ornament at a time, making sure to alternate the placement and colors as desired. Check out the final result! 19 Crochet & Knit Pillows To Make: {Free Patterns} Felt Baby Shoes - the purl bee - StumbleUpon. I think it’s lovely to welcome a little one into the world surrounded by thoughtful handmade gifts, and these itty-bitty boots are just the ticket for such a reception.

Brimming over with the “awww” factor, everyone who sees these Felt Baby Shoes wants to pick them up and coo, almost as if they contained a chubby little baby foot already! Sometimes when I get on a roll with a fun and easy project like this, it’s hard to stop. In this case, I ended up with a pile of eight pairs of shoes, all from one Purl Soho Wool Felt Bundle! Our gorgeous Autumn Bundle covers a beautiful spectrum of warm earth tones, just right for boys or girls. And a bright red, hand-embroidered edge finishes the color story with a zing, while adding a sweet handmade, rustic charm.

I love the idea of sewing up a big bunch of booties to have on hand for baby showers and welcome-to-the-world gifts. Materials To make eight pairs of 3 month sized baby shoes: Pattern Cutting and Pinning Cut two 1-inch lengths from the elastic. {tutorial: how to sew a zippered pouch} - StumbleUpon. 10 Free Tote Bag Patterns and Tutorials | Skip To My Lou - StumbleUpon. Simply Vintagegirl Blog & Blog Archive & Tutorial: How to Make Lovely Fabric Flowers - StumbleUpon.

How to make roses from maple leaves | haha.nu - the lifestyle blogzine - StumbleUpon. DIY: Banana Republic Braided Neck Tee Shirt | her new leaf - StumbleUpon.