
Honeybee Vintage: pillowcase challenge. I found this cute pillowcase a while back and I even paid a whole dollar for it!

I know..what a splurge:) I went back and forth about what to do with it. At first I was going to make an apron and oven mitt set for the Little Miss...but I decided I wanted to be selfish and make something for myself:) I started a new Bible study for moms at our church...so I decided my bible could use a cute cover:) This could also work for any other book you want to dress up. I so would have done this with all my textbooks in college if I knew how to sew back then!
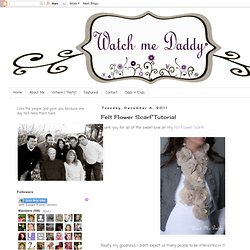
Ha! Materials: pillowcase (or about 2/3yd of fabric...depending on the size of your book) matching thread iron. * THE COUNTRY CHIC COTTAGE (DIY, Home Decor, Crafts, Farmhouse) Felt Flower Scarf Tutorial. Thank you for all of the sweet love on my Felt Flower Scarf!

Really, my goodness, I didn't expect so many people to be interested in it. I'm happy to share this tutorial for you on how to make one of your own! Materials needed: 1/2 yard of 72" Felt or Felted Wool (this measurement is to be safe... but you'll end up with some extra here for sure.) Scissors Needle and Coordinating Thread *optional - Fast Grab Tacky Glue or Hot Glue *optional - Small hook and eye Let's get started shall we? 1. Start by cutting your long scarf piece. Now, cut a scallop around the edge of your long scarf piece. Next, circle cutting mania. Each flower will have 6 circles. DO NOT spend the time cutting out perfect circles. Now scallop all of the circles. 2. Stack your 5 largest circles. Take your knotted needle and thread and come up through the stack of circles just off-center. Doodle Craft... Random Tutorial Generator. Chalkboard silver platter}
I am slightly obsessed with the whole chalkboard look right now and lately I have been seeing some really cool chalkboard silver trays.

I wanted to give it a try so I was pretty excited when I spotted this beauty for $3.50 at a thrift store. First I taped off the edges with blue painters tape. Then I used a foam brush to apply chalkboard paint. (I realized after that I should have sprayed it first with a metal primer but that's ok, it just meant I had to apply a few extra layers and now I know for next time.) And this is the finished product! Oh and did I mention the trays are magnetic?
Diy- burlap scrubber. There's always something new to learn... even (or especially!)

When you think you know it all. Take burlap... the material that I've come to know exceptionally well over the years. I've always preferred spot cleaning to getting it wet. I still feel that way when it comes to projects like buckets and bags, but my mother taught me something surprising. Burlap makes a fine cleaning tool when wet! How To: Take a rectangle of fabric and fold over the short sides twice and stitch in place to create a finished edge Fold in half lengthwise and stitch up the sides, keeping the finished top open.Sew a sturdy snap at the top.Add some soap shards.Get scrubbin'! These might even make a make a nice alternative exfoliator in the shower. Happy Scrubbing! Girl's Night Out. Search for "wooden bead c" Design. Tutorials. Sewing. DIY. Recipes. Crafts. A blog by Joy Kelley.