DIY: Celine Inspired Knot Bracelet. I have been lusting over the Celine Knot bracelet for months and have been extremely unlucky in finding it.
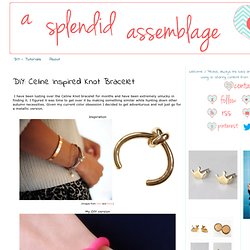
I figured it was time to get over it by making something similar while hunting down other autumn necessities. Given my current color obsession I decided to get adventurous and not just go for a metallic version. Inspiration My DIY version You will need: - polymer clay - a jar or thick glass bottle - an oven (:p) - acrylic colors or spray paint (optional) The jar or glass bottle will determine the size of the bracelet so pick one with a diameter close to that of your wrist. Turn on your oven adjusting the temperature according to your clay's instructions. Finger Knitting Tutorial. When I was a kid I learned how to finger knit at camp.
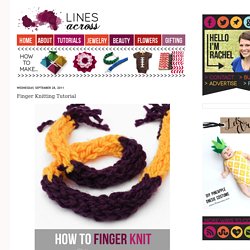
I thought it was the coolest thing ever. When I got home from camp, I bought 3 different rolls of yarn and knitted them all into one giant rope. I think it took me about a week (which is a really long time when you are a kid). I loved how I could take yarn and turn it into something new and interesting using just my hands. In my imagination, I thought that this knowledge would be useful some day when I was stranded on a deserted island (because there is always yarn on deserted islands). Tutorial {Scroll down for a short video tutorial} All you need is yarn (and scissors). 1. 2.
Pet ID Tag - Martha Stewart Pet projects. Friendship Bracelets. Anchor and Braid Bracelet. Some charms are perfect at being both a decorative touch and an unusual closure.
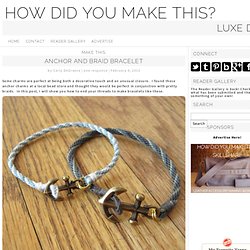
I found these anchor charms at a local bead store and thought they would be perfect in conjunction with pretty braids. In this post, I will show you how to end your threads to make bracelets like these. Charms work as a closure so long as they have a good way to hold securely. In my case, the bottom hook of the anchor can securely hold a loop. I purchased 2 anchors which were different sizes. Supplies: Embroidery Floss Charm for Closure Jump Rings Tools: Pliers Needle (tapestry is ideal due to the rounded point but a regular need with a large eye would work also) Braiding Disk (click info on how to make a braiding disk) Scissors Ruler I will show you photos from both bracelets in the photos above.
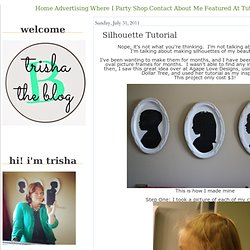
Small Anchor Charm 2 Color / 8 Strand Braid Bracelet: As we learned in the spiral braid tutorial each strand of embroidery floss is cut to twice the required length and folded in half to begin the braid. Silhouette Jewelry How-to...(Mom, You're Not Allowed to Read This) Mom, I'm serious.
If you're reading this, jump on over to Amy's blog or something. Or at least start practicing your surprised look when you open up your gift on Mother's Day. I'm so excited about this project I just did that I decided to post about it right away for those of you who may still be stumped as to what to get your mom for her big day. After browsing the aisles of Hobby Lobby and finding out that their jewelry-making supplies are 50% off this week, I came up with this Silhouette Charm Necklace using pictures of my kids: Do you love it?
The great news about this project is that it's relatively quick and also pretty easy. So, here's what to do: Head to Hobby Lobby or any place that sells these bezel pendants and a necklace chains. You'll also need a small amount of scrapbook or other pretty paper and some Gloss Mod Podge. Next, cut your pretty papers to fit your pendants and paint on a thin layer of the Mod Podge on the back of the paper to secure it inside the pendant. Bird nest necklace} I have been seeing a lot of bird nest jewelry around lately.
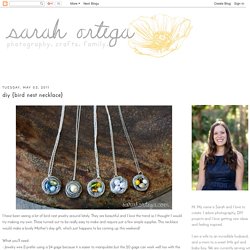
They are beautiful and I love the trend so I thought I would try making my own. These turned out to be really easy to make and require just a few simple supplies. This necklace would make a lovely Mother's day gift, which just happens to be coming up this weekend! What you'll need: - Jewelry wire (I prefer using a 24 gage because it is easier to manipulate but the 20 gage can work well too with the help of some round nose pliers) - pearls or glass beads - necklace chain - jump ring and a clasp Select the beads you want, string them onto your wire and arrange them as you'd like. then simply wrap the wire around the beads wrap some wire in the space between each bead (I like the look of three loops but you could just do one or two if you prefer) this is what the back looked like.
Glass Tile Pendants. Want to know how to make a glass tile pendant??

They're super easy - you can do this! Here's a brief tutorial. They can end up costing less than $1.70 each - wow! Perfect for gifts. What a great craft - I had one mom comment to me "this is a great craft that spans all ages - my daughter (7 yrs old) could do it and so could I and my mother - and we all enjoyed it! " First gather your supplies - you'll need: --a glass tile, --a bail (that's the hook that goes on the back), --paper or fabric design, --diamond glaze and a small paintbrush, --superglue, --and a chain to hang it on. Some ideas for your glass tile pendants: --Use fabric and paper - here's a post with great idea tips. I bought all my supplies from CandyTiles and was really impressed. ** update - 10% off at CandyTiles if you enter "sugarbeez10" in the coupon code area ** First take your tile, and trace it onto your paper.
Next squirt your diamond glaze on the back of the tile - about pea size. Go make some!! 3 Four and Under: Silhouette Tutorial. Nope, it's not what you're thinking.
Beaded Bracelet. I’m super excited to share this project with you, as it has been over two weeks in the making.
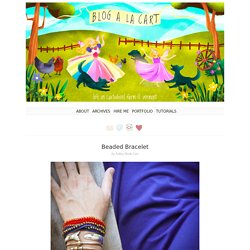
I fussed around with many a mini-crochet needle and embroidery thread, and my house is now littered with bitty seed beads, to arrive at what I think is my favorite and most unique tutorial yet! Woo hoo! Materials: Embroidery thread (I used 6 stranded thread) Crochet hook size 1 (2.75mm) Seed beads Jewelry clasps Needle Scissors Directions: Note: This pattern is for a bracelet that measures 6.5″ at completion.
I needed just under 16′ of embroidery thread for that length. 1. 2. 3. 4. 5. 6. 7. 8. 9. Or you can always go the neon route, which is clearly a Blog a la Cart fav. Admittedly, Sunny demands to wear the blue and “geen” one frequently. Photos: Ashley Weeks Cart.