
Make Magic With These DIY Concrete Dragon Eggs. DIY - how to make a cereal box wallet. D-I-Y > Food box wallet description: The cool graphics on cereal boxes are much too valuable to throw away.
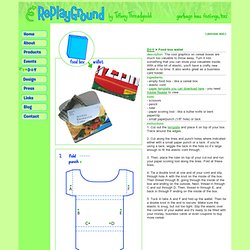
Turn it into something that you can store your valuables inside. With a little bit of elastic, you'll have a crafty new wallet in no time. It also works great as a business card holder. ingredients: - empty food box - like a cereal box - elastic cord - paper template you can download here - you need Adobe Reader to view tools: - scissors - pencil - ruler - paper scoring tool - like a butter knife or bent paperclip - small paperpunch (1/8" hole) or tack instructions: 1. 2. 3. More gifts... Just a notebook but it's all hopped up on cuteness. simple fun notebooks from wal-mart....with many many ribbons tied to the side. that's it. this is the mysterious crayon project!

Using old crayons...i made new ones. (you can make ice or bake in them too.) first break the crayons up and put the pieces into the shapes on the trays. set the silicone trays on a cookie sheet for stability. preheat your oven to 250-ish. put sheet of trays into the warm oven and check at 10 minutes. when all the crayons pieces have become liquid....they are done! Remove the sheet from the oven and let cool for at least an hour...or 3 or 4. the liquid wax was beautiful! I was loving it! I wanted to pour it all over something and paint with it. maybe another time.... each letter crayon is about 2 inches tall. Paper Flower Key Holder / Mark Montano. How to make gift bags from newspaper.
When I bought something at a store recently, the clerk handed me my purchase in a bag made from a newspaper.
I liked it very much and had to make some more—thus today's DIY recycled newspaper project: gift bags made from the Wall Street Journal. You can vary the dimensions, of course, but here's what I used to create a bag that's 5" tall, 4.5" wide, and 3" deep. Stack two sheets of newspaper on top of each other. This will be a two-ply bag for extra sturdiness. Cut out a rectangle that's 15.5" wide and 8.25" tall. Fold a flap 1.25" down from the top. Cut two pieces of cardstock or chipboard to 4.25" x 1", then glue them on the widest two panels just under the top fold. Put glue on the outside of the 0.5" tab and bring the left-most panel over to form the body of the bag, aligning the cut edge of the panel with the folded edge of the flap.
Upend the bag so the 2" flap is now up. Put glue on both flaps and fold them inward to form the bottom of the bag. Odyssey of a Mom Scholar. Last week one of my friends “shared” an idea on Facebook that I thought was kinda awesome, so I wanted to share it here.
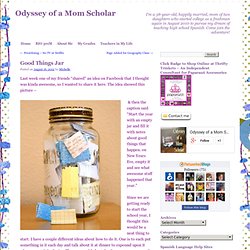
The idea showed this picture – & then the caption said “Start the year with an empty jar and fill it with notes about good things that happen. on New Years Eve, empty it and see what awesome stuff happened that year.” Since we are getting ready to start the school year, I thought this would be a neat thing to start. I have a couple different ideas about how to do it. One is to each put something in it each day and talk about it at dinner to expound upon it when we put it in the jar. I’m not sure yet which way we are going to do it, but I really want to do it. Anyway, I think it’s a great way to get the kids talking more about their days, especially as the school year goes on and all they start saying is “good” or “fine” when you ask how their day was!!