
Web Design: 10 Creative Techniques Using CSS3 Box Shadow. Box-shadow. Used in casting shadows (often called "Drop Shadows", like in Photoshop) from elements.
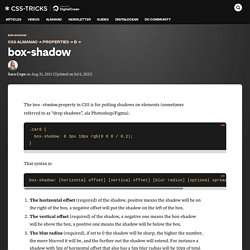
Here is an example with the deepest possible browser support: Thats: box-shadow: [horizontal offset] [vertical offset] [blur radius] [optional spread radius] [color]; The horizontal offset (required) of the shadow, positive means the shadow will be on the right of the box, a negative offset will put the shadow on the left of the box.The vertical offset (required) of the shadow, a negative one means the box-shadow will be above the box, a positive one means the shadow will be below the box.The blur radius (required), if set to 0 the shadow will be sharp, the higher the number, the more blurred it will be, and the further out the shadow will extend.
18 Amazing Effects You can Create with CSS3 Box Shadows. How To Make a Letterpress Texture Effect in Photoshop. I’ve received a few questions recently about how I create the letterpress style texturing that appears on pretty much every retro/vintage design I make.
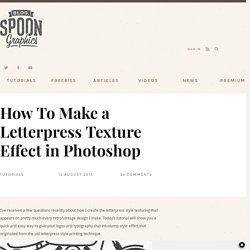
Today’s tutorial will show you a quick and easy way to give your logos and typography that ink stamp style effect that originated from the old letterpress style printing technique. Letterpress printing is an old printing method that transfers ink from a press onto paper, essentially like a rubber stamp. As we all know from playing with rubber and potato stamps as kids this kind of basic printing technique can result in some cool texturing, especially if areas of the printing surface lacks ink.
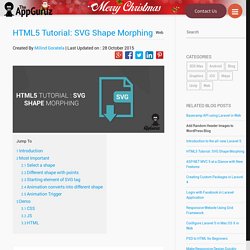
SVG Shape Morphing HTML5 Tutorial. Objective Main objective of this post is to give you an idea about SVG Shape Morphing Step 1 Introduction It’s very easy to animate svg (Scalable Vector Graphics) and comfortable.
7 Handmade Textures Tricks. As an illustrator and designer, for me it's all about that gritty magic.

My work as an illustrator, designer, and art director is heavily inspired by mid-century spot illustrations and design as well as vintage sci-fi, comics, surrealism, DIY art culture, and the textural wonders of degraded print. But, how do you get that look? 1. One trick is to work with a restricted color palette. This is a great way to hint at the nostalgia and tactility of found art, while also creating something completely new. 2. 3.
How To Create a Double Exposure Effect in Photoshop. Traditionally the double exposure effect is produced by photographers using nothing but their camera to combine two separate photographs to create an abstract and surreal image.
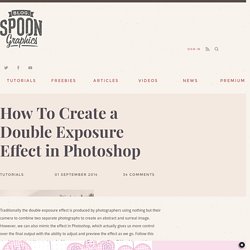
However, we can also mimic the effect in Photoshop, which actually gives us more control over the final output with the ability to adjust and preview the effect as we go. Follow this step by step tutorial to create a double exposure effect yourself, we’ll blend two existing photographs together with the help of some simple clipping and masking techniques. How To Create a Realistic Chalk Lettering Effect. Last week I posted a showcase of stunning chalk lettering designs, which gave me the inspiration to create some chalk typography myself.
Spoon Graphics Greatest Hits: My Most Popular Posts of 2015. At the end of every year I like to take some time to look back at my top content from the past 12 months and compare how well they each performed on social media.

This compilation features my 30 greatest hits from 2015, including my best tutorials, free resources and articles in order of their popularity judging by the total share count. iFixit : Le manuel de réparation gratuit. The Ultimate Guide to the Dodge & Burn Technique - Part 1: The Fundamentals.
Tutorial – Animando un SVG a través de CSS. Demo Files for Download - Petr Tichy - Front End Developer - Melbourne. This is a list of all free tutorials, demos and premium products available on my blog.
Enjoy responsibly. Building Interactive Scrolling Websites with ScrollMagic.js. ScrollMagic is a jQuery plugin which lets you use the scrollbar like a playback scrub control.
Using this, you can build some extremely beautiful landing pages and websites. Normally, we wouldn’t do a tutorial on using a single jQuery plugin, but scrollMagic does a lot and has quickly become one of my favorite plugins. In this article, I’ll cover my general opinion on scroll plugins, how to get started with ScrollMagic, and some basic and over-the-top creative demos. Easiest parallax in the world - Valdelama. Almost no CSS and a couple of lines of Jquery are all you need for this extremely simple parallax demo.
Easiest parallax in the world - Valdelama. Simple ScrollMagic Tutorial - triggerHook, setPin, TimelineMax. Building Interactive Scrolling Websites with ScrollMagic.js.
Texture. Portfolio expanded. Scroll position. Create a Retro Triangular Pattern Design in Illustrator. Follow this step by step Illustrator tutorial to create the popular retro style pattern design made up of lots of colourful squares and triangles. The process is pretty simple, making this a good tutorial for newcomers to Adobe Illustrator. We’ll be using tools to accurately align our elements, then see how the Pathfinder can easily create custom shapes. The pattern we’ll be creating is this cool retro inspired somewhat mosaic like design.
The mix of squares and triangles along with the limited colour palette attracts the eye with cool illusions. View the final retro pattern design Open up Adobe Illustrator and create a new document. Repeatedly press CMD+D to repeat the last transformation until the width of the artboard is filled with evenly spaced lines. Photoshop, Lightroom y fotografía digital. Pinceles personalizados en Photoshop usando trazados (paths) En este tip voy a hacer hincapié en dos potentes herramientas de Photoshop, los pinceles personalizados y los trazados. Combinándolos se pueden lograr efectos muy interesantes y complejos.Para hacerlo más fácil de entender lo voy a dividir en 3 partes que tratan diferentes temas y la parte final donde aplicamos todo lo visto. De esta manera, si ya conocen determinado tema o cómo trabajar con la herramienta que explico pueden saltear esa parte.Todo lo tratado en el tip está orientado a este ejemplo en particular y es solamente una porción de lo que en realidad se puede hacer con estas herramientas.Aclaración: El nivel de este tip es avanzado.
Voy a obviar muchas explicaciones para resumir lo más posible el tema porque la verdad es muy extenso. PARTE 1Trazados (Paths): los vectores de Photoshop. Por si alguien no lo sabía en Photoshop se puede trabajar con vectores. Paso 5Seleccionamos el primer Trazado. 30 tutoriels gratuits pour découvrir et maîtriser Photoshop.