
Re: [physicsclub] Building an underwater ROV - Google Groupes. Hi Leilah, The wind turbine got about halfway completed, we got the alternator portion built, but no construction on the actual turbine portion was started.
![Re: [physicsclub] Building an underwater ROV - Google Groupes](http://cdn.pearltrees.com/s/pic/th/building-underwater-google-62568373)
I don't know what the plans are this coming semester. I'm not sure there is a plan for the turbine construction as far as shape or style yet. I have a heavy course load this coming semester, so I probably won't be able to make the same time commitment I made to the generator portion. I think the underwater ROV is a really cool idea! Also, not to bug you, and I hope you are having a good trip, but did you get a chance to submit the recommendation letter to the CCI thing? Anyhoo, enjoy the rest of your trip! Alex - show quoted text -Hi Physics Club people,I hope everyone is enjoying the break.
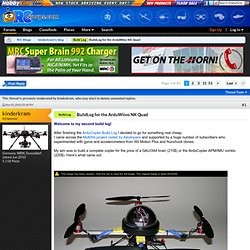
Bosch BMP085 Absolute pressure sensor - by Viacopter - Multicopters & Multirotors parts & services for Quadrocopters, Hexacopters, Octocopters. BST-BMP085-DS000-05. BuildLog for the ArduWiino NK Quad. Welcome to my second build log!

After finishing the ArduCopter Build Log I decided to go for something real cheap. I came across the MultiWii project coded by Alexinparis and supported by a huge number of subscribers who experimented with gyros and accelerometers from Wii Motion Plus and Nunchuck clones. My aim was to build a complete copter for the price of a GAUI344 brain (210$) or the ArduCopter APM/IMU combo (220$). Here's what came out: The image shows a previous frame which I used to test the components. Recommended reads! ALEX' brand new site offers most informations needed to build a MultiWii copter: IMPORTANT WARNING!
Alex' site focussed on Tri builds: Dedicated MultiWii thread: Berkley's connections & components blog: UndCon's MultiWii configurations via stick input: 420RcPilot's shield assembly blog: Shikra's Blog for TriWiiCopter Configuration and Settings: Pirate Menno aka joebarteam offers a great tutorial on PID tuning Step-by-step instructions with videos! Now you can: MultiWii additional HOWTO overview. 4: MultiWii release descriptions This post just combines the release descriptions of the last revisions.

Release version 1.9 1.8 -> 1.9 - some factorizations between PPM sum receiver code & standard receiver code EXPERIMENTAL: integration of direct SBUS receiver thanks to the contribution of Captain IxI & Zaggo For this, you must use: - a MEGA board - the RX1 of the Serial 1 port - have a way to invert the input signal. more info here: EXPERIMENTAL: integration of SPEKTRUM satellite receiver thanks to the contribution of Danal Estes For this, you must use: - a MEGA board - the RX1 of the Serial 1 port It could be used also on ProMini board with some restrictions (exclusive GUI or Spektrum use) more info here: EXPERIMENTAL: integration of direct Serial RX, to command the multi from a Bluetooth+phone Signal for instance. thanks to Luis.
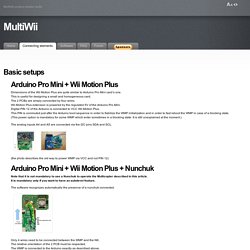
MultiWiiCopter (previously TriWiiCopter) Connecting elements « MultiWii. Dimensions of the Wii Motion Plus are quite similar to Arduino Pro Mini card’s one.

This is useful for designing a small and homogeneous card. The 2 PCBs are simply connected by four wires. Wii Motion Plus extension is powered by the regulated 5V of the Arduino Pro Mini. Digital PIN 12 of the Arduino is connected to VCC Wii Motion Plus. This PIN is commuted just after the Arduino boot sequence in order to fiabilize the WMP initialization and in order to fast reboot the WMP in case of a blocking state. The analog inputs A4 and A5 are connected via the I2C pins SDA and SCL. (the photo describes the old way to power WMP via VCC and not PIN 12) Note that it is not mandatory to use a Nunchuk to operate the Multicopter described in this article.It is mandatory only if you want to have an autolevel feature. The software recognizes automatically the presence of a nunchuk connected. Only 4 wires need to be connected between the WMP and the NK.
Some Arduino board example: Some IMUs example: and here: