
The Handy Hausfrau: Portable Spice Kit for Camping or Travel. Today's DIY project at The Handy Hausfrau is a portable spice "rack.
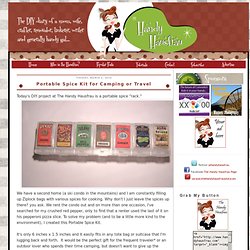
" We have a second home (a ski condo in the mountains) and I am constantly filling up Ziplock bags with various spices for cooking. Why don't I just leave the spices up there? You ask. We rent the condo out and on more than one occasion, I've searched for my crushed red pepper, only to find that a renter used the last of it on his pepperoni pizza slice. To solve my problem (and to be a little more kind to the environment), I created this Portable Spice Kit. It's only 6 inches x 1.5 inches and it easily fits in any tote bag or suitcase that I'm lugging back and forth. *I would check with the airlines to see if you can carry on spices. To create this project, head to your local Walgreens, CVS or other drug store.
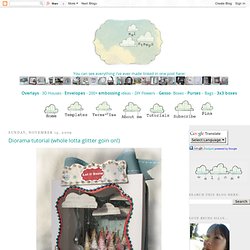
Notice the little key in the upper right corner of the package? When you open it up, you'll notice that each day's lid also has raised dots on the corner - braille to indicate the day for the visually impaired. Diorama tutorial (whole lotta glitter goin on!) This was messy (a glitter explosion!)
But oh so fun to make. I wish you could see the sparkles & spinning of the clouds in person. Makes ya feel like a kid again! A whole lot o' how to make a cupcake box into this diorama: part 1...the back layers of the diorama (the main box)part 2...the middle layers (trees, clouds, & the cupcake holder section)part 3...the lid (or front)part 4...the clouds make a diorama Creative Cuts & More die cuts used for this: Antique Label -in acetate Antique label -in chip board-medium weight Cupcake Box Set -in coconut swirl You can read more about the handy-dandy die cuts in this post, if you like& the remainder of the materials are detailed below. Part one the back layers (the sky etc...) Step 1a) Adhere a piece of patterned paper (4 inches by 4 inches) to the inside (bottom) of the CCM cupcake box.
Step 1b) Pierce it randomly with a paper piercer (It will let the light sparkle through like sparkly snow.) Step 5) Make the glittery trees. A) Cut out some trees.
Knitting. Diy: Salt Dough Ornaments : katyelliott.com. The holidays have officially begun. As we countdown to Christmas I’ll be sharing some of my favorite holiday decorations, crafts, and gift ideas. To start us off Bread Dough Ornaments from Stephanie of even*cleveland. So cute, I can’t wait to try. Thanks for sharing Stephanie! P.s. for christmas 2010 Stephanie made these stamped salt dough ornaments. Salt dough ornaments are an easy holiday craft that everyone can do, and you can make them as simple or as complicated as you like. Step 1. Step 2. For the gnomes, I used food coloring to dye some dough red for hats and jackets – this was EXTREMELY messy, so I would recommend wearing latex gloves if you mix in the color by hand, and rolling out any dyed dough between two sheets of wax paper to protect your counter and rolling pin. Once the ornaments are formed, poke them with a bamboo skewer to make holes to hang them from.
Step 3. Happy holidays! Related Post:Macaroni SnowflakesDiy: Icicle Chandelier share.