
Ask J+O: Making Vectors Pop » Making It! Every day, our inbox fills up with all kinds of questions about what we do.
Today, we’re going to start sharing our responses with you here. If you have a burning question about art, business, or anything else, send it over and we’ll do our best to answer it. Our first question comes from a reader who wants to know how we add texture to our illustrations: I just have a semi-technical question for you. Are the illustration in your website home just plain vectors? Since we launched our new site, many people have asked about our tools and techniques. Please note that this tutorial assumes that you have a basic working knowledge of Adobe® Photoshop™ and Adobe® Illustrator™. And, remember, this technique is only meant as a way to finish an illustration. Let’s get started! We’re going to use our good friend Marco the Compass Rose as our test subject. Using copy and paste between the programs, place your vector drawing into a new Photoshop document. At this point, I also do a bit of clean up.
Illustrator * Creating 3D objects. Note: 3D tools are independent of the Perspective Grid tools and 3D objects are treated like any other object in perspective.
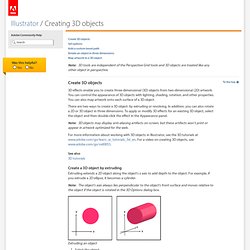
Create 3D objects 3D effects enable you to create three-dimensional (3D) objects from two-dimensional (2D) artwork. You can control the appearance of 3D objects with lighting, shading, rotation, and other properties. You can also map artwork onto each surface of a 3D object. There are two ways to create a 3D object: by extruding or revolving. Note: 3D objects may display anti-aliasing artifacts on screen, but these artifacts won’t print or appear in artwork optimized for the web.
How to Fill a Shape With an Image in Illustrator. You can fill any shape you have drawn in Adobe Illustrator with a photograph or other image by using a clipping mask.

Clipping masks may seem confusing if you have never used this feature before. There are two important things to remember before applying a clipping mask. First, the shape has to be above the image. Secondly, only the shape and the image can be selected. If the shape is below the image, or if any other objects are selected, the clipping mask will not work. Step 1 Launch Adobe Illustrator. Step 2 Select the “Rectangle Tool” from the Toolbox. Illustrator Mastery: 25 Techniques Every Designer Must Know. Like so many others, I began my design career by experimenting with Adobe Photoshop.

At the time bitmap graphics were more accessible and more easy to understand. Vector graphics, Adobe Illustrator and especially bezier curves contained a shroud of mystique, and I was having too much fun with Photoshop to see what was behind Illustrator’s magic curtain. Fast forward a few years later when I began to dabble in logo design, and suddenly Illustrator became the go-to tool. What amazed me was how much I had missed out on by not picking up Illustrator along side Photoshop in the beginning. So now here we are using Illustrator on a daily basis to produce incredible vector illustrations, but like Photoshop, there are many tools within illustrator that are often overlooked. Get to Know the Tools Panel The panel appears on the far left side when you open Illustrator. Below the tool icons are thumbnails displaying the current colors for fill and shape.
Pencil Tool. Use the Calligraphic Brush tool to create decorative type. Software: Illustrator CS4 or later Project time: 3-4 hours Skills: Set up calligraphic brushes to save time creating custom lettering, understand key functions of the Pathfinder menu: unite/Minus Front, use Scissors to break up paths, expand single strokes into vector shapes, use and edit the Blend tool to make simple patterns With calligraphic and hand-drawn typography facing a resurgence lately, I will show you how to create your own custom typography quickly and easily in Illustrator.
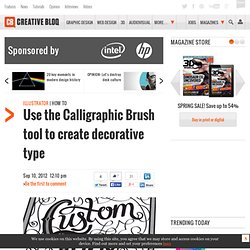
Taking you through from a hand-drawn template to the final image, I will teach you how to set up your own calligraphic brushes to mimic the chiselled nib of a classic calligraphy pen. You will also learn how to use the Scissors tool to divide and separate paths into multiple sections without breaking a line, and the Expand Appearance option to turn single-lined paths into full vector shapes for refinement. Step 01 Start by drawing out a rough template for the layout of your type. Step 02 Step 03 Step 04. Illustrator’s Pen Tool: The Comprehensive Guide. Illustrator's Live Trace: Sketch to Vector. Advertisement In this post we will take a drawn design, scan it and clean it up in Photoshop, then trace it using the Live Trace feature in Adobe Illustrator.
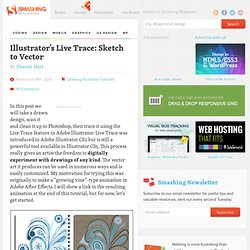
Live Trace was introduced in Adobe Illustrator CS2 but is still a powerful tool available in Illustrator CS5. This process really gives an artist the freedom to digitally experiment with drawings of any kind. The vector art it produces can be used in numerous ways and is easily customized. My motivation for trying this was originally to make a “growing vine”-type animation in Adobe After Effects. Scan and Clean Up Scan your sketch and bring the image into Adobe Photoshop.