

Building a Hackintosh Apple Can't Sue You For. Getting Mac OS X up and running on a computer without an Apple label has always been a bit of a hassle.
You needed customised Mac OS X disks, updates would ruin all your hard work, and there was lots of fiddling with EFI and the likes. Ever since the release of boot-132, this is no longer the case. Read on for how setting up a "Hack"intosh really is as easy as 1, 3, 2. As easy as 1, 3, 2 The most well-known way of setting up a Hackintosh is to download a hacked Mac OS X Leopard image, burn it to a disk, and go from there. However, ever since September last year, we have a new method, using a small boot CD called boot-132.
This method has several advantages. Using the boot-132 method, I built myself a non-Apple Macintosh with a flick of the wrist. The hardware The hardware used to build this Macintosh amounted to a total price of 199 EUR, ordered at my favourite Dutch online hardware retailer. The guide. Dual Boot Windows 7 and OS X Snow Leopard Using Chameleon. Using Chameleon as your bootloader, you can boot an infinite amount of operating systems on your PC.
It's simple to use a separate hard drive for each operating system.Install multiple operating systems on separate hard drives.Go to CMOS Setup Utility and choose Advanced BIOS Features.Select Hard Disk Boot Priority.Move your Chameleon OS X hard drive to top of list.Boot into Chameleon and choose your Operating System.The following guide will show you how to put OS X Snow Leopard and Windows 7 on the same hard drive. You can then use Chameleon to select either Snow Leopard or Windows 7 at boot time. It's a bit trickier, as the Windows installer will set itself as the active partition automatically. You have to manually set the OS X partition active at the end of the process. UPDATE: The latest MultiBeast will take care of choosing boot0hfs instead of boot0 to automatically boot from hfs partition, even if it's inactive. Thanks for reading and I hope it worked for you!
Mac OS X version 10.6.3 Snow Leopard: Software. xMove + MultiBeast: Install OS X 10.7 Lion on any Supported Intel Core 2 or Core i based PC. Any OSx86 installation guide can seem daunting at first glance, especially when trying to remember cryptic terminal commands and sorting through volumes of misinformation on the web.
This guide requires no coding, terminal work, or Mac experience of any kind. Because Apple is only distributing OS X Lion through the Mac App Store, we had to rethink our retail installation method. What follows is our recommendation for the easiest, cleanest and most Mac-like installation process. For best results, follow this guide to the letter. Building a CustoMac: Three Updated LGA 1156 Builds for OS X. By request, here are three updated builds, based on the original CustoMac post from June 2010.
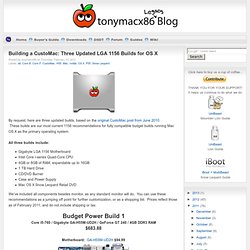
These builds are our most current 1156 recommendations for fully compatible budget builds running Mac OS X as the primary operating system. All three builds include: Gigabyte LGA 1156 MotherboardIntel Core i-series Quad-Core CPU4GB or 8GB of RAM, expandable up to 16GB1 TB Hard DriveCD/DVD BurnerCase and Power SupplyMac OS X Snow Leopard Retail DVD We've included all components besides monitor, as any standard monitor will do. You can use these recommendations as a jumping off point for further customization, or as a shopping list. Core i5-760 / Gigabyte GA-H55M-UD2H / GeForce GT 240 / 4GB DDR3 RAM Core i7-870 / Gigabyte GA-H55M-UD2H / Radeon HD 5770 / 4GB DDR3 RAM Core i7-870 / Gigabyte GA-P55A-UD3 / Radeon HD 5870 / 8GB DDR3 RAM NOTE: Only MODEL NO: ACB10us v1.0 will wake from sleep.
Oh, and don't forget, if you end up buying anything, click through one of the links above, or in the sidebar. iBoot + MultiBeast: Install Mac OS X on any Intel-based PC. Any OSx86 installation guide can seem daunting at first glance, especially when trying to remember cryptic terminal commands and sorting through volumes of misinformation on the web. This guide requires no coding, terminal work, or Mac experience of any kind. You will not need access to a Mac. In fact, it's easier and faster for me to install Snow Leopard with fully working components on my system than it is to install Windows 7. And more fun. The iBoot + MultiBeast method is designed and tested for any desktop or laptop running the latest line of Intel processors, the Core i3/i5/i7s.
A computer running an Intel ProcessorA blank CD A Mac OS X Snow Leopard Retail DVDTo leave any fear of your computer at the door.Patience and humility- it may not work out perfectly the first time- but with enough tenacity and grit, you'll reach the promised land. STEP 2: INSTALL MAC OS X In order to boot the Mac OS X Retail DVD, you'll need to download and burn iBoot. Congratulations! Thanks in advance! UniBeast: Install Mac OS X Lion Using an All-In-One Bootable USB Drive. STEP 1: Purchase Mac OS X Lion The operating system is not free.
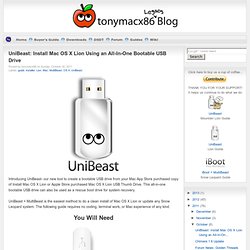
There are two ways to purchase your copy of Mac OS X Lion. The simplest way is to download the Application from the Mac App Store. Alternately, the OS X Lion USB Thumb is available online at Apple.com or any Apple Store retail location. STEP 2: Create a Bootable USB Drive Using UniBeast Take a deep breath and take your time- this is pretty simple, but it's easy to miss things if you rush.