
Monogrammed Cuff Links. These simple monogrammed cuff links are an elegant way to show your Dad you're thinking about him this Fathers Day.

Alternatively, they would be a great gift for the groom's party for those of you planning a wedding! --Molly Materials 1/4 yard of Moda Muslin in WhiteA small piece of highest loft "Supreme" batting 1 ball of Valdani embroidery thread in Thunder A Clover water soluble Chaco Marker 1 spool of 100% cotton thread in color 1006An embroidery hoop A compassA rulerOne pair of simple 1/2-inch round cuff links. Your can find the cuff links I used at this link. Embroider The way this project is put together is very similar to my Embroidered Covered Button Project. On the Muslin, trace around both cuff links at least 2-inches apart with your Choco Pen. Father's Day Tie.
As you may remember we posted a Little Boy’s Tie around Easter and it got a great response.
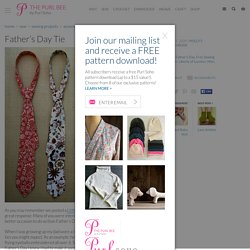
Many of you were interested in making a larger version and what better occasion to do so than Father’s Day which is on June 21st this year! When I was growing up my dad wore a tie almost every day. But not the kind of ties you might expect. As an example; he had one, handmade by my mom, with flying eyeballs embroidered all over it. So when we decided to do a man’s tie for Father’s Day I knew I had to make it special, and not boring for my dad. Liberty of London Tana Lawn seemed like the perfect fabric for the job. I think the end product is a perfect Father’s Day present. Perhaps, now that I’ve mastered the basic shape, I will embroider some flying eyeballs on them but that might be a bit much? Felt Ball Necklaces. A couple weeks ago the Purl Bee team was having its usual brainstorming session.

We strolled around the shop, being inspired by the rich colors and plethora of fibers. As we walked about, I picked up one of Molly's Felt Ball Trivets which was on display. Throughout the rest of the meeting I could not help but play with the trivet, twirling it between my fingers, sliding it on my arm as a bracelet. Noticing my interest, Joelle instantly thought, wouldn't it be nice to have that trivet as necklace. And the project was born. We wanted to create the same modern feel as the trivets, but transformed for attire. The thin yarn has a delicate appareance, but packs a punch with its color. Materials To make one necklace with approximately 40-inch diameter: One skein of Alchemy's Silken Straw. Preparing your Silk Before you start making your necklace, first decide how many stripes you would like on each felt ball. Wedding Garter. This wedding garter is the perfect "something blue" for a bride to be.

It's very simple to make and comes together in a flash. Materials Cutting and Preparing to Sew Press the fabric Cut a 5-inch strip from selvage to selvage. Iron the strip in half lengthwise. To prepare for sewing, wind a bobbin with the elastic thread. Sewing You will want to do a few test runs before starting to sew on your strip. Once you've settled on your tension sew along the entire pressed middle fold of the strip with the right side of the fabric facing up as pictured above. Next sew a line parallel and 1/4-inch to the left of the first line. Sew another line to left of the last one and then two lines to the right of the first middle line, all 1/4-inch apart from one another.
Next sew 3/4-inches in from either edge of the strip. Fold the strip in half lengthwise, right sides together, and pin it together along the raw edge. Sew this seam together with a 1/2-inch seam allowance. Finishing All done! Adjustable Button Necklace « Trash to Treasure - tutorials. This wonderful tutorial is made by Petronella Luiting specially for our project "Tarbetust tarvilikuks" (Trash to treasure) - in witch we share tutorials of recycling and reusing things.
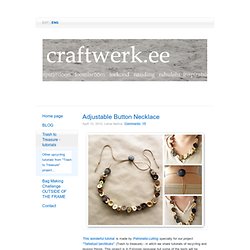
This project is in Estonian language but some of the texts will be available in English as well... There are plenty of fab tutorials in Estonian version of the page - you can check them out HERE. Don't speak Estonian? No problem just crab Google Translate and follow clear and good photos of the instructions. Happy discovering! Project is supported by EAA and Norwegian Financial Mechanisms through Fund for NGOs.
Click the link and... Do you have old buttons in the house ? Material needed: Step 1: Measure about 150 cm of the cord and cut it off; thread this piece on the needle you are going to use. Step 2: Step 3: Repeat step 2 as long as you like the necklace to be (I made it here about 50 cm long). Step 4: the adjustable closure. Now you knot each end, so that they cannot slide out of the button.