
Write a "Love It" Plugin with Ajax in WordPress. Everyone is familiar with the “Like” button from Facebook, as well as many of its spin offs from other social networks.
In this tutorial, we’re going to create our own version of the “like” button, but it is going to be a “love it” button and also specific to our website. Our plugin is going to use ajax to process the “love it” button clicks, it will display the total number of loves, and it will also have a widget to display the most loved items. Demo of What We are Creating A Pro version of this plugin is available for download and purchase. The plugin itself is not overly complicated, but it may appear that way if you’re not really familiar with some of the methods I’m going to use.
As with all my plugins, the plugin will be broken up into individual files. We will start with the main plugin file, which lives inside of the folder called “love-it”. This file simply defines our plugin name, the author, plugin URL, etc; all of that stuff we are so used to creating by this time. Pittsburgh Web Design & Development – Andrew M Peters. Overview & Preparation Making jQuery ajax calls in WordPress to return JSON data to your client-side Javascript is an invaluable application that is only going to become more popular in the next few years.
What’s the significance of using jQuery ajax to get JSON data from a WordPress site? Doing this (the right way) essentially allows you to request server-side information from your WordPress database, then have it returned to your client-side in one quick, extremely lightweight, and simple swoop. WordPress Answers. WordPress Settings API Tutorial. Originally posted here: When writing the Simple Facebook Connect plugin, I investigated how the Settings API worked.
How to leverage the Theme Customizer in your own themes. Note: Everything I’m talking about here, including the code, is in beta mode.
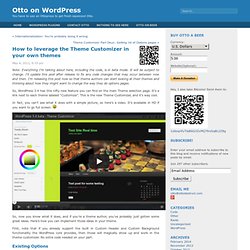
It will be subject to change. I’ll update this post after release to fix any code changes that may occur between now and then. I’m releasing this post now so that theme authors can start looking at their themes and thinking about how they might want to change the way they do options pages. So, WordPress 3.4 has this nifty new feature you can find on the main Theme selection page. It’s a link next to each theme labeled “Customize”.
In fact, you can’t see what it does with a simple picture, so here’s a video. So, now you know what it does, and if you’re a theme author, you’ve probably just gotten some great ideas. First, note that if you already support the built in Custom Header and Custom Background functionality the WordPress core provides, then those will magically show up and work in the theme customizer. Existing Options. 3.4 Green is Good to Go. WordPress 3.4 is out, named “Green” in honor of jazz guitarist and composer Grant Green.
Green is a great nickname for this hot release of WordPress, bringing with it some excellent new features and improvements. As with all WordPress upgrades, it is recommended you backup your full WordPress site, database and all files, before upgrading. Ipstenu has been keeping a Master List for Troubleshooting WordPress 3.4 upgrade issues and so far, the list is short.
Most issues are with non-compatible and non-compliant WordPress Plugins and Themes, especially with those not using Child Themes to customize their WordPress Theme. Upgrade all of those before upgrading to the new version of WordPress. The WordPress Codex features a Version 3.4 full report and list of features and improvements. WordPress 3.4 is several months past due but worth the wait. Speed. 4 Ways to Loop with WordPress. At the heart of the WordPress theme template is the venerable WordPress loop.
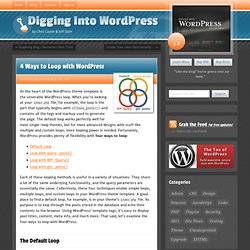
When you’re looking at your index.php file, for example, the loop is the part that typically begins with if(have_posts()) and contains all the tags and markup used to generate the page. The default loop works perfectly well for most single-loop themes, but for more advanced designs with stuff like multiple and custom loops, more looping power is needed. Fortunately, WordPress provides plenty of flexibility with four ways to loop: Each of these looping methods is useful in a variety of situations.
They share a lot of the same underlying functionality, and the query parameters are essentially the same. The Default Loop The default WordPress loop looks something like this: Creating a custom functions plugin for end users. Most of the WordPress tutorials I write mention adding custom functions to your theme’s functions.php file.
Function Reference/posts nav link. Function Reference/posts nav link Languages: English • 日本語 • Русский • (Add your language) Description Displays links for next and previous pages.
Useful for providing "paged" navigation of index, category and archive pages. For displaying next and previous pages of posts see next_posts_link() and previous_posts_link(). For displaying next and previous post navigation on individual posts, see next_post_link() and previous_post_link(). Template Hierarchy. Languages: English • Français • Italiano • 日本語 • 한국어 • Русский • Español • Português do Brasil • 中文(简体) • (Add your language) Introduction WordPress Templates fit together like the pieces of a puzzle to generate the web pages on your WordPress site.
Some templates (the header and footer template files for example) are used on all the web pages, while others are used only under specific conditions. The Loop in Action. The Loop in Action Languages: English • Español • 日本語 • 中文(简体) • Українська • Русский • (Add your language) Introduction "The Loop" is the main process of WordPress.
You use The Loop in your template files to show posts to visitors. You could make templates without The Loop, but you could only display data from one post. Before The Loop goes into action, WordPress verifies that all the files it needs are present. If the user didn't ask for a specific post, category, page, or date, WordPress uses the previously collected default values to determine which posts to prepare for the user. After all this is done, WordPress connects to the database, retrieves the specified information, and stores the results in a variable. By default, if the visitor did not select a specific post, page, category, or date, WordPress uses index.php to display everything. Creating a Favicon. Languages: English • 日本語 • (Add your language) A favicon (short for "favorite icon") is an icon associated with a website or webpage intended to be used when you bookmark the web page.
Web browsers use them in the URL bar, on tabs, and elsewhere to help identify a website visually. Also, it is used as application icon of mobile device. A favicon is typically a graphic 16 x 16 pixels square and is saved as favicon.ico in the root directory of your server. You can use a favicon with any WordPress site on a web server that allows access to the root directories. WordPress Version 4.3 or later. WordPress' .htaccess file explained.