
A Little Hut- Paper Fun. DIY Faux Curled Rosewood Wreath {Made From Rolled Recycled Book Pages} I have seen various versions of Faux Rosewood Wreaths in just about every store and catalog for the upcoming season; most with a price tag running upwards of $40 or more.

Some are crafted of paper and other of real wood shavings. Last year I made a few rolled flower gift toppers from recycled book pages and they remind me so much of the curled wood roses I thought they would make a good substitute. {with a much lower price tag} Materials Needed:Foam Wreath FormRecycled Book PagesLots of Hot GlueRibbon to Hang The full step by step tutorial I posted last year can be found {here}.Basically you layer three book pages together and draw a spiral circle. Starting with the outside of the spiral, roll the paper inward to create the flower shape. Give the wreath form a light coat of white {or light color} spray paint to help camouflage any see-through spaces. It seriously takes quite a few roses to fill the entire wreath, however I think the finished project has such a unique look. {Simply Lovely} Paper Fortune Cookie Favors by La La Laurie. Bloomin' Handmade Greeting Cards You Can Plant.
You’ve might have seen seed paper recently.
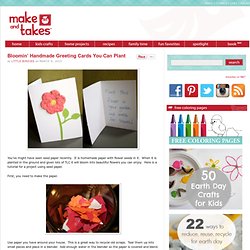
It is homemade paper with flower seeds in it. When it is planted in the ground and given lots of TLC it will bloom into beautiful flowers you can enjoy. Here is a tutorial for a project using seed paper. First, you need to make the paper. Use paper you have around your house. When your paper is nice and evenly blended you can add your seeds. Now it is ready to be shaped. Place a towel on the counter and if you have a piece of felt, place the felt on top of the towel. Take another towel and press it down on the paper pulp to help dry the excess water.
How to Turn a Crafty Ebook into a Cool Gift, part 1. Last year, I didn't talk much about crafty ebooks during the holidays, because let's face it – as cool as they are, it can be hard to give them as gifts, since there's not really anything tangible to give.

…Which got me thinking: what could you do to make them tangible - and crafty? So I came up with a whole bunch of cool ways you could buy someone an indie crafty ebook as a gift, and also turn it into something really cool to wrap up and put under the tree. Today, we kick off a week of tutorials for making great gifts of crafty ebooks. Hope you enjoy – and support independent self-publishers! Today's project is extremely simple – print, cut, punch and you're done. Here's what you'll need: One ebook, printed out onto heavy paper or card stockDouble-sided, heavyweight scrapbook paperPaper cutter (or ruler and craft knife)Glue stickThree-hole punch (or standard hole punch)Two 1" binder rings (available at office supply stores)
How to make a staple-free matchbook notepad. In an effort to use up the damaged & small surplus of 2010 calendars I have on-hand, I've been experimenting with ways to repurpose them.
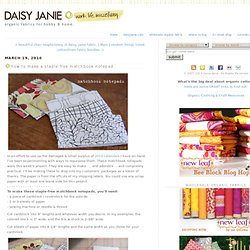
These matchbook notepads were this week's project. They are easy to make .... and adorable ... and completely practical. Oops, I Craft My Pants: Cookie-Sheet Calendar. This past week, a lady from my husband's work let me borrow her Cricutmachine.
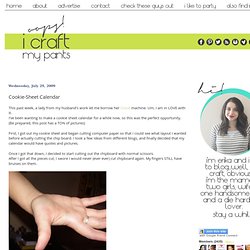
Um, I am in LOVE with it. I've been wanting to make a cookie sheet calendar for a while now, so this was the perfect opportunity. (Be prepared, this post has a TON of pictures) First, I got out my cookie sheet and began cutting computer paper so that I could see what layout I wanted before actually cutting the chip board. I took a few ideas from different blogs, and finally decided that my calendar would have quotes and pictures. Once I got that down, I decided to start cutting out the chipboard with normal scissors. Once the chip board was cut, I cut and glued paper to the chipboard. Paper Illustrations, Gift boxes, Calendars, Stationery, Printables, Handmade cards. Monster Page-Corner Bookmarks. “you maki me happy” sushi card. If you share the love of sushi with the love of your life, this greeting card craft is designed for you!
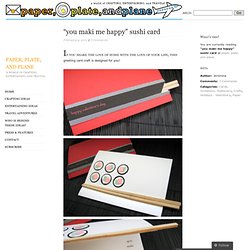
Sushi is one of those foods for which I acquired the taste quite late. I remember my first experience of sushi as a child, around the age of seven, an era long before sushi catapulted into trend status. I was impressed by a plate of such pretty and colorful food. But one big bite had me wondering if there was a tragic mistake! My then seven year old palate assumed it was to embark on a gastronomy of pure candy and had little ability to equate an appealing sight with the taste of fish. To create the sleeve of this card: 1. 2. 3. 4. To create the inner card: 5. 6. 7. Insert the inner card into the sleeve. Now go and maki someone happy this Valentine’s Day! Like this: Like Loading... Tagged: japanese card, maki card, maki greeting card, sushi card, sushi greeting card, valentine card, valentine crafts.