
Free sewing patterns and tutorials! I’m woefully behind in posting about my Sewing 101 tutorials over at design*sponge — but I’ve been hard at work designing, sewing, writing and photographing, and creating lots of good how-to posts over there for your stitchy pleasure. (They’re specially made for beginning sewists, so newbies, don’t be shy!) Click on over to design*sponge to check out my columns: How to sew a pouf. Download a free template to make this chunky pouf, and learn everything you’ll need to know to assemble it and create the tufting. It’s easy, I promise! How to make your own roller blinds. Pioneer Woman Home & Garden.
A sweet friend of mine sent the girls and me a box of adorably adorable owl pillows this week.
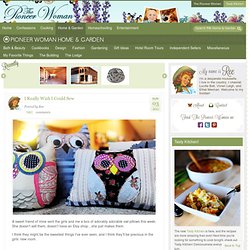
She doesn’t sell them, doesn’t have an Etsy shop…she just makes them. I think they might be the sweetest things I’ve ever seen, and I think they’ll be precious in the girls’ new room. I don’t know what it is about owl pillows. Or owls in general. They’re just so charming. It must have something to do with the eyes. A ModernTake on the Doily - $850 Lamp for less than $50. A Modern Take on the Doily $850 Lamp for less than $50?

Yes Please! Hello Pretty people! We are so excited to share a project we did this past weekend. A few months ago, I came across a ceiling lamp, I absolutely loved. It was $850, and I just couldn’t justify the spend, being it was simply made of doilies. To get started, you are going to need a few things to make this project successful. Corn starchballoon (we used a 40” blown up until completely round, as pictured)upholstery thread (but any thread will do)twinedrop clothschool gluecheap paintbrushpetroleum jellylamp kit24+ doiliesstiff stuff We sewed the doilies around the balloon with the upholstery thread, very carefully.
Make sure to create a space to place your bulb socket. Once you have sewn about ¾ of your balloon, stop and do the last ¼ separately. Lay down your tarp and hang your balloon from some twine above the tarp. Rub the balloon down with the petroleum jelly. Mail organizer tutorial. To kick off Spice up your Kitchen, I figured I should start things off with a tutorial to help you get organized.
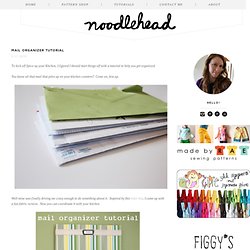
You know all that mail that piles up on your kitchen counters? Come on, fess up. Well mine was finally driving me crazy enough to do something about it. Inspired by this letter bin, I came up with a fun fabric version. Now you can coordinate it with your kitchen. Here's what you'll need: I used Elmer's spray glue and a piece of fabric cut about 4" bigger on all sides. Lay the fabric squarely on top and smooth and wrap around sides. Make the mail slots: For both mail slots: Use your pattern piece and cut out two pieces of exterior and two pieces of lining, putting the pattern piece on the fold as indicated on the template. Sew the exterior and lining piece RIGHT sides together using a 1/2" seam allowance at the top of what will be the mail slot. Repeat for other mail slot pieces. Align the twill tape about an inch below the top of each mail slot. Quilted Ironing Board Cover. Hi!
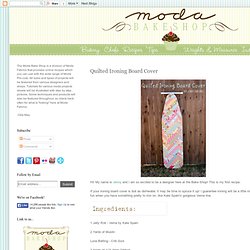
My name is Jenny and I am so excited to be a designer here at the Bake Shop! This is my first recipe. If your ironing board cover is dull as dishwater, it may be time to spruce it up! I guarantee ironing will be a little more fun when you have something pretty to iron on, like Kate Spain's gorgeous Verna line. 1 Jelly Roll - Verna by Kate Spain 2 Yards of Muslin Luna Batting - Crib Size. Spring Clean & Tidy Week: Sofa Caddy - Sew4Home. Denim Do-it-All Bins. By Betz White Repurposing with denim is a natural.
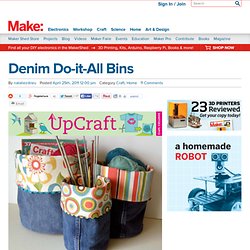
Who doesn’t have an extra pair of jeans lying around that are outgrown, out of fashion or worn out in some way? Put that denim to good use by making up a few Denim Do-it-All Bins. They’re great for organizing your yarn stash, magazines, or craft supplies. Materials (for large bin)One pair of jeans, any adult size or large kid size 1/2 yd lining fabric – lightweight cottons*, or mid-weight twill, canvas, etc. 1/2 yd interfacing, *needed for lighter-weight lining fabrics only1/2 yd quilt batting 1 yd rickrack, ball fringe or other trimming Heavy-duty sewing machine needle for denimFabric marking tool Ruler Fabric shears IronFinished Measurements: Feel free to change the dimensions to suit your needs! Directions Step 1: Begin with a pair of legs from a pair of unwanted jeans. Step 2: Examine the seams.
Step 3: Place a straight edge across the bottom of the flat leg piece, perpendicular to the seam running up the center. Related. Tutorial for Fabric Mail Sorter. 1 yard fabric for the body and outside of the pockets – can be cotton, linen, or even canvas would be ok ½ yard fabric for the pocket lining and binding – should be quilting cotton or similar weight ½ yard Pellon 70 or other ultra heavy weight interfacing ½ yard Pellon 987F or other lightweight fusible fleece or fusible interfacing 1/3 yard Pellon 40, 50, or other lightweight interfacing 65 inches of bias binding, if not making your own Extra-large grommet and setting tools Thread to match backing fabric 1. 2. 3. 4. 5.
Serger Instructions: Fold the lining over the top so that wrong sides are together and match the raw edges on the bottom. Non-Serger: With right sides together, match raw edges at the bottom and press from the bottom up so that you get a lining band at the top. Repeat for rest of pockets. 6. Shabby flower pillow (a tutorial) Sometimes, ideas in my head don’t always turn out as planned.
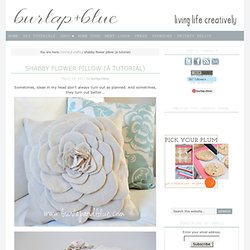
And sometimes, they turn out better…. After running across Sweet Jessie’s Scalloped Garland tutorial a few months ago, I wanted to take the same technique and use it to make a shabby, fun, linen pillow. Here’s how I did it: Supplies Needed:fabric (I used linen)sewing machinezipper (if desired) Step 1: Create your “petals”.
Step 2: Take sew petals and turn inside out. Step 3: Stitch petals down to fabric. Step 4: Continue creating petals and attaching them to pillow front. My New Slipcover.