
The Daily Telecraft: Cute Crafts! Google. © 2021 - Privacy - Terms.

Leather Pouch. I've been waiting for today with the utmost anticipation.
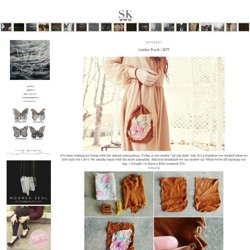
Today is our weekly "all day date" day. It's a tradition we created when we first said our I do's. We usually begin with the most unhealthy, delicious breakfast we can muster up. While we're off enjoying our day, I thought I'd share a little weekend DIY. 1. Pantry Supplies: Scissors 2. Carteles y composiciones tipográficas. Diseñar con tipografía… utilizar este elemento como parte esencial de una composición no es tarea facil.
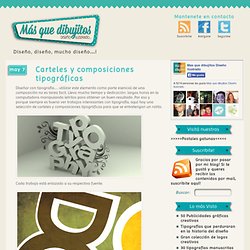
Lleva mucho tiempo y dedicación: largas horas en la computadora manipulando letritas para obtener un buen resultado. Por eso y porque siempre es bueno ver trabajos interesantes con tipografía, aquí hay una selección de carteles y composiciones tipográficas para que se entretengan un ratito. Cada trabajo está enlazado a su respectiva fuente. Permítanme este pequeño atrevimiento: Diseño de carteles: galería de carteles de conciertos en Mallorca y promocionales - Music posters. Illustration inspiration. Handmade Party Ideas: did someone say party? Perfil del usuario Erika Kuhn.
50 great examples of infographics. Kate’s illuminated canvas. [my apologies, kate's new diy series was supposed to go up yesterday but i totally fell behind] this month i will feature projects using canvas, and to kick it off i decided to use a lightweight canvas fabric to create an unusual “night light” painting that could look good on or off. we needed a light in our hallway because i get up early in the morning when it is dark out. i thought i could use this as an opportunity to make a conversation piece that people see when they first enter our house. i am very happy with the results and i can’t wait to experiment with all kinds of painted designs. i wanted it to have kind of a raw, art gallery feel, which is why i left the sides unfinished and did not frame the piece. but if you painted the sides, framed the image, and chose different text or images, this could easily work in a kids room, a guest room, or be a fun holiday installation. hope this inspires some fun ideas for night lights!
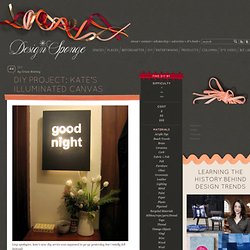
Happy crafting! – kate. Stuff to Make in my Old Age - StumbleUpon. How To Make A Stylish Photo Frame For Several Photos. Here is a simple yet stylish photo frame that can accomodate quite many photos at once. The idea is very simple. Fasten twines on the empty frame and hang photos using clothes pins on them.
You can use a frame you bought or a frame you made by yourself. To make it you just need to find some wood strips, sand them, paint or stain them and fasten together with the staples and nails. Yes, everything is as simple as it sounds. Free People Clothing Boutique Blog - StumbleUpon. UPDATE: This post originally ran on March 23 2011, but with summer winding down we wanted to bring it back up for some late summer inspiration!
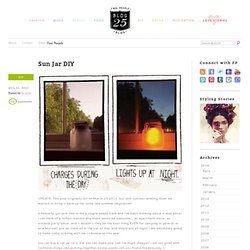
A fellow fp girl sent this to me a couple weeks back and i’ve been thinking about it ever since! I can think of a million reasons why these would be awesome… as apartment décor, as outdoor party décor, and – wouldn’t they be the best thing EVER for camping in general or at a festival? Just let them sit in the sun all day, and they’ll last all night! I am absolutely going to make some to bring with me to bonnaroo this year. you can buy a sun jar here, but you can make your own for much cheaper! What you need: a mason jar with a clear glass lid like this one from ikea, a solar garden light like the ones pictured above, which i found here, adhesive and glass frosting spray. start by spraying the inside of the jar with the frosting spray – this will help diffuse the light and give it a warm glow. don’t spray the lid though!
Last image. Tutorials for Recycling T-Shirts - StumbleUpon. So way way back, in June, I wrote this Studio Organization post, about starting the process of organizing my studio by cleaning out the closet full of junk.

Well, it's September and...let's just say the closet is a work in progress. Some of the things that are taking up space in the closet are shirts that I never wear anymore. I realized I could repurpose them into something else! Here are some tutorials for recycling shirts: Check out these t-shirt scarves! Create cute little bows for accessories or packaging with this tutorial.