DIY Glitter Soy Candles. This year, my most favorite niece in the whole world turns one.
She will be having a “Royal Birthday,” complete with lots of gold and pink decor – my sister-in-law has gone out of her way to make sure this princess party will be one to remember. Hacer corazones con ganchos. I happened to have this bundle of white cotton, and as I wanted to crochet up some sweet little hearts, I decided to form smaller bundles of white yarn and dye each bundle in natural dyes to get pretty pastels.
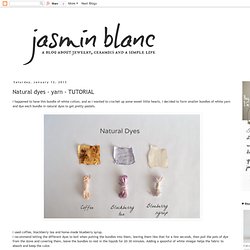
I used coffee, blackberry tea and home-made blueberry syrup. I recommend letting the different dyes to boil when putting the bundles into them, leaving them like that for a few seconds, then pull the pots of dye from the stove and covering them, leave the bundles to rest in the liquids for 20-30 minutes. Adding a spoonful of white vinegar helps the fabric to absorb and keep the color.
Remember, your yarn needs to be 100% natural in order to absorb these natural dyes. You can then use the yarn to do different projects. Enjoy! DIY: Paper Flowers In A Vase. If you’re avid readers of Bespoke Bride you’ll know that we’ve been busing painting and decorating lately, ready to move into our new office! (eek!) We’ve also been trying our hands at a spot of DIY and let me tell ya…we’re not half bad at making pretty little decorations to lavish around our new space! DIY: Neon Edged Boxes. Earlier this week I showed you how I made painted storage boxes with DIY: Painted Storage Box Tutorial as inspired by this project at Centsational Girl.
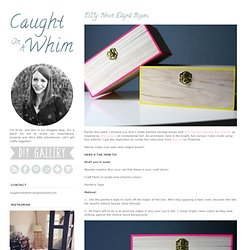
As promised, here is the bright, fun version I also made using that tutorial. I got the inspiration to create this neon look from this pin on Pinterest. Wanna make your own neon edged boxes? Stuff you'll need: Wooden Jewelry Box (you can find these in your craft store) Craft Paint (in bright and cheerful colors) Painter's Tape Method: 1. 2. Not the typical adjectives associated with storage boxes, but for these neon beauties, they just seem fitting. So which version of the boxes do you guys prefer? Origami boxes. If you are like me and are just getting around to taking down your 2011 calendars, you are in luck because today I will show you how I make origami gift boxes out of recycled calendars.
And if you recycled your calendars months ago, don’t worry, pretty much any paper will work for these boxes, although heavier weight papers work best for larger boxes. These boxes are a great way to recycle pretty papers that you have around the house and wrap small gifts or candies or to hide small clutter! The first box may take awhile to make, but they get easier with practice.
Gold Notebooks. It’s no secret that I’m really into the “dipped” look right now.
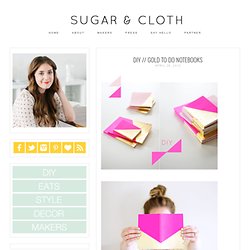
I think I’ve posted at least two DIY’s with some color dipping relation (here & here), so I refrained from titling this one as such (although I still read it in my mind as Gold Dipped To Do Notebooks, shhh). Seriously though, who wouldn’t want to help scratch out a few bullet points on your to-do list if they saw you jotting it down in this little beauty, hm? I should confess though that I’ve never actually tried to make my own notebook after finding this project because I’d rather not disappoint myself with falling short of how perfect these turned out. Instead, I’ll direct any questions you may have to Whitney, at Eat Sleep Cuddle. Directions as said by the pro.. photos & DIY by Eat Sleep Cuddle // layout by Sugar & Cloth. Origami cute foxes. Encouraged by the cute foxes that roam carefree in places like pinterest and etsy, I got into the mood to make origami versions with the hope that they will turn out demurely adorable just like the ones I had seen.
I followed the instructions for a model found in a calendar by author Margaret Van Sicklen and made minor modifications to allow an extra flap on the tail end (see the second image). To make my foxes a tad more foxy looking, I coloured the edge white with a colour pencil to emphasise each of their pointed muzzle after adding their eyes and noses. Glass Head Sewing Pins. Sewing pins with glass heads are practical – that larger pin head makes it easier to pick up and keep track of.
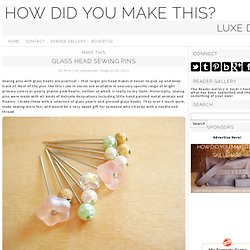
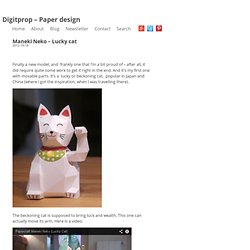
Most of the pins like this I see in stores are available in one very specific range of bright primary colors or pearly plastic pink hearts, neither of which is really to my taste. Historically, sewing pins were made with all kinds of delicate decorations including little hand painted metal animals and flowers. I made these with a selection of glass pearls and pressed glass beads. They aren’t much work, make sewing more fun, and would be a very sweet gift for someone who’s handy with a needle and thread. Supplies: - straight pins – in most occasions you’ll want the longest pins you can find - glass beads – in most occasions, you’ll want some pretty small beads - jeweler’s cement or super glue These beads are glass pearls, metal beads that are variable called “star dust” and “gold dust” and some Czech pressed glass beads. As you’ve probably gathered, the assembly is dead simple. Lucky cat. Finally a new model, and frankly one that I’m a bit proud of – after all, it did require quite some work to get it right in the end.
Stab Bound Journal. Make a hand bound journal with elaborate side stitching for yourself or as a gift.
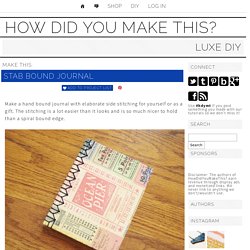
The stitching is a lot easier than it looks and is so much nicer to hold than a spiral bound edge. Supplies and Equipment – sharp utility knife and cutting surface BE VERY CAREFUL WITH THE SHARP BLADE – rulers – drill with 1/16th inch bit OR a small paper punch BE VERY CAREFUL WITH POWER TOOLS – fancy cover paper – I used Cavallini Vintage Tickets Wrapping Paper – 20″ x 28″ – 1 sheet of 8.5×11 for endpapers (this can be fancy or the same paper as your pages) – 10 sheets of 8.5×11 paper for pages – 3 yards of embroidery floss – mat board – I used Crescent No. 33 White & Cream Smooth Mat Board. Libretita de cereal. I am still a little old-fashioned when it comes to taking notes and I usually have at least two pocket notebooks in my purse at all times (one for craft ideas and the other for making to do lists).
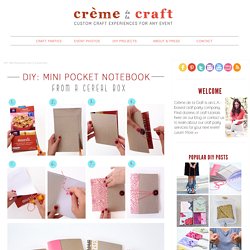
I realized that I am also very picky when it comes to choosing the perfect notebook, and for those of you who are like me, I've got a solution for you! Follow the directions below to make your own personalized, budget-friendly pocket journal out of cereal boxes inspired by my favorite Moleskine notebooks. Choose your favorite decorative paper and a stylish button to create the perfect notebook that suits your own style. These were so easy and fun to make, I ended up making four...one for me and three for my friends. Materials: • Cereal box (1 cereal box makes 2 notebooks.