
Download Microsoft Office Outlook Tool: Time Zone Data Update Tool for Microsoft Office Outlook 32-bit from Official Microsoft Download Center. Outlook's Appointments and Time Zones. To many people, Microsoft Outlook really seems really bad at handling time zone changes, and that’s being kind.
This is in part because people don’t understand that Outlook uses UTC time for appointments and adjusts the time using the time zone offset configured on the computer. Note that this is not “an Outlook problem”, as this is how computers, email clients and mail servers handle time zones. For example, any email client will display this sent time: Thu, 9 Jun 2005 08:16:24 -0700 as on a computer configured for the Eastern Time Zone, which has a -0400 offset during Daylight savings time. By storing all times as UTC, Outlook doesn’t need to store any other time information in the appointment and uses the local time zone when rendering the view.
Outlook does not support an absolute time option for the calendar, which would permit you to enter 2 PM and the appointment would always stay on 2 PM, no matter how many times you changed the time zone. Workaround. Shift multiple Appointments to a different time - HowTo-Outlook.
Scheduled and recurring email in Outlook? Excel email validation formula. Insert, delete, or edit footnotes and endnotes - Word. In Word 2010, you can use the updated ribbon tabs to navigate and organize your most important commands. Footnotes and endnotes are used in printed documents to explain, comment on, or provide references for text in a document. How To Delete/Remove Blank Rows & Columns In Excel 2010 Spreadsheet. Here is a small tip for those using Excel 2010 who want to remove all blank rows in an easy way without having to remove each blank row manually.
Please note that this tip applies to removing multiple columns as well. First select the portion of the spreadsheet from where you wish to remove the blank rows and then hit the Home tab. Here navigate to the Editing options and choose the Go To Special option under the Find & Select option. In the Go to Special dialogue box, choose Blanks and hit OK. All the blank rows will be selected. Now choose the Delete Sheet Rows option under the Delete drop down box. If you want to remove blank columns, select the portion of the spreadsheet from where you want to delete the blank columns, follow all steps as listed above and finally in the end select the ‘Delete Sheet Columns’ option.
For more, learn how you can delete duplicate rows in Excel. Controlling Autodiscover using Group Policy. 27/03/2015 – Update: This has turned into my second most popular blog post, and is also one of the first I ever wrote.

For that reason, I have given it a major update and hopefully made it more readable and helpful! Autodiscover is a very important part of any Exchange deployment these days, whether it is a cloud-based Office 365 deployment or an On Premise deployment. It is the primary method by which your clients discover where their Exchange Server is located and what configuration is set.
Manual configuration of Outlook profiles is still possible, but is very much a thing of the past. How does Autodiscover work in Outlook? When you configure a new Outlook profile, or open Outlook with a profile already configured, the client will go through a series of lookups to discover the correct server to connect to. 1. 2. Office 365 – Outlook Profiles in a Cutover Migration. One of the drawbacks of performing a cutover migration from an On Premise Exchange environment to Office 365 is that Outlook profiles must be recreated to connect to the Office 365 servers.
IF formula in a Word table. Field codes in Word. Fields in Word are used as placeholders for data that might change in a document and for creating form letters and labels in mail-merge documents.
Word inserts fields automatically when you use particular commands, such as when you insert a page number, when you insert a document building block such as a cover page, or when you create a table of contents. You can also manually insert fields to automate aspects of your document, such as merging data from a data source or performing calculations. In current and recent versions of Word there’s little need to insert fields manually, because built-in commands and content controls provide most of the capabilities that fields provided for earlier versions.
Range.Find Method (Excel) Finds specific information in a range. expression .Find(What, After, LookIn, LookAt, SearchOrder, SearchDirection, MatchCase, MatchByte, SearchFormat) expression A variable that represents a Range object.
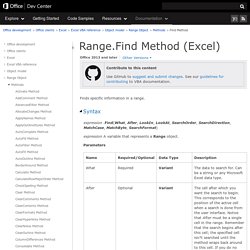
Parameters Return Value A Range object that represents the first cell where that information is found. This method returns Nothing if no match is found. The settings for LookIn, LookAt, SearchOrder, and MatchByte are saved each time you use this method. You can use the FindNext and FindPrevious methods to repeat the search. When the search reaches the end of the specified search range, it wraps around to the beginning of the range. To find cells that match more complicated patterns, use a For Each...Next statement with the Like operator. For Each c In [A1:C5] If c.Font.Name Like "Cour*" Then c.Font.Name = "Times New Roman" End If Next This example finds all cells in the range A1:A500 on worksheet one that contain the value 2 and changes it to 5.
Sample code provided by: Holy Macro!