
Make Your Own Weather Station - Met Office Education. Seven Layer Density Column at Steve Spangler Science. Measure 8 ounces of each type of liquid into the 9 ounce portion cups.

You may want to color each of the liquids to make a more dramatic effect in your column. Light Karo syrup is easier to color than dark syrup. The only liquids that you may not be able to color are the vegetable oil and the honey. Start your column by pouring the honey into the cylinder. Now, you will pour each liquid SLOWLY into the container, one at a time. The same amount of two different liquids will have different weights because they have different masses. To test this, you might want to set up a scale and measure each of the liquids that you poured into your column. ** NOTE: The numbers in the table are based on data from manufacturers for each item.
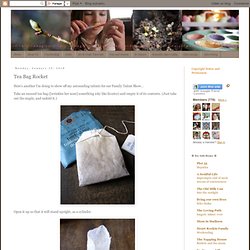
The table shows the densities of the liquids used in the column as well as other common liquids (measured in g/cm3 or g/mL). Density is basically how much "stuff" is smashed into a particular area... or a comparison between an object's mass and volume. Ordinary Life Magic: Tea Bag Rocket. Here’s another I’m doing to show off my astounding talents for our Family Talent Show… Take an unused tea bag ([wrinkles her nose] something icky like licorice) and empty it of its contents.

(Just take out the staple, and unfold it.) Open it up so that it will stand upright, as a cylinder. Light the top of it on fire with a match or lighter. Count down… and then shwoosh!!! Up it goes into the sky. Have another one ready for back up, ’cause they’ll probably wanna see it again. How it works: “Everyone knows that hot air rises and this experiment demonstrates that idea as well as the principles of convection currents. Lung Model Experiment — Early Bird Homeschool. I can’t believe it’s Friday already and I haven’t been in this space all week! It’s been one of those weeks where no one (especially me!) Has been feeling motivated to do much of anything… although, the girls have been doing some extensive fairy pretend play!
We have been enjoying some hands-on activities to explore the human body. I bought a Magic School Bus science kit, Journey into the Human Body , and we have also been using a book from the library, Play and Find Out About the Human Body . Earlier this week, we used a plastic 2-liter bottle, a balloon, and a sheet of plastic to make a model of the lung: The balloon represents the lung and the plastic sheet across the bottom of the bottle represents the diaphragm muscle . We’re also planning to test our lung capacity and compare kid lungs to adult lungs. I am hoping for a sunny weekend and some fresh air to get rid of the blahs around here. Tagged as: human body , lung , science experiment. A Blog About Motherhood in Alaska: Summer Kid Crafts: Make a Hovercraft. This is a brilliant kid craft--so brilliant that you may indeed find yourself playing with it too.

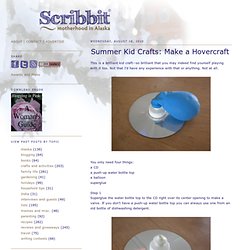
Not that I'd have any experience with that or anything. Not at all. You only need four things:a CDa push-up water bottle topa balloonsuperglue Step 1Superglue the water bottle top to the CD right over its center opening to make a valve. If you don't have a push-up water bottle top you can always use one from an old bottle of dishwashing detergent. Step 2After the glue is dry and with the valve in the closed position, blow up the balloon and fix it over the valve in the middle of the CD. Step 3Place the hovercraft on a hard and flat floor (not carpet), let go of the balloon and pull the bottle valve to the open position.
Sponsored by Sorella Jewelry Studio for fine personalized jewelry.