
50 Illustrator Tutorials Every Designer Should See. Adobe Illustrator can be a little tricky to get your head around, particularly after getting used to the workflow of applications such as Photoshop.
The differences between layer use and the creation of objects and shapes can be really strange at first hand. Luckily there’s a range of help available for free online in the form of tutorials. Here is my collection of hand-picked articles from various sites that every designer should see, whether you’re a beginner or advanced user, there will be something here for you! Vector Tracing a Photo Create the Photoshop CS2 Splash Graphic Illustrating a Summer Field Landscape How to Turn Glasses into a Great Geek Icon Create a Vector Film Slate Icon A Guide to Illustrator’s Paintbrush Tool and Brush Panel A Guide to Illustrator’s Blend Tool How to Create a Cute Bunny Vector Character Design with Swirls and Flourishes Swirl Mania in Illustrator and Photoshop Designing a Sleek Pencil Icon Illustrator Watercolour Brush Tutorial Creating a Vector Folder Icon.
How to Create a Cute Bunny Vector Character. In this Adobe Illustrator tutorial, I will show you how to create a cute bunny character.
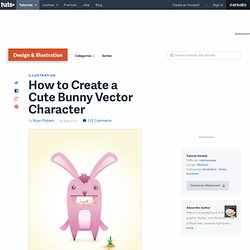
This tutorial uses simple shapes and gradients that are easy to apply to other character illustrations. The great thing about his tutorial is you don't have to be an amazing artist to create it! Check Chris Spooner's post 70 Cute and Cheeky Vector Animal Characters for more character inspiration. 1. Create the Bunny Body Step 1 Create a New document, then make a 190 x 290px tall rectangle with the Rectangle Tool (M). Step 2 With your Direct Selection Tool (A), select the top left corner of the rectangle. Step 3 Repeat the previous step with the top right anchor point. Step 4 Fill the rectangle with a Linear Gradient from the Gradient panel and change the first swatch to a pink color and the second swatch to a darker pink color. Step 5 Use the Gradient Tool (G) to adjust the gradient by clicking and dragging from the middle of the shape to the bottom. Step 6 Step 7 2. 3. Go to Effect > Warp > Arch. 4. 5. 6. 7.
Creating a ribbon in Adobe Illustrator. Ever wondered how you draw a ribbon in Adobe Illustrator?
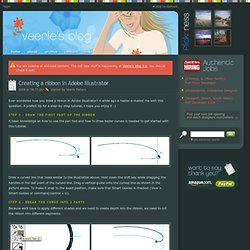
A while ago a reader e-mailed me with this question. A prefect tip for a step-by-step tutorial, I hope you enjoy it :) Step 1 - draw the first part of the ribbon A basic knowledge on how to use the pen tool and how to draw bezier curves is needed to get started with this tutorial. Draw a curved line that looks similar to the illustration above. Step 2 - break the curve into 2 parts Because we'll have to apply different shades and we need to create depth into the ribbon, we need to cut the ribbon into different segments. Select the Scissors Tool and click on the location on the path as shown in the picture above. Step 3 - close the paths Close the paths as shown in the picture below, so the ribbon exists of 2 segments. Step 4 - rotate and duplicate the 2 segments of the ribbon Chances are that both segments don't perfectly match.
Step 5 - merge the middle segments of the ribbon into 1 segment Our ribbon is now divided into 3 segments.