
Photoshop Brushes « Digital Lady Syd's Fun Photoshop Blog. This week I am including one of my previous Tidbits blogs on the Smudge Tool that I ran a couple years ago.

Since I have recently started experimenting again with the Smudge Tool, it seemed appropriate to share that info along with some new tips. And yes, there is still a lot of confusion regarding the Smudge Tool and the newer Mixer Brush Tool. Smudge Tool Tips The image above is a good example of using a combination of the Smudge Tool on edges, a Regular Brush Tool for the texture, and Topaz (for website see my Tidbits Blog sidebar) Simplify 4 to overall soften the image.
I rarely use just one tool in Photoshop to get results. The Photoshop CC Manual offers a couple tips: (1) Select Sample All Layers in the options bar to smudge using color data from all visible layers. The Smudge Tool can also be very useful on a layer mask to make subtle changes by nudging the edges using a Strength of 50%, Hardness of 0% and Mode of Normal. Art History Tool and Smudge Tool Image Frame Like this: 1. Shoeshine Scenario: Pencil Technique. Shoeshine Scenario: Marker Technique. Hand drawn look photoshop. How to Create a Set of Hand-Drawn Design Elements. Some of the more popular resource packs at Vandelay Premier have been those that are created to be used with hand-drawn or doodled designs.

While we aim to provide resources that are as useful as possible, there may be times when you need a specific design element that you can’t find anywhere. In that case, you can create your own, and in this tutorial we’ll show you how. We’ll be creating a small set of hand-drawn resources, but using the techniques covered in this post you’ll be able to create as much or as little as you need. While stock resources can be great for saving time in your design process, creating your own resources can often be a lot of fun, and with hand-drawn design this is definitely the case. To follow this tutorial you’ll need: A pen or markerPaperA scannerPhotoshopIllustrator We’ll be using both Photoshop and Illustrator in the tutorial to create a small set of Photoshop brushes, and the we’ll vectorize the images for added flexibility.
Creating the Brushes: That’s it! Create a Sketchy Hand-Drawn Camera Illustration in Illustrator. In this tutorial, we're going to use Illustrator (and a bit of Photoshop) to create an image that looks roughly hand-drawn on textured paper.

We'll be creating a camera illustration in this rough sketchy style. Republished Tutorial Every few weeks, we revisit some of our reader's favorite posts from throughout the history of the site. This tutorial was first published in July of 2008. To begin with let's have a look at the image we'll be creating.
Take a series of photos of your subject to decide which angle will work best. Import your chosen photo into Illustrator using File > Place. Choose a red 0.5 pt stroke, with no fill, and use the Pen tool to start tracing the outlines of your image. Use the Pencil tool to draw the finer details. Now that we're done tracing we're going to make the drawing feel more hand-rendered. You might have to experiment with the settings to get the desired effect; here's what I used. Lock your finer details by selecting them and hitting Command+2. Photoshop: Hand Drawn Design.
In case you haven't noticed yet, the hand drawn style is one of the hottest design trends.
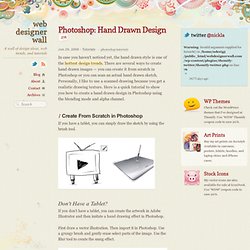
There are several ways to create hand drawn images — you can create it from scratch in Photoshop or you can scan an actual hand drawn sketch. Personally, I like to use a scanned drawing because you get a realistic drawing texture. Here is a quick tutorial to show you how to create a hand drawn design in Photoshop using the blending mode and alpha channel. 1 Create From Scratch in Photoshop If you have a tablet, you can simply draw the sketch by using the brush tool. Hand-Drawn Photoshop Brushes Collection.