
How to make decoupage glue for crafts - Portland Arts & Crafts. T H E T O Y M A K E R. Paper iPhone Covers. I found this clever trick on Pinterest the other week from Oops I Craft My Pants and had to try it for myself: iPhone covers using scrapbook paper!
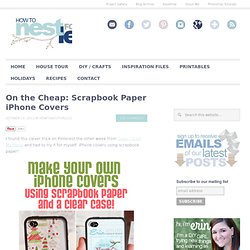
Now when I had my first cell phone in high school (the old Nokia), I probably had about 15 different cell phone covers that I would switch out to match my clothes everyday! I figure this scrapbook paper iPhone phone cover is an easy way to update my phone without spending all the cash! First thing I did was purchase a couple sheets of scrapbook paper from Michael’s. I also purchased a clear iPhone 4 cover from Best Buy. You could really purchase any cheap clear phone cover, but I wanted one with protective rubber sides since I’m a klutz and always drop my phone! First thing I did was trace the scrapbook paper around the iPhone cover to get the basic shape. I cut out the main section just using a pair of scissors. MADE: TUTORIAL: Heartbreaker Valentines. Who said valentines were only red and pink?
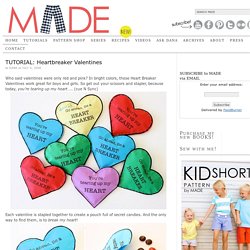
In bright colors, these Heart Breaker Valentines work great for boys and girls. So get out your scissors and stapler, because today, you’re tearing up my heart….. (cue N Sync) Each valentine is stapled together to create a pouch full of secret candies. And the only way to find them, is to break my heart! Skill Level: AnyNeeded: * colorful paper* computer printer* stapler/staples* scissors* candy Start by printing this template from your computer.Two options….1) You can find the PDF file HERE. I chose to print on bright colored paper so the Heartbreakers work for both boys and girls. Another option: print to white paper and let the your kids color the hearts themselves: Most of all, make sure your kids check out what you’re doing. Staple around the outside of each heart, leaving an opening at the top of the heart for inserting candy (or, use your sewing machine to sew around the edge…though it might be more difficult to sew it shut.
Cutting files, Printables, Paper crafts, Fabric. Create free tuts. So I finally got these all spruced up and ready to roll.
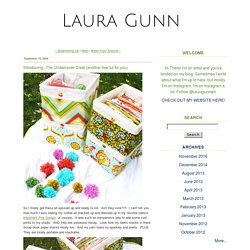
Aint they cute?!?! I can't tell you how much I love seeing my crates all stacked up and dressed up in my favorite fabrics (Heather's Pop Garden, of course). It was such an inexpensive way to add some cool prints to my studio. AND they are sooooooo handy. Look how my fabric stacks in there. You may be saying, "What in the heck are these? " Goodbye ugly plastic thing with little holes that my stuff always falls through. Homemade Sidewalk Chalk.
By Michelle Vackar, Modern Handmade Child One of our favorite outside activities at our home is drawing with chalk on the driveway.

You can play hopscotch, four-square, and of course draw and create silly stories. My daughters and I were talking one day as we played hopscotch about how to make chalk and I thought to myself, let’s try it! It ended up being quite a lot of fun. What you will need: • Toilet paper or paper towel tubes • Scissors • Duct tape • Wax paper • Small bucket or disposable container to make the recipe • ¾ cup of warm water • 1 ½ cups Plaster of Paris • 2-3 tablespoons of tempera paint • Paper bag or a “mess mat” ** we made six tubes of chalk – we simply doubled the above recipe Step 1: If you are using paper towel tubes, cut each tube in half, so it is roughly the length of a toilet paper roll tube.
Step 2: Cover one end of each tube with duct table to hold the contents within. How to make gift bags from newspaper. When I bought something at a store recently, the clerk handed me my purchase in a bag made from a newspaper.
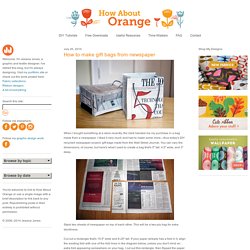
I liked it very much and had to make some more—thus today's DIY recycled newspaper project: gift bags made from the Wall Street Journal. You can vary the dimensions, of course, but here's what I used to create a bag that's 5" tall, 4.5" wide, and 3" deep. Stack two sheets of newspaper on top of each other. This will be a two-ply bag for extra sturdiness. Cut out a rectangle that's 15.5" wide and 8.25" tall. Fold a flap 1.25" down from the top. Cut two pieces of cardstock or chipboard to 4.25" x 1", then glue them on the widest two panels just under the top fold.
Put glue on the outside of the 0.5" tab and bring the left-most panel over to form the body of the bag, aligning the cut edge of the panel with the folded edge of the flap. Upend the bag so the 2" flap is now up. Put glue on both flaps and fold them inward to form the bottom of the bag.