background preloader

Crafts

Facebook Twitter

Ribbon Flowers by MakeBowsandMore.com. DIY Lightshade. Key West Diy Flip Flops. This post is part of the Rock The Flop Event with Grand Prize of a $100 gift card to Roberts Crafts, more details on how to enter here. I am way to excited about how these turned out! It was one of those ideas that you didn’t know if it would work out, and it turns out even better than you hoped. I love those kinds. Much better than the ones you are quite certain you have all figured out and they end up in the scrap bucket :).

So I wanted this to be a no-sew project and create a relaxed flip flop that looks like it just walked off a beach. Because really, that is where I wished I just walked off of. I just cut the fabric and tied some knots! Also I had a few emails reminding me I chose Labor day weekend for the finale of the event. You have to have a pair of flip flops that have the discs holding the top part on, on the back. Now flip over the shoes, and cut off that disc with an exacto knife. Now you have a clean slate! Here is what I did: Next I took two strips measuring 2½ in x 24 in. 25 Handmade Gifts Under $5.

If your gift list is long and your budget is small here are some great Handmade Gifts that you can make. Keep in mind that handmade items are not just beautiful but special… I love to give them and I love to receive them. In my opinion they are the best! Jersey Knit Bracelet Lovely! This would make a perfect gift for any of your girlfriends. You can choose the colors and recycle t-shirts that you have around the house.

Cheap and cute! Tutorial Paper Clip Earrings Tutorial This is a brilliant idea… and the possibilities are endless. Love it! Printed Candles Who doesn’t love a candle? Think about how many different stamps you could use to customize this project. tutorial Hot Chocolate Art! What a great gift for neighbors and teachers… I am personally a hot chocolate lover so this would make a great gift for me tutorial Tile Coaster You can buy these plain tiles at Home Depot for under a dollar. I’ve seen them with family pictures also… Way cute! Tutorial Bow Belt I was amazed how easy this tutorial was.

So Pretty! Large T-Shirt to Fitted Tee Tutorial | a.steed's.life. I have these two t-shirts that I love. They're soft, comfortable, and have good worn (and sentimental) designs on them. But, I never wear them for anything other than around the house because they are large men's t-shirts and look completely shapeless on me. Then I found this great tutorial on YouTube for how to make a big t-shirt a fitted shirt! - T-Shirt Surgery: How to Make a Shirt Fit So, while I was staying with my mom at her camper this summer (she lives & travels in an RV), I asked her to help me try it out. First, a before & after look at the t-shirt we did.

So, here's how it's done. Start with a t-shirt you love that's just too big Turn the shirt inside out and lay a shirt that DOES fit you on top of it, lining up the collars so that you can be sure it is centered over your large t-shirt. Thanks to brianagayle for the video tutorial & tips! No time to make your own? Jewelry & Metalwork with Coins. Coins have a magical quality that has drawn collectors for centuries.

Working with coinage in metalwork and wearing coins as jewelry can be a fun alternative to moreconventional jewelry materials. The artwork on coinage is often beautifully detailed and rendered. Coin jewelry can represent national pride when an image on a coin evokes such feeling. Luck is a theme represented by the “lucky penny”. Coins can make jewelry exotic, with the use of rare, unusual, or foreign coins. Conversely, it is interesting to see the everyday mundane coin as special, when it is showcased in jewelry. Many people are concerned that defacing a coin for use in jewelry is illegal. As metalworkers, the use of coins can be tricky if we are to use heat techniques to alter coins. The following is some useful information on US coinage: Metal Content by mint year: Nickel:1866-1942: 75% Copper, 25% Zinc1942-1945: 56% Copper, 35% Zinc, 9% Manganese1945-2005: 75% Copper, 25% Zinc.

Shoesday Tuesday - $5 Faux Saddle Shoes Tutorial! I love shoes. Why? 1. Because if I gain weight or lose weight, my shoes always fit. 2. For some reason, you can get away with crazy shoes and still be considered respectable. 3. I have been wanting a pair of saddle shoes but I don't want to spend $50. So - without further ado, I give you my very easy, two step tutorial on how can make your own saddle shoes for around 5 buckaroos. For this tutorial, you will need: Cheapie canvas tennis shoes & a fabric marker. I got my tennies at Wal-Mart for $5 and an employee warned me that they go quickly. For the ink work, I used a Sharpie brand fabric pen. STEP 1: Using your fabric marker, trace the natural middle shape of your shoe. STEP 2: Fill in the shape. FYI - I am not a Sharpie brand flunky and I'm not paid to say that the markers are awesome - they just are.

Thanks for checking out my very first Shoesday! You might also be interested in: Shoestaches! Bright Laceless Tennies DIY Woot! Free Pattern's Outline for a Crochet Necklace. Well, this is quite different from the "Easiest Crochet Necklace" I've shown in the other post, and I've tried to write down an outline of this one's pattern.For any question just contact me.. I know that probably this is not so clear! Anyway, here it is: Materials:Less than one ball of any colour cotton yarn (worsted weight)4.00mm hook Necklace:Ch77, sc in second ch from hook and in the next 3chs.Ch76, sc in the 4th ch at the beg of previous ch loop, and in next 3chs, ch1, turn.Sc in first sc and in next 3 sc, ch80, sc in the 4 sc at the beg of previous row, ch1, turn.Sc in first sc and in next 3 sc, ch84, sc in the 4 sc at the beg of previous row, ch3 and sl st on the other side of the same closure piece to make a button hole.Sew a button on the opposite closure piece of the button hole.Make a flower of any kind (mines are just improvised!)

To embellish the necklace, and sew it on the four chains strands. These are very easy, and I hope you won't have problems making them.Enjoy! Crafts I tell myself I'll do. / cute pillow. Vively Online: A Pretty Free Project - Paper Medallion Wall Hanging. "If you really wanted to, we could go and purchase some of the furniture brand new, you know", said my husband, as he sees me pick up yet another project. It's true. My husband brings in over 90% of the household income, and we have learned how to make do with this arrangement.

We've learned to save on somethings, and splurge on others. If we really wanted to, we could put aside money for furniture, home decorations and the "frivolous". I could annoy myself and everyone else, by saying that I'd rather spend that money on my kid's piano and martial arts lessons, but deep down I know that it's a LIE. The truth is, that when I put time and effort into something that I make, the joy (and pride?) Makes me smile each time I look at it. I would have been happy to buy something like that. So, you know that High and Low comparisons that you sometimes see in magazines. I was browsing through images on google when I came across a picture of a beautiful bedroom with fur-like medallions on the wall. Tissue Rosette Kissing Balls. *Update–Many of you have had questions about how to “twist” the paper. 
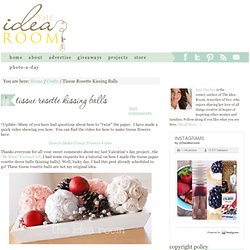
I have made a quick video showing you how. You can find the video for how to make tissue flowers here: How to Make Tissue Flowers Video Thanks everyone for all your sweet comments about my last Valentine’s day project…the “Be Mine” Framed Art.

Many of you will remember that I have made these before and have them hanging in my daughter’s room. First off you will need a couple of rolls of tissue paper streamers. Start by cutting the paper into strips about 24 inches long. Now take your strip and start on one end and begin rolling it up between your fingers. After you have a few rolls, continue to roll it up but now twist the paper. Now just continue to roll and twist until you have reached the end of the strip. After you have a few rosettes made, start gluing {I used a glue gun} them onto a round styrofoam ball. On this particular rosette ball, I did not twist the paper. The fun thing is to just try different things. New Clutches From A Vintage Suitcase. A year or so ago my friend Chris gave me this tiny vintage suitcase. Originally, it had belonged to his older sister when they were children. It was so pretty, I had to take it! Unfortunately, the zipper was beyond repair so up until now it's been serving as storage for my daughter's artwork.

Now that her art pile has outgrown the suitcase it seemed liked a good time to give this thing an upgrade while creating a summer staple for myself! Materials: -small suitcase -cotton thread -oversized button -large vintage adornment (optional) Preparing The Material Step 1: The first step is to separate the useable material from the suitcase's frame. Step 2: Insert one of the scissor blade into the hole and cut the rest of the way around. When you're done with steps 1 and 2, the panel you'd like to use should be completely separate from the rest of the suitcase.

Step 3: Use a ruler and knife to straighten three of the fabric's sides (the two long sides and one of the short ones). Sewing It Up. Paper products. / epic journaling. Crafts / Toilet paper rolls! Someday I Should Make This / DIY scarf. Crafting / "Home is Where the Heart Is"-- pins and string on wood.