
Mechanical Toy Project (Year 9) on Behance. In Year 9 pupils undertake a Mechanical Toy Project, where a toy such as those shown below is designed and made.
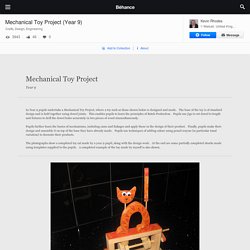
The base of the toy is of standard design and is held together using dowel joints. This enables pupils to learn the principles of Batch Production. Pupils use jigs to cut dowel to length and fixtures to drill the dowel holes accurately in two pieces of wood simmultaneously.Pupils further learn the basics of mechanisms, including cams and linkages and apply these in the design of their product. Moving toy mechanisms. Simple Mechanics. Cams The basic principle of the cam is to turn a circular motion into a linear one.
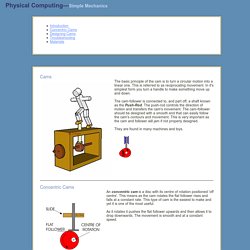
This is referred to as reciprocating movement. In it's simplest form you turn a handle to make something move up and down. The cam-follower is connected to, and part off, a shaft known as the Push-Rod. The push-rod controls the direction of motion and transfers the cam's movement. They are found in many machines and toys. Concentric Cams An concentric cam is a disc with its centre of rotation positioned 'off centre'. As it rotates it pushes the flat follower upwards and then allows it to drop downwards. A mechanical toy based on a series of concentric cams is seen below. More Examples Below is a mechanical toy based on a CAM mechanism. Designing Cams. Maker Spaces on Pinterest. How To Make A Light Up Shoebox Theater. Got an extra shoebox lying around?

Recycle it into an arctic-themed puppet theater with working lights! It’s a blast to make and perfect for impromptu imaginative play, even after the lights go out. Let’s get started… Note: Because of small parts, this is a project best suited for children 3 years and older. Older children and adults can prepare the box. What You’ll Need Shoebox with lid1 piece of cardboard, approximately A3 sized1 sheet of white copy paper2 sheets of dark and light blue A4-sized paper5 or 6 wooden skewers1 strand of LED Christmas lights (10 lights)Small wooden beads Tools RulerCraft knifeCutting matScissors (kid-friendly)Felt-tip pens, black and coloredPencilScotch tapeGlueGlue stick Step 1 Mark a frame on the bottom of the shoebox and cut it out as shown. Step 2 To make a platform, mark and cut the same lines as before on a slightly smaller piece of cardboard that should fit inside the box as shown. Step 3 Glue in the two separator pieces and the platform.
Have fun! Sidestreet Bannerworks * Garden railways and automata. Keith Newstead Automata. Automata Mechanisms and Mechanical Toys. Www.robives.com. Papercraft Automata Race Game littleBits Circuit. Gather the following modules: 4 Wire (w1)1 Fork (w7)2 Button (i3)1 Sound Trigger (i20)1 Power (p1)1 Arduino (w6) On the Fork module, connect the Wire Out end to the first branch and the Wire In to a Button (i3) module Do the same thing on the second branch and connect a second wire to the remaining button.
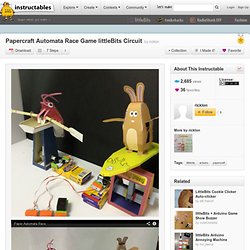
On the last branch, connect the Sound Trigger (i20) module. Then, attach the other end of the Sound Trigger to the first input pin (D0) on the Arduino (w6) module. Take another Wire module and connect the button on the first fork branch and connect it to the the second input pin (A0) on the Arduino. Then attach the Power module to the left of the Fork (w7) module so that it can provide power to all the input modules.
DESIGN SQUAD NATION . Build.