
A Snowman Christmas Tree Ornament / Tutorial. How to Make a No-Sew Ruffled Christmas Tree Skirt. D-I-Y: Loopy Christmas Balls. ALL THAT GLITTERS...MINUS THE MESS. Party Ideas by Mardi Gras Outlet: Deco Mesh Christmas Tree made with a Tomato Cage: Tutorial. Great Christmas decorations ideally make a big impact and are inexpensive!
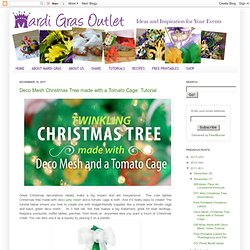
This cute lighted Christmas tree made with deco poly mesh and a tomato cage is both. And it's really easy to create! The tutorial below shows you how to create one with budget-friendly supplies like a simple wire tomato cage and basic green deco mesh. At 3 feet tall, this tree makes a big statement- great for stair landings, fireplace surrounds, buffet tables, porches, front doors or anywhere else you want a touch of Christmas cheer. You can also use it as a topiary by placing it on a planter. Deco poly mesh is a type of soft plastic netting that has a full puffy shape. MardiGrasOutlet.com sells deco mesh and other supplies you will need for this project. Dollar Store Crafts » Blog Archive Make a Salt Dough Snowman Family » Dollar Store Crafts. If you’ve never made salt dough you are missing out on lots of fun; that goes for kids and adults alike!

The beauty of salt dough is that you don’t have to make a great big batch, simply follow the ratio of 1 part salt, 2 parts flour and 1 part water. If you want to make a big batch use 1 cup of salt, 2 cups of flour and 1 cup of water. You’ll have plenty of dough to make a slew of ornaments, pins, magnets or bowl fillers. If you just want to make a few items, use tablespoons instead of cups! There’s no measurement rule. Fall and Halloween Wreaths / Easy Fall Harvest Wreath. Then she made...: Sock Snowmen. This morning when I went out to take my daughter to school it was -12.

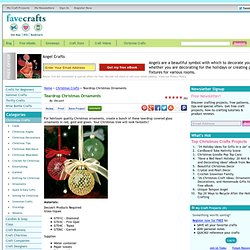
That is too cold for my blood and despite the beautiful snow on the ground there is NO way you're getting me outside to make a snowman. So, instead, I'll opt for the inside version made out of socks. They're easier to make, last longer and dare I say it... they're cuter too. Teardrop Christmas Ornaments. There are currently no images from other crafters. close Terms & Conditions You must enter into this Agreement if you want to submit digital images or other content to Prime Publishing through Sharing Customer Images (the "Service").
As used in this Agreement, "we" or "Prime Publishing" means Prime Publishing, LLC. and "you" means the individual or entity submitting materials to Prime Publishing. Any individual or entity that wants to use the Service must accept the terms of this Agreement without change. 1) Eligibility. DIY / Christmas trees. Mingle Monday {7 Christmas Wreaths Tutorials} - Living. I absolutely adore Christmas wreaths.

Honestly, I think I may have a bit of an obsession with them and couldn’t wait to show you the 7 Christmas wreath tutorials that I’m absolutely loving. Each of these could easily be made in some of my favorite Christmas Wreath tutorials and inspirations that I’ve found. I feel in love with this Vintage Ornament Wreath that The Toasted Coconut shared in last week’s Mingle Monday. It brought back so many memories of ornaments from my Grandparents’ trees when I was growing up. Another beautiful Christmas wreath tutorial using ornaments from Matt and Becky. Stretch a rubber band around a cylindrical va - Popular Holidays & Events Pins on Pinterest.
Custom Order for WLMARTIN by wellgood. Day {26} and Day 27- Yarn Snowman and Flood light Angel. {I've linked this post up to the Poppies at Play Christmas Crafts Contest.
Smile Like You Mean it: Ornament #4: Snowman. Day 4!
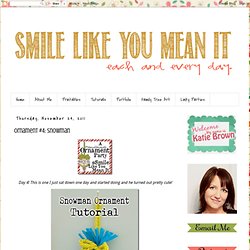
This is one I just sat down one day and started doing and he turned out pretty cute! *White Felt (for the head) *colored/pattern felt (Hat) *Orange & black felt (nose & mouth) *white sparkly felt or white fur trim (to trim the bottom edge of your hat) *googly eyes *yarn or ribbon (to tie around the hat & to hang your ornament from) 1. Download this Snowman Pattern PDF and cut it out for your template. 2. 3. 4. 5. Smile Like You Mean it: Ornament #1: Mini Wreath Tutorial. Yay!

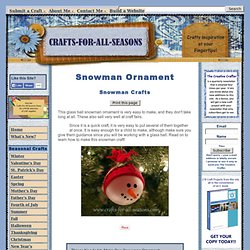
The first day of the Handmade Ornament Party is here! And I have been dying to show off this cute little ornament for weeks!! Snowman Ornament. Snowman Crafts This glass ball snowman ornament is very easy to make, and they don't take long at all.
These also sell very well at craft fairs. Since it is a quick craft, it is very easy to put several of them together at once. Obsessively Crafting: Halloween Door Hanger. ***UPDATE SEPTEMBER 2012 I've received so many views and comments about this craft.
Thank you for stopping by. If any of you make this or something similar, please send me a picture. I'll post all the pictures around Halloween for everyone to see. Let's share the creativity! Send your pictures to Leilani3259@msn.com. Pasta Christmas Elf Craft: Christmas Crafts. Total Time 1 hour Ages school-age This is a great pasta Christmas elf project for older kids as they can use the glue gun (with supervision) to assemble all the small parts. by Amanda Formaro What you'll need 1 jumbo shell (head) 1 manicotti pasta (body) 6 ziti pasta (arms and legs) 4 elbow macaroni (hands and feet) Acrylic paint: flesh, green, red, white, pink, black 2 small wiggle eyes 1 mini pink pompom 1 small glittery white pompom 2 small glittery green pompoms 1 sheet white felt 8” green yarn Hot glue gun Paintbrush Toothpick White craft glue (step 9 only) Helpful Tip: 1. 2. 3.
How to make it Paint the manicotti, four pieces of the ziti, and two elbow macaroni with green paint. Black Burlap Halloween Wreath. Use this step by step picture tutorial to learn how to make a Halloween Wreath. I made this cute black burlap Halloween wreath and it is so easy to make and the turn out stinkin cute! {see my Christmas version here} Halloween Wreath Tutorial Supplies 1.25 yards of black burlap cut into 1″x16″ strips {i used a rotary cutter, but if you want to prevent most of the loose strands, you could use this burlap cutting technique.} 14″ foam wreath ringblack paint {i used craft paint, but spray paint would work, too}scissors or rotary cutter paint your wreath ring black to hide the green under the burlap. when the paint dries, tie the burlap strips around the ring with a double knot. overlap the strips a little and bunch them together so you have a full wreath.keep adding strips and arranging until you like the overall look of the wreath.