Jewelry. Jewelry. Projects. Bench Rope makeover. Piece by piece we are getting closer to a finished SK8R boyz bedroom redux. The pieces and projects are all planned and we are still on track to be done by the end of the month. I am very anxious to finish and share the results with you. Today we are making over a bench which was on its way out. This was a perfect solution for a bench in the reading area of the bedroom. I used orange towing rope to weave the seat. Savour... hardware aisle chic Get the rest after the jump... Woven Rope Bench Before you start: Check your local home improvement center for other types of rope to suit your needs. Make sure to get the right sized staples.
This job can be done solo, but it would be easier with two. Working from back to front is imperative. You will have far fewer side to side ropes than back to front ropes. As you place more side to side ropes the tension will build making it more difficult to manage. Before: The materials: Bench or chair Rope Needle nose pliers Hammer Staple Gun Staples Lighter. Water Balloon Luminaries. A fun and easy project with a beautiful payoff. Learn how to make these Balloon Luminaries. You will need: High-Melt Paraffin Wax (IGI 1260)Party BalloonsDouble BoilerCookie Sheet Instructions: 1. Fill a balloon with tepid water. 2. 3. 4. 5. 6. 7. 8. 9. 10.
Here is an example of these luminaries when using dye. Cut glass. I posted a picture about 1 week ago on Instagram, Facebook and Twitter of me cutting glass using just string. I got LOT’S of requests for a tutorial on how I DID THIS! So here it is. FINALLY! You will be able to learn how to cut glass. I want to warn you. It’s best to triple your yarn because it will burn longer! Soak it GOOD! I like to tie my yarn where I want my glass to “cut” then quickly pour polish remover over the string again. Get a big bowl with ice and water ready. VERY IMPORTANT! Slowly turn your bottle. You can’t let the flame go OUT then dunk it in the ice water. YAY!!! I reallly hope you enjoyed this tutorial because I had ALOT of requests for it! © Copyright jaderbombllc, All rights Reserved.
Easy string balls. Whattya need? BalloonStringScissorsGlueJar How do I make glue string balls? Step 1: Hang inflated balloon from ceiling. Step 2: Put string and glue in the jar with a hole in the lid. Next, pull string from hole while wrapping around the balloon. Step 3: Wait until dry (try to contain yourself). Created by Dane Holweger. Worded t-shirt stencil. Yes, I am a nerd. I came up with a brilliant idea for a Harry Potter t-shirt and I couldn't resist.
"Expecto Patronum! " However, you can make whatever kind of design you want with a freezer paper stencil. It doesn't have to be Harry Potter related. I learned about the joys of freezer paper back in my early college days. Basically, freezer paper is backed with a plastic coating that will stick to soft surfaces when ironed, but it peels off cleanly and easily.
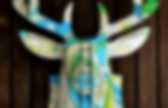
To make a sweet t-shirt you will need: paper & pencil a t-shirt an iron a piece of cardboard or poster board fabric paint & brush Start by drawing your design on some regular old paper. My design kept getting bigger, so I taped two sheets together. Next, place your design underneath a sheet of freezer paper and trace it neatly with a sharpie. The marker gives your lines greater width making it easier to cut them out and paint them in later. Now place a piece of cardboard under your freezer paper to protect your table while you cut. Nest necklace. Paper flowers. Japanese Kusudama, this tutorial is featured on Craftuts Anyone can do that, I assure you. The proof: I can, just take a quick look at my result below. And, believe me, I am neither meticulous nor particularly patient. You could even say I’m the opposite. Below you can see my very first attempt to create paper flowers. What you will need to make your own Kusudama paper ball?
1. 3. 4. (optionally) I prefer torn paper instead of cut. You have to start with a single petal. Now you have to glue your 5 petals into a flower. Apply the glue to only one side of each petal, except for the last one, in this case cover both sides with glue. Your first flower is done. Don’t glue every petal right after you make it. When all 12 flowers are finished you have to glue them together.
When two halves of Kusudama Flower Ball are ready you have to glue them together. DORM MURAL Jr. year.