
Flax & twine: Day 1: A Strand of Pearls - a diy ribbon and pearl necklace. Yippee–here it is–Day number 1.
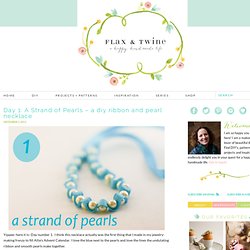
I think this necklace actually was the first thing that I made in my jewelry-making frenzy to fill Allie’s Advent Calendar. I love the blue next to the pearls and love the lines the undulating ribbon and smooth pearls make together. This ribbon strand ties in a bow in the back to whatever length your little girl desires. The overall length on this one is 28″, but with the bow, she can shorten it to whatever length she likes. The necklace is super easy to make. I thought I couldn’t get better than the blue until I made the sample for the easy diy tutorial below – I just ADORE the green. Materials: -1/4″ ribbon -faux pearl beads -needle -embroidery floss/thread Time: Approximately 30 minutes Cut your ribbon to desired length, adding enough length to flow in and out between the pearls. Pierce the ribbon in the middle of its width approximately 9″ along your piece of ribbon. Bend the ribbon around the pearl to judge where you should put the needle next.
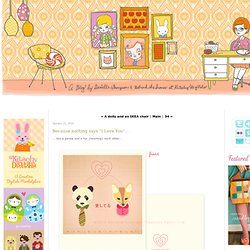
Finis. Thompson Family-Life: Because nothing says "I Love You"... ... like a panda and a fox {hearting} each other... oh, and a freebie. ;-) You can download it here.
This printable folding card and envelope design is my small way of saying "thank-you" for stopping by my blog (if you are new -hi! -, and especially if you've been following for a LONG time!) , for leaving sweet and helpful comments, for buying my products, and just generally being nice. I appreciate it so much!
This is a high-resolution PDF that you are welcome to use for PERSONAL USE. There are two envelope options: one for mailing and one for not mailing. I included directions where needed in the PDF. (source: envelope template based off template at Designers Toolbox.) Some photos of everything printed and assembled (sorry for the different color casts on these photos.. not a good day for taking photos... ;-) If you share this with a friend, please make sure to link them back here. **edited to add! But paper: I purchased the Staples brand matte paper and I've LOVED it.
MADE: TUTORIAL: Heartbreaker Valentines - StumbleUpon. Who said valentines were only red and pink?
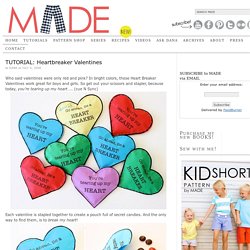
In bright colors, these Heart Breaker Valentines work great for boys and girls. So get out your scissors and stapler, because today, you’re tearing up my heart….. (cue N Sync) Each valentine is stapled together to create a pouch full of secret candies. And the only way to find them, is to break my heart! Skill Level: AnyNeeded: * colorful paper* computer printer* stapler/staples* scissors* candy Start by printing this template from your computer.Two options….1) You can find the PDF file HERE.
I chose to print on bright colored paper so the Heartbreakers work for both boys and girls. Another option: print to white paper and let the your kids color the hearts themselves: Most of all, make sure your kids check out what you’re doing. Staple around the outside of each heart, leaving an opening at the top of the heart for inserting candy (or, use your sewing machine to sew around the edge…though it might be more difficult to sew it shut.