
The Kurtz Corner: Nail Art - Starting a New Trend! 100 Okay so a lot of you have been asking how I did my nails so here is a tutorial!
I'm not gonna lie this is pretty tricky for some and it may take you a few several tries What you'll need 1. A cup or a bowl 2. 3. 4. 5. 6. 7. 8. 9. Lets get started!! Start by laying out some newspaper or paper towels, this will get messy! Let your nails dry completely! After you colors are selected unscrew all of the caps and get ready to work fast!
Take your toothpick now and drag it through the color to form your designs. Pick the area of the design you want to use on your finger and slowly lower your taped finger into the water. Keep your finger under the water for a few seconds and then, with your finger still under the water, use a toothpick to clean up the polish around your finger. Your finger will look something like this. 100 Let you nail art dry and apply a clear coat of polish. 100 Voila! This might will require patience! Tutorial: Easy Sponge Gradient. Happy Sunday! Today, I wanted to show you guys how I did the Tropical Gradient from earlier this week. It's very easy and I like that it has that seamless look. You'll need: -two or more polishes. Here, I've used Zoya Sooki and Zoya Arizona* -disposable cosmetic sponge wedges -nail polish remover and qtips for clean up Start out by painting your nails with your base coat and your base color.
You might want to cut the sponges down to size, to make it easier to use. Bounce the sponge against your nail. When you're finished, apply your top coat and carefully clean up the skin around the nail with your polish remover and qtips. A few tips: -Creme finishes seem to work the best. Here's a diagonal manicure that I did with Zoya Wednesday* and Zoya Tracie*: Was that simple or what? Spring Nail Art. Courtesy of Miss Pop Nails Nail art is hot this season, and while you might fret that it isn’t office-appropriate (there are some major designs out there!)
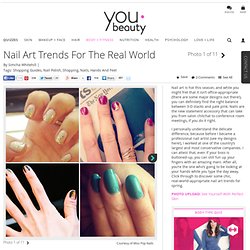
, you can definitely find the right balance between 3-D stacks and pale pink. Nails are the new statement accessory that can take you from salon chitchat to conference room meetings, if you do it right. I personally understand the delicate difference, because before I became a professional nail artist (see my designs here!) , I worked at one of the country’s largest and most conservative companies. PHOTO UPLOAD: See Yourself With Perfect Skin The Reverse French The usual French Tip is at the edge of the nails, but the Reverse French (also known as the Ruffian French) is flipped. QUIZ: How Quickly is Your Beauty Aging? The Glitter Fade This nail look is like the dress that takes you from work to a night out on the town. MORE: A Black Eye From a Manicure?!
The Half-Moon. Cute nails c: 321 226 447 192 141 223 1185 96 115 113 220 310 201 51 366 26 116 101 499 108 29 192 266 80 606 172 88 60 150 384 86 187 44 63 33 75 27 63 82 55 33 895 200 416 145 913 224 164 119 201 70 680 812 1246 86 381 101 263 35 1651 262 230 136 654 614 150 260 2384 25 256 42 182 149 189.

Tutorials. I don't create tutorials for every manicure I do, but if I have, this is where you'll find them!
Explore the manicures and tutorials attached with them by clicking on the images below! If you try it out, let me know, I'd love to see your recreations. If there are any past manicures you'd like to see a tutorial for, drop me a line!