
Make It and Love It: Satin Flower Headbands. Satin Flower Headbands Remember this post about the pettiskirt?
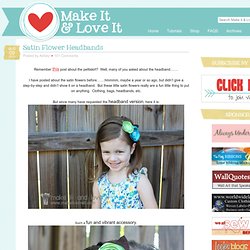
Well, many of you asked about the headband……. I have posted about the satin flowers before…….hmmmm, maybe a year or so ago, but didn’t give a step-by-step and didn’t show it on a headband. But these little satin flowers really are a fun little thing to put on anything. Clothing, bags, headbands, etc. But since many have requested the headband version, here it is: Such a fun and vibrant accessory. Many color combos are at your fingertips. The headbands work especially well to keep hair out of the face,while your little one peeps on the neighbors. And how can you resist all those layers of petals… Nice and full and perfectly sweet. Ready to make your own? Wall-E Art. Make a Friendship Bracelet the Easy Way. Houri. Houris in paradise, riding camels. From a 15th-century Persian manuscript. In Islam, the ḥūr or ḥūrīyah[note 1] (Arabic: حورية) are commonly translated as "(splendid)[1] companions of equal age (well-matched)",[2] "lovely eyed",[3] of "modest gaze",[4] "pure beings" or "companions pure" of paradise, denoting humans and jinn who enter Jannah (paradise) after being recreated anew in the hereafter.[5] Islam also has a strong mystical tradition which places these heavenly delights in the context of the ecstatic awareness of God.[6] Description[edit] Quranic description[edit]
Crystal Enamel Drinking Glasses. My kids are old enough that we can all use glass to drink out of now.
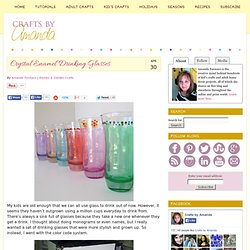
However, it seems they haven’t outgrown using a million cups everyday to drink from. There’s always a sink full of glasses because they take a new one whenever they get a drink. I thought about doing monograms or even names, but I really wanted a set of drinking glasses that were more stylish and grown up. So instead, I went with the color code system. It all started with this box of drinking glasses I bought at the thrift store for $3.54. The set includes 6 tall glasses and 6 short glasses. Paint chip greeting cards. Like most of you, I’m sure, I tend to go through a lot of paint chips when trying to decide on a color to paint a room.

And when the project is done, I toss the paint chips into a box I keep in my craft room. They are the perfect “I’ll use these one day” items, right? Well I stumbled upon the box a few days ago and realized just how many I’d collected over the years. Oh the memories this pile brings back! There are the numerous shades of tan that I went through when painting the kitchen. Braided Headband Tutorial.
It's chilly outside here today and I'm loving it!
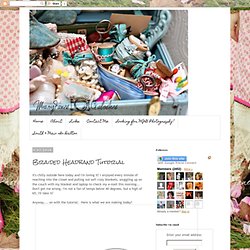
I enjoyed every minute of reaching into the closet and pulling out soft cozy blankets, snuggling up on the couch with my blanket and laptop to check my e-mail this morning... Don't get me wrong, I'm not a fan of temps below 40 degrees, but a high of 65, I'll take it! Anyway.... on with the tutorial. Here is what we are making today! What you need- Thick hair tie Six 1" strips of fabric Bulldog clip or safety pin Sewing machine (or needle and thread) Fabric tac I ripped my fabric strips so they were a bit frayed on the edges, personal choice. Tack each end of the braid just enough that it doesn't come undone . Then tack both braids together on each end, be careful not to twist the braids.
Gift Box. Gift Box This box made from two bills. The bills/box can be the gift itself, but it is also just about the right size for a ring box. (Perhaps a dollar-bill ring?) Get yourself two fairly new, crisp bills. Older "soggier" bills are much harder to work with. Lay the bill on a flat surface, face up. Fold the note top-to-bottom just to the right of the portrait, then unfold. Starting at the top left corner (as illustrated), close the top third fold to about 90 degrees. Inside this corner will be a remaining portion that you will crease along the natural 45 degree line to complete the corner. Complete the previous step for the other three corners. For each tab, pull it inside the box, folding so that the natural edge of the box is pulled slightly over inside the fold. Top 100 Tutorials of 2010.
Tiny Polaroid Magnets. Hi there!
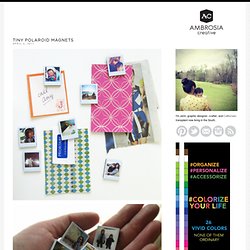
It’s felt like forever since I’ve last blogged, and has felt like an eternity since I’ve done anything crafty and nifty. Since my morning sickness has gone into full speed (yes, we’re expecting our third this fall!) I haven’t felt like myself. But nothing like inspiration to wake one out of a reverie — or nightmare, in my constantly sick state. I came across these DIY Pantone chip magnets on How About Orange and wanted to do something similar.
You will need: Cardboard (mine was the backing of a sketchbook — much thicker than the back of a regular spiral bound notebook) or 2-3 sheets of white cardstock or poster board spray-mounted together to use as a sturdy backing to the magnetsOpaque white marker (necessary only if your cardboard is not white) Craft knife Metal straight edge/ruler Clear packing tape or frisk film. Step 1: Download a Photoshop file of the Polaroid frames below. Step 2: Print out photos onto photo paper. Step 4: Trim out photos with craft knife. Mason Jar Key Hook. Hey guys! Hope you all had a great Wednesday I have a fun project to share today! I started with a 1×8 board from Lowe’s that I cut to about 2′ long. I used a different paint method on this board and I love how it turned out so I am going to share it with you in my next post.
So for now… Here is my board after it is painted and ready to go. Crafty. Etched Portion Control Wine Glass. OK, confession: I’m on Weight-Watchers.
And a major part of the program isn’t completely restricting what you eat and drink, but you DO have to watch and control your portions. This goes for wine, too. Paper Flower Key Holder / Mark Montano. Difficulty Rating: Beginner Tags If you need a quick 'just because' gift for someone, this is it!
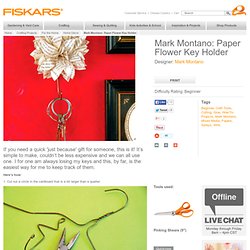
It’s simple to make, couldn’t be less expensive and we can all use one. I for one am always losing my keys and this, by far, is the easiest way for me to keep track of them. How to Make Leaf Skeletons. I wanted to share with you a project from one of my readers who shares with us how to make leaf skeletons.

I LOVE this! I have several leafs in various forms displayed in my home and knew I needed to make some of her leaf skeletons to add to my decor. I love how a pattern of leaves can enhance the beauty in your home. So I asked Heather if she would mind sharing her project with you. You can find more great projects from Heather at her blog The Other White House. I have spent hours and tried various ways of making these. {every}nothing wonderful: Tutorial: Repurposed Envelopes (From Magazines to Mailing)
Note: If you like this idea, be sure to check out how to make paper ruffles to add to your envelopes!
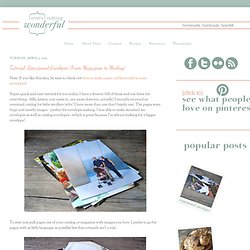
Super quick and easy tutorial for you today. I have a drawer full of these and use them for everything - bills, letters, you name it...my mom does too, actually! I recently received an oversized catalog for baby strollers (why? I have more than one that I barely use). The pages were huge and mostly images - perfect for envelope making. To start just pull pages out of your catalog or magazine with images you love. Crafting MacGyver: Circular Logic. Paper Flowers – Anyone Can Do That. Japanese Kusudama, this tutorial is featured on Craftuts Anyone can do that, I assure you.

The proof: I can, just take a quick look at my result below. And, believe me, I am neither meticulous nor particularly patient. Most favorited all-time. Chopstick Bowl - Recycled Gifts. Type to Search Like Us On Facebook Follow Us On Twitter Follow Us On Pinterest Good Housekeeping Gift Ideas 2016 Presented by. CraftPOP.com Arts and Crafts Links Directory: Main. The Shirt. As with all these designs, try to start with a relatively clean, crisp bill. It will make it much easier. All folds should be sharply creased. It helps to go over the fold with a fingernail on a flat, hard surface. Start by folding the bill precisely in half lengthwise. (I prefer to fold in toward the front of the bill. Fold the bill one quarter of the way in from each side lengthwise.
Turn the bill over. Turn the bill over again. Fold a little less than one third of the bill lengthwise from the opposite end as shown. Now you will fold inward in the same direction, tucking the previous fold under the "collar" created in step 4.