
Photoshop. Photoshop. 25 Photoshop secrets to improve your skills. If you've decided to give your best pencils a little rest and jump into digital art, you'll more than likely need some photo editing software.

Part of Adobe's Creative Cloud suite, Photoshop is used by thousands of designers worldwide on a daily basis. 5 best laptops for Photoshop It's such a flexible bit of kit that you could spend a week learning new features, doing Photoshop tutorials and experimenting with Photoshop brushes and still have only scratched the surface of what's possible. Once you've overcome the beginners' learning curve, however, there are some real gems hidden inside Photoshop that can help you speed up your work and get more out for less effort.
Here we've rounded up 30 of the best Photoshop secrets to help sharpen your skills and improve your productivity. 01. In the top right hand corner of every panel is a little icon that reveals a fly-out menu, giving additional options that you might not have seen before. 02. 03. The Bird's Eye View feature helps with this. 04. Master Photoshop masks and selections. Creating selections and masks in Photoshop is a fundamental part of any professional creative workflow.

Whether you're a junior designer, illustrator, animator, or even a creative director, at some point you will have to create a mask and cut something out in Photoshop - even if it's only because you're working late and the repro department has all gone home. There are many varied ways to create selections in Photoshop, ranging from the quick and easy techniques that we're all familiar with - such as using the Magic Wand tool to cut out objects from a high-contrast, flat background, or switching to the Pen tool for greater accuracy - through to more precise, time-consuming techniques that take a while to master.
In this workflow guide I'll walk through some more advanced, non-destructive ways of creating masks. 01. Non-destructive layer mask tricks. September Tutorial #2: Realistic Fire. In this tutorial, you will learn how to create realistic-looking fire and flame effects that you can add to any image.

Perfect as Halloween is just around the corner (well, sorta!). Part 1: Step 1 Go to File > New to open a new file (Command +N for Mac or Control+N for PC). The file size can be set according to your requirement. For example, I set my file size to: Width: 800 pixels Height: 600 pixels Resolution: 300 pixels/inch Color mode: RGB Step 2 Set default color to black and white (press D). Step 3 Fill the background color with white (CMD+Delete/CTRL+Backspace). Step 4 Go to Filter > Render > Difference Clouds. Step 5 Continue applying the Difference Clouds filter on the image until the fire pattern is formed(CMD+F/CTRL+F). Step 6. How to Make a Still Water Reflection Scene in Photoshop » Creative Beacon. Sometimes it is difficult to find that perfect shot that you need for a project.
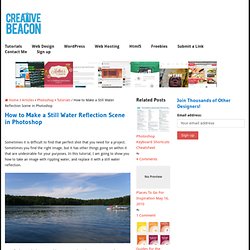
Sometimes you find the right image, but it has other things going on within it that are undesirable for your purposes. In this tutorial, I am going to show you how to take an image with rippling water, and replace it with a still water reflection. First, find your ideal image and bring it into Photoshop. Hit command + J (CTRL + J on the PC) to duplicate the background layer, so you can always have the original to go back and work from in case you really mess things up. (Yes it really happens sometimes. Place the flipped version to where it looks like an exact reflection of the top. Below the reflected layers, make a new layer and grab your Gradient Tool. Finally, click the blue gradient layer, and hold shift and click on the upside down reflected image and go to Layer>New> Group From Layers.
About The Author jgeorge. 10 Must-Have Photoshop Plugins That Are Free. If you’re looking for new and creative ways to edit or enhance your images, plugins can make your Photoshop workflow go so much smoother.
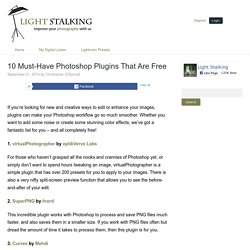
Whether you want to add some noise or create some stunning color effects, we’ve got a fantastic list for you – and all completely free! 1. virtualPhotographer by optikVerve Labs For those who haven’t grasped all the nooks and crannies of Photoshop yet, or simply don’t want to spend hours tweaking an image, virtualPhotographer is a simple plugin that has over 200 presets for you to apply to your images. There is also a very nifty split-screen preview function that allows you to see the before-and-after of your edit. 2. This incredible plugin works with Photoshop to process and save PNG files much faster, and also saves them in a smaller size. 3. If you haven’t mastered the idea behind curves yet, this plugin has eight common presets to select from, allowing you to choose which one compliments your photo the best. 4. 5. 6. 7. 8. 9. The Power of Photoshop's Refine Edge Tool.
One of the most difficult and frustrating tasks in Photoshop is making a clean and decent selection on photos that involve super fine hair, fur, leaves, and any fiber like elements.
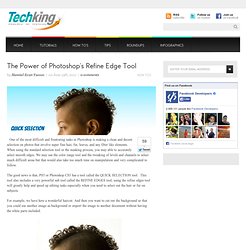
When using the standard selection tool or the masking process, you may able to accurately select smooth edges. We may use the color range tool and the tweaking of levels and channels to select much difficult areas but that would also take too much time on manipulation and very complicated to follow. The good news is that, PS5 or Photoshop CS5 has a tool called the QUICK SELECTION tool. This tool also includes a very powerful sub tool called the REFINE EDGES tool, using the refine edges tool will greatly help and speed up editing tasks especially when you need to select out the hair or fur on subjects. For example, we have here a wonderful haircut. Normally we would start at the marquee tool. Now when you have selected the necessary parts, find the Refine Edges option found at the right top area.