

Curled Rosewood Wreath. I have seen various versions of Faux Rosewood Wreaths in just about every store and catalog for the upcoming season; most with a price tag running upwards of $40 or more.
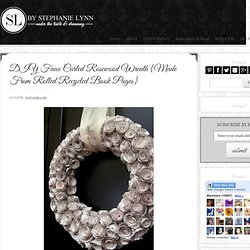
Some are crafted of paper and other of real wood shavings. Last year I made a few rolled flower gift toppers from recycled book pages and they remind me so much of the curled wood roses I thought they would make a good substitute. {with a much lower price tag} Materials Needed:Foam Wreath FormRecycled Book PagesLots of Hot GlueRibbon to Hang The full step by step tutorial I posted last year can be found {here}.Basically you layer three book pages together and draw a spiral circle.
Starting with the outside of the spiral, roll the paper inward to create the flower shape. Give the wreath form a light coat of white {or light color} spray paint to help camouflage any see-through spaces. It seriously takes quite a few roses to fill the entire wreath, however I think the finished project has such a unique look. {Simply Lovely} Christmas topiary. DIY Glitter Vases.
Inspired by many reader requests for a DIY tutorial to recreate the glittery mason jar vases from this New Year’s Eve party, today we’re playing with glitter.
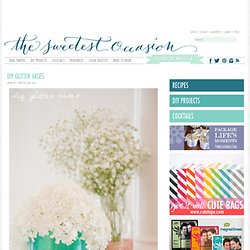
A whole lot of glitter! I whipped up two different versions of these glitter vasses, both of which are quick and easy. They’re perfect for parties, weddings or just to add a touch of sparkle to your dining room table. I seriously love how they turned out! Supplies - DIY Organizer from Old Window « My so called crafty life. Today I have a fun and versatile craft for you all, we’re going to make an organizer from an old window!
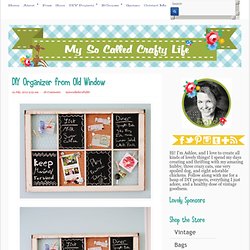
I made mine with some cork, chicken wire and chalkboard painted wood. Ginormous Button Pillow. Giant Paper Rose Flower. If you loved the beautiful DIY wedding this morning and Nata’s gorgeous paper flower bouquets, you are in luck as Nata is sharing how she crafted them with us!
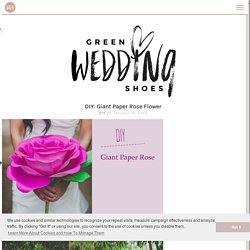
She was inspired by a template created by Morgan Levine on Martha Stewart (as was I in the flowers I created for this styled shoot). I just love that this basic idea has inspired different brides to create their own version of giant paper flowers – you might remember these equally awesome giant paper flowers from this wedding I shared last year. :) Thanks so much Nata for sharing how you created your giant pink paper rose + special thanks to Studio Castillero for the photos of the DIY + her wedding! Materials (to make one giant rose) Step 1: Cut the petals Cut 5-6 teardrop petals and 15-6 heart-shaped petals from the petal colored crepe paper. DIY Dorm Room. The exciting world of Pinterest has started a new trend of DIY (“do it yourself”) projects.

DIY Photo Frame For Several Photos. Here is a simple yet stylish photo frame that can accomodate quite many photos at once. The idea is very simple. Fasten twines on the empty frame and hang photos using clothes pins on them. You can use a frame you bought or a frame you made by yourself. To make it you just need to find some wood strips, sand them, paint or stain them and fasten together with the staples and nails. Yes, everything is as simple as it sounds. Chalkboard table. DIY Planter Box Centerpiece. Hey friends!

After finishing my mirrors in the dining room, my table started to look naked! Tea light made from an orange. It’s still Winter, even though the weather in Utah has been ten kinds of insane.

She’s a fickle little diva, that Winter. Anyhow, since citrus is so widely available in the depths of despair December/January it’s a fun time to get your craft on and whip up a tea light made from an orange. Or three. Serious. String/Doily Lanterns. Jessica of Wednesday Inc shows us how to make those gorgeous twine chandeliers from the inspiration shoot she shared with us this morning.

Using balloons, glue and twine, you can also make these lanterns for your wedding – and then bring it home and use it as your very own mid century lampshade. What you will need are: balloons, glue, yarn, tray for glue, corn starch 1/2 cup of Corn starch, 1/4 cup of Warm water, clear fast drying spray paint, hanging lamp cord or fishing line (depending on your desired final product), and a lighting kit if you’re looking for a fully functional lantern. Jessica recommends using a sharpie to mark on the inflated balloon how much room you need to leave for the lighting cord. She also recommends coating the balloon with vaseline prior to wrapping the yarn coated with glue so it doesn’t stick on the balloon once it’s dry. You can see all the details on Jessica’s blog. Firefly jars, sans fireflies. T-shirt pom poms. Learn how to turn old t-shirts into pom poms!

T-shirt Pom Poms are so much more durable than tissue paper ones. DIY Stone Sconces. This is a super easy project that anyone can do on the super cheap.
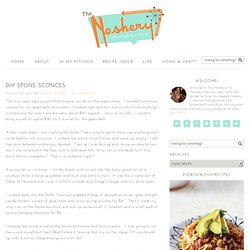
I wanted some nice sconces for my guest bath downstairs. I looked high and low and couldn’t find anything I wanted and the ones I did like were about $20 a piece….story of my life. How To Make Tissue Paper Pom Poms. Tutorial: Making tissue paper balls. Step 1: Start with 10 sheets of tissue paper in the color of your choice and according fold it across the pile. The folds should be about 1 1/2 to 2 inches wide. This is what it should look like when you get done folding it. Step 2: Fold it in half and secure the middle with craft wire. In order to get the craft wire tight, I use my fingers to squish the middle in order to pull the wire tight. Cut the edges of the tissue paper to a point. Step 3: Fan out the paper on both sides of the wire. Step 4: Carefully separate the tissue paper one by one on alternating sides of the wire.
Continue separating the tissue paper, and when you get to the end you’ll need to rearrange the tissue paper until it looks even.