
Always Chrysti - Always Chrysti - 100+ Ways to Creatively Reuse Old Magazines. Fashion Blog. If you’re feeling crafty and need some inspiration, there’s no better source than Merrick of Merrick’s Art.
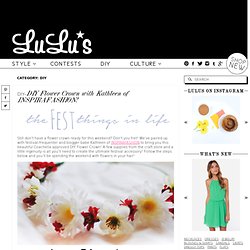
That’s why we are so excited to team up with her for this fab fashion DIY! Tired of your old shift dresses? Transform them with this easy mini dress to top refashion! It’s the perfect way to re-purpose your old frocks for a look that’s fresh and fab! See below for the full tutorial! As you might know, I don’t wear mini dresses. So I was thinking about this annoying situation a few weeks ago, and then I ran across this pin that I’d pinned ages ago and it sparked an idea.
Here’s how I styled it, and a super easy tutorial is at the end of this post! (Photos by sara walk photography) Step 1. (note: mine had a lining, so I did the exact same steps, just making it about an inch shorter on all sides so it didn’t show). The Little Foodie: Cereal and Milk Popsicles. Don’t forget to check out my Apple Pie Push Up Pops and enter the Shabby Apple Giveaway!
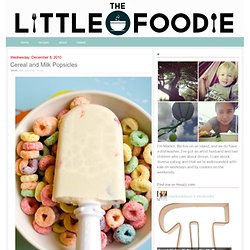
Ends 6/17/12. When people first hear about Momofuku recipes/methods, I think there are 3 stages of reaction. 1. Skepticism (or the Whaaaaat?! Phase) 2. Consideration 3. There are so many "aha" moments in Momofuku that I believe if there are more than 5 tastes, as Harold McGee believes, Momofuku will find it. Cereal milk panna cotta is a Momofuku (Christina Tossi) recipe. For a while I kept it there in the back of my mind. Jake got me the book for my birthday. Amaya was ecstatic that I bought fruit loops. Living life at 70 degrees has its perks. Probably many of you reading this are freezing and wondering why the heck I'm posting popsicles, as if I lived in Australia or something. But you know what? Cereal and Milk Popsicles or Fruit Loop Popsicles The best thing about the Zoku is that the popsicle milk isn't overly crunchy.
Turn the oven to 300 degrees. Did you know there was a Zoku Blog? Just-bolero. Comentarios: LiveInternet - rusas de servicios en línea diarios. Laptop / Kindle / I-Pad Sleeve Tutorial. Camera carrier insert tutorial. A few months a go I showed you a preview of the camera carrier insert I sewed.
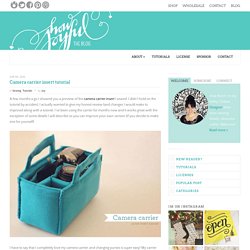
I didn’t hold on the tutorial by accident, I actually wanted to give my honest review (and changes I would make to improve) along with a tutorial. I’ve been using the carrier for months now and it works great with the exception of some details I will describe so you can improve your own version (if you decide to make one for yourself) I have to say that I completely love my camera carrier, and changing purses is super easy! My carrier fits in all my purses, in some more tight than others, so when I need to carry more than just my camera I simply choose a bigger handbag, works beautifully! The problems I’ve had so far with my carrier are the following: So now to the materials and instructions, because you should make one for you too! MATERIALS: For the main body you will need: [ Click on Images to enlarge] INSERT: The pieces for your insert are: I hope you all had a great weekend!
Camera Carrier Insert Tutorial.