
Ending Bum Crack One Pant At A Time « patchwork crafts, quilt patterns for beginners, tutorials, free patterns. Home / sewing / Ending Bum Crack One Pant At A Time Having the trend of low rider pants is fine, but it does start to pose a problem in the back.
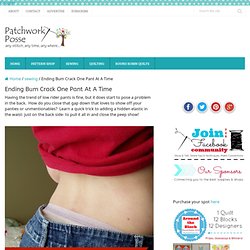
How do you close that gap down that loves to show off your panties or unmentionables? Learn a quick trick to adding a hidden elastic in the waist- just on the back side- to pull it all in and close the peep show! How to fix pants that have a gap in the back of waist This tutorial is to help those who have girls showing their bum cracks. You need: 1 pair of pants that just don’t fit, show off your bums, or are sticking 2″ off of your back. 1″ elastic band 16″ long (you will be cutting this to size later) Super Sharp Scissors Buttons Instructions: You will be making slits on EACH SIDE of the waist for the elastic.
Holding the waist with both hands at the sides, pull apart the band. Repeat this for the left and right sides of the waist. Vintage Pillowcase Apron Tutorial. Sweet Apron made from a Pillow Case Tutorial Step 1.
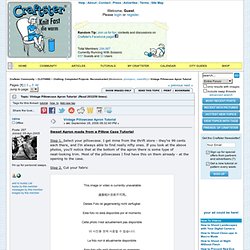
Select your pillowcase. I get mine from the thrift store - they're 99 cents each there, and I'm always able to find really nifty ones. If you look at the above photos, you'll notice that at the bottom of the apron there is some type of neat-looking trim. Most of the pillowcases I find have this on them already - at the opening to the case. Step 2. Cut your pillowcase into two parts.
Cut the second piece of the pillowcase (aka the part that is NOT your apron) in half lengthwise. Take the half that has 3 edges sewn (aka the top of the pillowcase). Match your first cut pocket to the other side of this piece of fabric and cut out your second pocket. Hows it Hangin? A Flop Tutorial. I know some of you still have snow on the ground, but for us Floridians summer is already kicking into high gear.
And summer means flip flops. Yep, we southern girls have 'em for everything: casual wear, evening wear, 'flops with heels, 'flops with big poofy flowers glued on...you name it. They're cheap impulse buys, so it's easy to accumulate a whole mountain of flip-flops in a single season. But say you don't like the "mountain" storage method.
Say you need to get your mound o' 'flops off the floor and into a tidy system, but are limited on space. Well, how about this? This was my no-cost solution last year: a left over curtain rod mounted on two shelf brackets, and lots of modified hangers. Now, the fun part is the actual hangers. First, grab a handful of the flimsiest metal hangers you can find in your closet. Cut off the bottom section of the hanger like so: Delia creates. Judah Method - Bleaching Experemnet on the Behance Network. SEW Hip! Slouchy Slippers...completed! - Sewing Daisies. SEW Hip!

Slouchy Slippers (issue 20) have been made... The SEW Hip! Pattern is advertised as a beginner's pattern, and I wholeheartedly agree. The Slouchy Slippers are incredibly easy to make. How to Make a No Sew Pillow Cover {no sew} via TipJunkie.com - StumbleUpon. Painting a Kimono. Anthro Necklace Week - Paisley Rebirth Necklace & Flamingo Toes.
Anthro Necklace Week Day 4!

In case you have not visited this week – it is officially Anthropologie Necklace Week! 5 Days of Tutorials ending in 5 Lovely Giveaways!! If you need to catch up, here are Days 1, 2 a & 3. If you’re not a follower – maybe you should do that so you don’t forget to check in for Day 5. :) Pretty-In-Pinking Tutorial Pontentilla Bib Tutorial Narcissus Net Tutorial Today we are creating the Adorable Paisley Rebirth Necklace. Where on earth do they come up with the names for these?? Here is mine: And here is theirs: This one is a blast to do. I went with a little darker colors than they did because I just fell in love with the fabric in the scarf I found. Here’s your handy dandy tutorial!! Materials: Sewing Machine (you can hand sew it, it will just take longer) Supplies: Scarf or lightweight fabric (you need enough for a 33″ x 12″ piece)Silver chain – 4 yardsSmall pieces of different chains2 Large beaded pieces or pins (I bought these at Michaels)Needle and matching thread.
Simply Vintagegirl Blog » Blog Archive » Tutorial: How to Make Lovely Fabric Flowers. 29 May 2010 These elegant fabric flowers are very simple to make . . . and only take a few basic supplies.
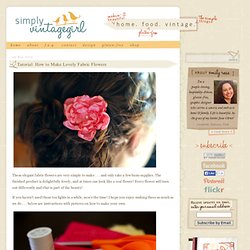
The finished product is delightfully lovely, and at times can look like a real flower! Every flower will turn out differently and that is part of the beauty! If you haven’t used those tea lights in a while, now’s the time! I hope you enjoy making these as much as we do . . . below are instructions with pictures on how to make your own. Supplies: · Synthetic Silky Fabric · Scissors · Candle (preferably a tea light) Additional supplies: · Needle and Thread, Glue Dots or Glue Gun · Buttons and/or Beads Directions: 1. Make the largest one’s diameter about half an inch larger than you want the diameter of the flower, as the petals will end up shrinking a bit. 2. You can also cut around the pattern and skip the drawing part, it just might not be as uniform . . . but with these, uniform isn’t necessary.