
Studio — About Slickforce Studio. Get ready to impress your clients, puzzle your competition, and blow your models’ minds!

For the first time ever, award-winning photographer and retoucher Nick Saglimbeni shares the tips, tricks, and techniques that he’s used on over 100 magazine covers! These same techniques have won him numerous awards, including a staggering three Grand Prize Guru Awards at the renowned PhotoshopWorld conference. Unlike other retouching tutorials, Mastering Retouching™ is a complete system that teaches you step-by-step how to quickly spot problem areas and eradicate even the most difficult flaws.
Our signature approach to non-destructive image editing allows you to dial-up or scale-back the intensity of your retouching even after the shot is completed! Armed with the ability to correct any issue, you’ll never look at your photos the same way! Best of all, photographers and retouchers love the methods taught within Mastering Retouching™ because they can be incorporated into your existing workflow. TwiceBaked Photography - Sean's Blog: Visual Frequencies. Few subjects have gotten as much forum attention in the past couple of years as the 'awakening' surrounding the use of visual frequencies in retouching.
I say 'awakening' of course because, while new HDR software is seemingly being released everyday, visual frequencies have always been a part of the images we work on. Up until now, though, only a very few retouchers knew they existed, and even fewer know even now how to fully employ them in production work. So, my wife having left me for some high-speed training this week, I want to make use of the free time by embarking on a short series to try to make up for where my previous attempts to tackle the subject have fallen flat.
Before we get started, though, this is a very complex subject, and as such, I am very much going to be glossing over a lot of the details in the first few posts in order to convey the basic principles. The truth, as they say is ugly, and so we'll save it for when you have the foundation to tackle it properly. Frequency Separation LOW-HIGH-COLOR (ENGLISH) HighPass Sucks (+ solution) Summary Information and Links now at bottom of post Bottom Line Up Front: High Pass is an inaccurate spatial-frequency gaussian based separation technique.

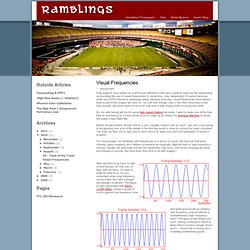
The steps below and the actions provided effect a much more accurate result than can be accomplished otherwise. Background: Ultimately, this is a spinoff of Mr. Connery's thread on deconvolution as an image sharpening technique here, wherein I set forth my method for finer control of such while both remaining within Photoshop and not spending additional $$ on plugins. Key to its success is the separation of high and low spatial frequency image data and the fine-tuning of each. Separation of spatial frequency data has a number of applications in image editing. Findings / Technique: In my own experimentation, I've found that HP gives exceptionally high differences from 'truth' when separating high and low frequency information. 1.)
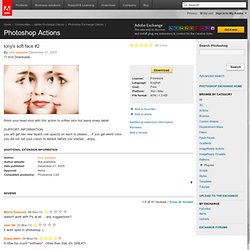
Working in 8bit mode, this will give you an accurate frequency separation to about 129/32k or 1/256. Photoshop Actions. Finish your head shot with this action to soften skin but leave sharp detail SUPPORT INFORMATION you will get two new layers, set opacity on each to please.,,..if you get weird color you did not set your colors to default before you started,.,.enjoy Additional extension information Reviews Maria Svecova 06-Dec-12 Rating = 1 doesn't work with Ps at all ... any suggestions?
Sum fat 23-Mar-12 Rating = 1 it wont open in photoshop :( Diana Neill 20-May-10 Rating = 4 A little too much "softness". Kendalg1 05-Nov-09 Rating = 5 I've had excellent results using this action on male models, too. Www.modelmayhem.com/pvphoto. RonNichols.com. Perfect Portrait 2. Keeping the details, Skin smoothing the smart way - TipSquirrel. How many times have you seen beauty retouching that has gone too far? You know the kind where the model is left with skin like Barbie?
Well this technique allows you to retouch and soften the skin without losing the fine details and texture. First of all I would like the say, this is a technique I have stumbled upon from Lee Veris over in Hollywood. I’ve added my own little twist to the technique to make it a little more useable. This technique does take a few twists and turns along the way, so hold on and enjoy the ride. The girl in today’s tutorial has great skin, but the details revealed with today’s cameras means that skin can look over detailed and distracting.
As we can see in the image above, there is quite a lot of texture in the skin and also a little too much detail for beauty retouching. The first step is to create a duplicate layer using Cmd J (Ctrl J for Windows) Now we need to invert the new layer using either Cmd (Ctrl) I or from the menu as shown above. NB! Before and After.