
Pom Pom Pandemic. TIPPED OUT. All photos: Kristin Ess + thebeautydepartment.com post designed by kristin ess Lots of emails this week asking for a tutorial on Lauren’s temporary bright colors.

Here I’ve replicated the process for you in 7 steps on an extension. While I never recommend bleaching out the ends of your hair at home, if you want to do the fun colors yourself, maybe get the tips bleached out by a pro + then play with the temporary colors on your own. The best things about this color– you’re able to hide it in a bun for work if you need to, AND you’re only doing a couple of inches on the bottom so it won’t kill you to cut it off if you get over it quickly. TOOLS: highlighting comb, clips, foils, color brush, hair bleach with the appropriate volume (always seek a professional when using bleach), light pink color, dark pink color, light blue, dark blue, clear gloss. Step 1 Highlight the tips of the hair using hair bleach with the correct volume. Step 3 Shampoo and lightly condition bleach out of the hair. DIY Garden Markers. This year I’m planting my herbs in the sunniest corner of our yard, so hopefully they won’t turn yellow and die again.

Third time’s the charm, right? I don’t really need herb markers (I mean, it’s pretty easily to tell the difference between basil and rosemary), but they are so darn cute that I decided to make myself a set with my old stash of polymer clay and rubber stamps. This is what you need to make your own: oven bake-able polymer clay rolled into 1.25″ balls (one ball for each marker) appropriate baking dish (according to package instructions) a rolling pin a butter knife rubber letter stamps an oven Roll each clay ball into a coil about 5.5″ long. Use the dull side of your knife to trim one end into a point (the dull side won’t leave behind serrated marks), and shape the edges of each marker with the flat side of your knife. Stamp your garden markers, and bake them according to the clay package instructions. Three-Week Body Makeover.
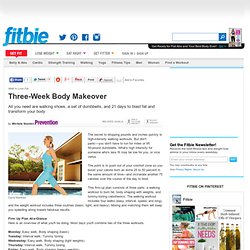
The secret to dropping pounds and inches quickly is high-intensity walking workouts.

But don't panic—you don't have to run for miles or lift 50-pound dumbbells. What's high intensity for someone who's less fit may be low for you, or vice versa. The point is to push out of your comfort zone so you boost your calorie burn an extra 25 to 50 percent in the same amount of time—and incinerate another 75 calories over the course of the day to boot. This firm-up plan consists of three parts: a walking workout to burn fat, body shaping with weights, and tummy-toning calisthenics. The walking workout includes four walks (easy, interval, speed, and long), and the weight workout includes three routines (basic, light, and heavy). Firm Up Plan At-a-GlanceHere is an overview of what you'll be doing. Chart Your ProgressMake tracking your 21-day fitness plan easier by hanging a fitness log in plain sight—and using it. Week 1: 30 minutes Week 2: 35 minutes Week 3: 40 minutes. Doily canvas bag.
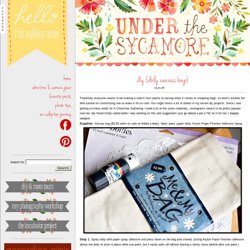
Thankfully everyone seems to be making a switch from plastic to lasting when it comes to shopping bags, so here’s another fun little tutorial on customizing one to make it oh so cute.

You might notice a lot of doilies in my recent diy projects. Since I was getting so many ready for A Christmas Gathering I used a lot of the same materials…monograms seems to be pretty popular now too. My friend Cindy called while I was working on this and suggested I just go ahead a put a “W” on it for her, I happily obligied. Canvas bag ($2.00 when on sale at Hobby Lobby), fabric paint, paper doily, Krylon Paper Finishes Adhesive Spray : Spray doily with paper spray adhesive and press down on the bag (not shown) . : Gently paint over the holes – I recommend paint meant for fabric, not crafts. . : Peel back doily before paint dries. Bag after doily is removed I traced on my letter and filled it in with paint.