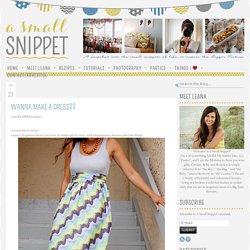

Wanna make a dress?? I am PUMPED today!

Wanna know why? Cause i’m gonna show you how to make quick, easy, and inexpensive dresses just like these! I know what y’all are thinking…no way that’s quick and easy. oh…you are SO wrong. it really is! I might even venture to say that its one of the easiest sewing projects i’ve ever done. go ahead…try it…and try to prove me wrong! I orginally found this brilliant idea here and was instantly motivated to try it. i did, however, change up some things along the way, such as making a long maxi dress, and one other thing in particular that will prevent a massive headache, so i’ll go ahead and post a tutorial here for you to see. i took the following pictures for the tutorial as i was sewing the long dress. i will make a note in each step where there is something different to do for the short dress. first things first…gather your supplies. all you need is a ribbed tank top and some coordinating fabric and thread. how cheap is that??
For the long dress: for the short dress: 45678. DIY Bleach Tie Dye - Honestly WTF. Last summer, we were obsessed with shibori indigo tie dying.

No, really . . . we just about dyed anything white in sight. So when Free People asked us to include a DIY in their guest blogger series, we knew a new tie dye project was absolutely in order. And as the weather is beginning to warm up, what better time than now to start experimenting with reverse tie dye using bleach! Black tees and tops: watch out! To make a grid-like pattern, fold the shirt like an accordion and bind it between two pieces of wood or other flat shaped objects. Before you start bleaching, make sure you are wearing gloves and working outdoors or in a well ventilated area. The rusty brown color will slowly fade into a beautiful lighter shade as it begins to set. Your reverse bleach tie dye shirt is ready to wear! (top image from here, rest of images by HonestlyWTF) DIY Fashion-Forward Bracelets & Diy & Lifestyle & RTR On Campus.
When money is tight, but fabulous fashion is a necessity, try out your crafting skills to make something new and fantastic.

These bracelets are sure to impress and look quite expensive, but all they require is some gold chain and friendship bracelet yarn, both of which you can find at a craft store like Michael’s Art Supply. Make one signature piece or stack a bunch for a layered look! BFrend Bracelets by Monika You can find the full blog post here to see more styles of these bracelets.
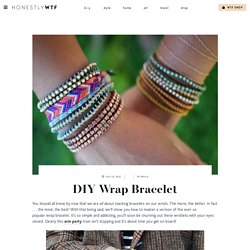
In order to create them, check out these various friendship bracelet patterns. Another fun and very creative bracelet is this one made out of gold or silver nuts, normally used to secure bolts. DIY Wrap Bracelet - Honestly WTF - StumbleUpon. You should all know by now that we are all about stacking bracelets on our wrists.

The more, the better. In fact . . . the most, the best! With that being said, we’ll show you how to master a version of the ever so popular wrap bracelet. It’s so simple and addicting, you’ll soon be churning out these wristlets with your eyes closed. Clearly this arm party train isn’t stopping and it’s about time you get on board! You’ll need (for a double wrapped bracelet) :* Lengths will vary depending on the size of your wrist (see comments for suggestions). Fold the length of leather cording in half to form a loop. Place the ball chain along the leather cording with the end of the chain meeting the end of the wrap. Continue wrapping while checking it for fit around the wrist. When you have reached the end of the ball chain wrap the linen cording around the leather strands 2-3 more times. Thread the hex nut through the strands and tie a second knot. Watermark Tee by Sweet Verbana - StumbleUpon.
Hello U-Create readers!

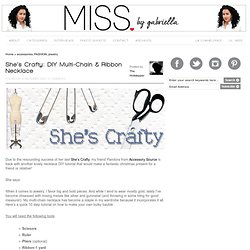
I am so excited to be guest posting here today. Shes Crafty: DIY Multi-Chain &Ribbon Necklace. Due to the resounding success of her last She’s Crafty, my friend Pandora from Accessory Source is back with another lovely necklace DIY tutorial that would make a fantastic christmas present for a friend or relative!

She says: When it comes to jewelry, I favor big and bold pieces. And while I tend to wear mostly gold, lately I’ve become obsessed with mixing metals like silver and gunmetal (and throwing in some bling for good measure!). My multi-chain necklace has become a staple in my wardrobe because it incorporates it all. Here’s a quick 10 step tutorial on how to make your own bulky bauble. You will need the following tools: ScissorsRulerPliers (optional)Ribbon-1 yardTwo jump rings (the size of a nickel). Supplies I chose a mix of metals in various colors and sizes and a few strands with rhinestones. All of my materials were purchased at Toho Shoji. Cut your first strand of chain to 12 inches Step 1: Cut your first strand 12 inches long.