
MANI MONDAY. NAILED IT! Photos by post designed by kristin ess There’s something really nice about taking a break from nail polish for a second, right?

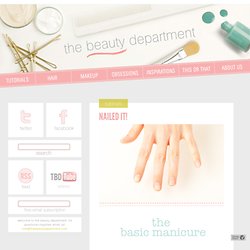
There are so many fun nail trends today that it makes you want to change things up… a lot! In this tutorial, we show you how to give yourself a perfectly polished, natural manicure that looks lovely and allows your nails to breathe. Always clean your tools properly before you begin. You can simply wipe them down with alcohol and a cotton ball, b for proper sterilization we placed our metal tools on a cookie sheet (make sure they don’t have plastic on them) and baked them at 375 for 15 minutes.
NAILED IT! Photos + post design by Kristin Ess While you’re all probably busy decking the halls right now, perhaps you’ll be able to take a break to get fancy, festive + fun with this manicure tutorial from Lady Conrad!

She wanted to string some lights across her nails and so she did… Literally! Here’s how she created these lil’ cuties: TOOLS: base & top coat, green polish & red polish (you can use any colors you want), white or off-white polish, cuticle nippers or small scissors, black cotton string, a small brush or pointed q-tip. On clean nails, do a solid coat (or two thin coats) of white or off white polish.After the white polish dries, do one clear coat. Tags: bright, brite, christmas, DIY, do it yourself, holiday, how to, kristin ess, lauren conrad, light, lighting, lights, lite, mani, manicure, nail art, nails, string, the beauty department, thebeautydepartment.com, tutorial, xmas Related posts:
MANI MONDAY. Photos: Kristin Ess, post designed by Kristin Ess AHOY, friends!!

We found a fun new way to do NAUTICAL! We used the straight strips that come in this french manicure kit to make our stripes! Might be one of the easiest nail art manicures ever! Painting stripes can be a big challenge, but this is pretty simple… Last but not least, apply your top coat! Enjoy your Monday everyone!! MANI MONDAY. Photos + post by Kristin Ess So many dots, so little time.

Between the nail pictures you send us + the nail tutorials seen on Pinterest, we have noticed that polka dots are a major favorite right now. Getting those perfect little circles isn’t easy unless you have the right tool– the dotting tool. You can buy them at beauty supply stores and you can find similar tools at art supply stores… or better yet, you can simply make your own using things you most likely have in your house already. Here are the steps! Get a straight pin. Here are some of our favorite dotting tool designs that we found while surfing around! MANI MONDAY. Photos and posts by Kristin Ess Let’s discuss the “accent nail”.

It’s fun (and a lot easier) to do nail art on just one nail, but it can be hard to come up with a pattern idea. Here’s a suggestion: take a peek in your closet! Look at your favorite shirts, skirts and dresses for inspiration. When our recent STYLEMINT tops came in the mail and we opened the box, we noticed the patterns + colors were perfection. Paint the whole nail white. Note: You can also use the white polish to make dots on the red if you want to go opposite. Gather some different sized art brushes. Paint the base of your nail blue.Dip a nail striping brush in white polish.Lightly drag across the surface of the nail. Here are some full view shots of the STYLEMINT tops that have were featured above. (this advertorial was generously brought to you by STYLEMINT) Related posts: PRETTY POLISH IDEA. Photos + post by Kristin Ess First of all, sorry for the lack of posts this week.

By now you know that Lady Conrad has a brand new book called THE FAME GAME. We joined her on her book tour and that busy schedule left little time for much else. But we’re back and bringing you the ombre stain mani! We’ve seen lots of ombre techniques in the past, but this one is pretty cool because it’s done on your bare nails and has more of a stain effect than looking like actual nail polish. You will need: 3-4 gradient nail polish colors (dark to light and all in the tonal family), a clear top coat, a triangle makeup sponge, a cup of water, a piece of paper for blotting the polish, a paint brush + nail polish remover for clean up. Unscrew the lids of your 3 or 4 gradient colors so they’re ready to go.
Try it in other colors. Nail Art Inspired By Art - Mondrian-Inspired Nail Art.