
20 Unbelievably Tiny Knitted And Crocheted Things. DIY Gift Series: Mountain Pillow. This mountain pillow is the second project in our holiday DIY gift series with Merrilee Liddiard of Mer Mag.

You can check out last week’s project, a lovely bleach-dot clutch, by clicking here. Enjoy! — Kate I don’t know about you, but I’m loving all things mountains of late, and this simple snow-peaked pillow is just the thing to sate my need for high altitudes while staying warm and cozy indoors. — Merrilee Read the full how-to after the jump . . . Materials thick fabric for the base of the mountain (I used a solid heavyweight gray suiting fabric for mine.)white fabric for the snow peaks (I used a shearling white faux fur fabric for my peaks.)mountain pillow patterncorresponding threadsewing pinssewing machinestuffing Instructions 1. 2. 3. 4. 5. 6. 7. 8. 9. 10. 11. 01couv_m49.indd - ficheconseil-mobile-a-doudous.aspx. Blogger: Connexion. Felt Owl Brooch. After showing you the sneak peek at this cute little guy yesterday I just had to sit down in my tea break this afternoon and write up the tutorial for how to make your own :) If you've been reading my blog since it started you may recognise him as he's based on an old & now discontinued design I used to sell in my Etsy shop a few years ago.
I keep seeing owls popping up all over the place at the moment so it seemed like a good time to dig out my old pattern! To make your owl brooch you will need: - a needle, a pin, scissors, and the template at the bottom of this post - two colours of felt to make the owl's body and wings (I used a dark chestnut brown and ginger) - thread to match these two colours - scraps of black, white and orange felt - black, white and orange thread - a brooch clasp or safety pin Optional: polyester stuffing. RAWR Creatures: HOW TO MAKE A SOCK TEDDY BEAR.
Hi!
I came across a cute tutorial last week on how to make a sock teddy bear. He looked so fun and easy, I thought I'd give one a shot. I stitched one up while Tim and I were watching a movie Friday evening so I snapped a few pics along the way and thought I'd share. I tried to track down the original creator and designer of these little bears and I believe the source comes from a site called Taobao. You'll notice I had the help of a little kitty named Boo, who you'll see makes a couple of guest appearances in the step-by-step photos. :) Boo is a frequent sidekick while I'm sewing my RAWR creatures and does have his own drawer in my desk where he likes to curl up while I sew.
On to the tutorial! • 2 socks (1 is the majority of the bear, the other you'll only need a small amount for the bear's nose) • scissors • thread • marker (or something to draw your shapes for cutting) • stuffing. Favorite How To / This is how you create a Teddy Bear from a sock. Poupoule.pdf (Objet application/pdf) Coussins.pdf (Objet application/pdf) Chunky_Floor_Cushion_vf.pdf. Chunky Floor Cushion pattern by Gwen Wagner-Adair. Puff Daddy - knitted stool. Puff is the Norwegian word for stool.
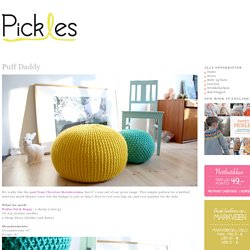
We really liked the pouf from Christien Meinderstsma, but it´s way out of our price range. This simple pattern for a knitted stool has much thinner yarn, but the budget is just as thin;) Nice to rest your legs on, and very popular for the kids. What we used:Eskimo, 18 balls (Or yarn suitable for US #13 needles)Acrylic yarn would probably be a really good alternative, as it´s a piece of furnitureUS #19 circular needles2 cheap duves (feather and down) How we did it:Cast on 35 stitches using three threads.Knit the garter stitch until you´ve knitted all the balls, and there is just enough yarn left to asseble the stool. You now have ONE rectangular piece.Cast off loosely. Assemble the first long side. Stuff the duves into the stool. Assemble the other end in the same manner as the first. And there you go! 1,2,3,4...petits chats!!! - L'Atelier de la Souris ! Beau soleil aujourd'hui....mais j'avais plutôt envie de jouer avec mes aiguilles dans mon atelier...et comme j'avais quelques petits cadeaux à faire...j'ai opté pour ces petits chats...à accrocher à une poignée de porte ...ou autre...
Et pour celles qui voudraient aussi faire ce petit chat....CADEAU! Tuto petites poules en tissu. Les créations de la DT : Projet DT : Invasion de souris ! 71710286.pdf (Objet application/pdf)