
Wonderful Photos: How to Increase your Depth of Field by Focus Stacking. Focus stacking Focus stacking can be used to increase the available depth of field in a shot.
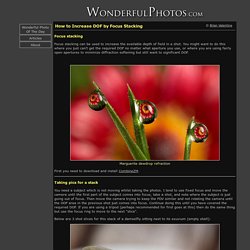
You might want to do this where you just can't get the required DOF no matter what aperture you use, or where you are using fairly open apertures to minimize diffraction softening but still want to significant DOF. Marguerite dewdrop refraction First you need to download and install CombineZM. Taking pics for a stack You need a subject which is not moving whilst taking the photos. Below are 3 shot slices for this stack of a damselfly sitting next to its exuvium (empty shell): Close objects in focus Middle objects in focus Far objects in focus Stacking the images Run CombineZM and load the files by clicking on File -> New. Starting CombineZM Load in the images you wish to stack. Loading the images to be stacked To do the stack, click on Macro -> Do Stack Instructing CombineZM to begin stacking The program will then start comparing the shots, aligning them, and color matching them.
CombineZM processing. CombineZM Focus Stacks Photos For Greater Macro Shots. Quick Tips: Instagram your images using Photoshop. Instagram reinvented the photo sharing on our social media structure.

It's a fast, beautiful and fun way to share your pictures to friends and family. And what I like the most about Instagram, are the various schemes that offers you to filter your pictures with your own little touch. My all-time favorite Instagram filter is the "Nashville" and today, I will show you a quick tutorial about how to achieve that same effect on your images. It's a very simple effect and very easy to accomplish in Photoshop. Step 1 Open your image in Photoshop and double-click on the background layer to make into a layer and named it Nashville. For this tutorial, I've used an image from Patrick Smith from Patrick Smith Photography. Step 2 Create a new layer and fill it with the color (Red: 247 , Green: 217 , Blue: 173) and leave the opacity to 100% and your blending options to "Multiply".
Step 3 Click back on the "Nashville" layer and click Image > Adjustments > Curves. Step 4 Step 5 Step 6 Step 7 Step 8 Final Words. Twenty-One Ways to Improve Your Photographs. 2005-May-18 by Alan and Mario NOTE: This article was written by Brooks Jensen and posted by Alan and Mario.
It was a great read from LensWork magazine so we had to post it. He was young, naïve, just starting. As the saying goes, “Out of the mouths of babes …” He asked, “What are the most important things I should do to improve my photographs?” It was such a straightforward question – and I have been involved in photography so long – you’d think I would have had a simple and canned answer. Landscape Photography. I admit it - I am a filter junkie.

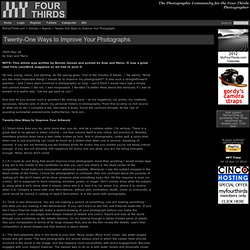
I rarely take a landscape photo without a filter attached to my lens! For me, filters are not used for gimmicky effects but are used to overcome the main limitation of digital sensors, which is the lack of ability to record wide ranges of contrast. My two most used filters are the polarizer and neutral density graduated filters (ND grads for short). Both of these filters help reduce the range of contrast in photos so that the sensor can record all the tones in a scene.
For example, Photo 1a (above) has no filters used while photo 1b (below) was taken with a warming polarizer (to reduce contrast and saturate colors). Photo 1c (below) was taken with both a polarizer and a 2-stop hard-edge grad filter (to further reduce contrast between the dark foreground and bright sky and mountains). The Cokin P-Holder Rather than use screw-in filters on my lens, I use drop-in filters that slide into the Cokin P-Holder.
Vignetting – A Painful Reality? Go Big! Understanding Depth of Field in Photography. Depth of field refers to the range of distance that appears acceptably sharp.
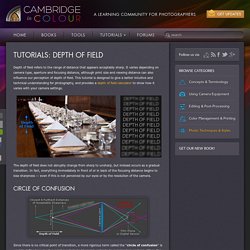
It varies depending on camera type, aperture and focusing distance, although print size and viewing distance can also influence our perception of depth of field. This tutorial is designed to give a better intuitive and technical understanding for photography, and provides a depth of field calculator to show how it varies with your camera settings. The depth of field does not abruptly change from sharp to unsharp, but instead occurs as a gradual transition. In fact, everything immediately in front of or in back of the focusing distance begins to lose sharpness — even if this is not perceived by our eyes or by the resolution of the camera.