
DIY Custom Paper With Rice Paste. Paste paper is easy and fun to do.
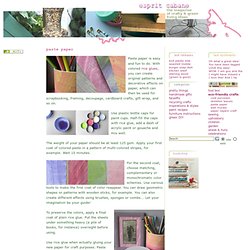
With colored rice glues, you can create original patterns and decorative effects on paper, which can then be used for scrapbooking, framing, decoupage, cardboard crafts, gift wrap, and so on. Use plastic bottle caps for paint cups. Half-fill the caps with rice glue, add a dash of acrylic paint or gouache and mix well. The weight of your paper should be at least 125 gsm. Apply your first coat of colored paste in a pattern of multi-colored stripes, for example. For the second coat, choose matching, complementary or monochromatic color schemes.
To preserve the colors, apply a final coat of plain rice glue. Use rice glue when actually gluing your new paper for craft purposes. Marbleizing Paper Tutorial. To make this fun and easy marbleized paper you will need: 1/2 tsp alum (helps paint adhere to the paper), 2 cups liquid starch, liquid acrylic paints, a long wooden skewer , a 9 X 13 pan and white copy paper cut to fit the inside your pan.
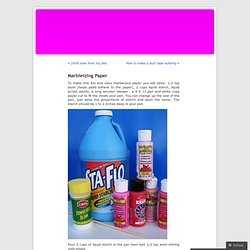
You can change up the size of the pan, just keep the proportions of starch and alum the same. The starch should be 1 to 2 inches deep in your pan. Pour 2 cups of liquid starch in the pan then add 1/2 tsp alum stirring until mixed. Gently drop acrylic paint on the surface of the starch. How to “Tie-Dye” Paper. “Tie-dying” paper is a fun and easy project. And, chances are, you already have everything on hand you need to do it.
The Props Food coloringFoaming shaving creamCookie sheet, or any large shallow panSomething to stir withPaper (For this project, I used plain laser printer paper)Paper towels The Procedure Squirt the bottom of the pan with shaving cream as shown. Spread the foam around evenly. Drip several drops of food coloring into the foamy mess, like so. Stir food coloring through cream, making far out swirls. Place your piece of paper into your colored foam. Lift out, or rather, peel off paper from foam. Batik On Paper + Salt Watercolors. One of my recent finds on the web were batik pillowcases created with blue school gel and fabric paint.
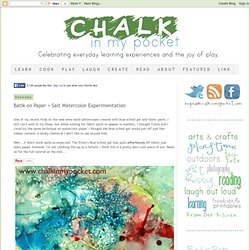
I still can't wait to try those, but while waiting for fabric paint to appear in mailbox, I thought Claire and I could try the same technique on watercolor paper. I thought the blue school gel would pull off just like rubber cement, a stinky chemical I don't like to use around kids. Well...it didn't work quite as expected. The Elmer's Blue School gel that pulls effortlessly off fabric just tears paper. However, I'm not chalking this up as a failure, I think this is a pretty darn cool piece of are. 20K+ The glue reacted with the paint in such a unique way - the photo doesn't really capture how raised it is.
The white starbursts seen throughout the painting are pockets of salt on the liquid watercolors. Speaking of liquid watercolors, check these out. Painting With Watercolors, Glue & Salt. Ever since our adventure with “secret message watercolor painting” the munchkin has been enamored with his watercolors.
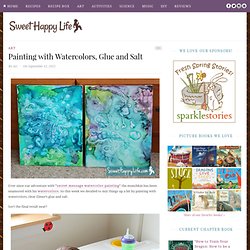
So this week we decided to mix things up a bit by painting with watercolors, clear Elmer’s glue and salt. Isn’t the final result neat? The idea for using glue and salt with watercolors came from Pinterest. I kept seeing pins with notes about sprinkling salt on wet watercolors or using glue to create designs on top of the paint. Finally I saw this post about combining the two techniques and I was like, that’s it, we’re doing this. As you can see in the photo above, the munchkin was super into this activity.
We used canvases for our paintings because I had some around, but watercolor paper would work equally well. After setting everything up the process was simple and fun! So, kinda like cloud watching, the munchkin was all about seeing shapes in the blobs of glue. How To Do Flower Pounding. Did you know that you can transfer the color from flowers and even leaves onto fabric by beating them with a hammer?
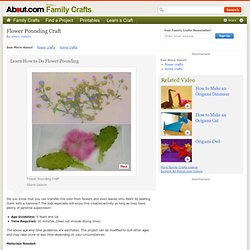
The kids especially will enjoy this creative activity as long as they have plenty of parental supervision! Age Guideline: 5 Years and Up Time Required: 30 minutes (Does not include drying time) The above age and time guidelines are estimates. This project can be modified to suit other ages and may take more or less time depending on your circumstances. Materials Needed: Variety of Fresh Flowers and Leaves White, cotton fabric (muslin works well) Wax Paper Masking Tape Hammer Instructions: It is best to work on a hard surface, like a sidewalk or cement floor. Hammered Leaf & Flower Prints. Antique Paper Recipe. This project is great for aging school projects, invitations or other paper craft projects.
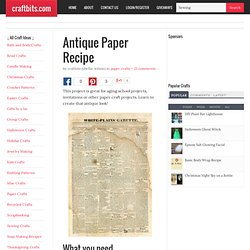
Learn to create that antique look! What you need Tea bags Coffee Sponge brush Instructions Make a cup of tea with a tea bag and let the bag sit in the tea for five to ten minutes. Let it cool down and remove the bag. Gently squeeze the tea bag to get rid of any excess water. Alternatively make a cup of strong instant coffee and let it cool down. Easy Collagraph (Block) Paper Printing. I was converted to collagraphs 3 years ago when I wanted to do a series of prints in a much larger size than was my usual.
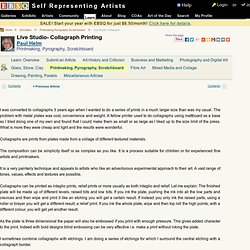
The problem with metal plates was cost, convenience and weight.