
Locker Hooking. I've been fascinated with locker hooking since Vicki posted about her project some time ago.
It's a craft where you take strips of fabric, "hook" them through a mesh canvas, and then "lock" them down by running a cotton string through the loops. There's not a lot on information on locker hooking on the web, but this site, which sells supplies, including patterns, also has a very useful tutorial that can get you started. You use up a lot of strips of fabric in this craft. I of course have lots of fabric, and some of it is even already in strips, but instead, I'm using up old cotton curtains, sheets and pillowcases that are worn thin, faded, or even holey.
It's easy to cut the 1" strips with a rotary cutter and ruler. I ordered my canvas and needle from an eBay vendor. Other items one could make with this craft include place mats, table runners, and handbags. I've seen starter kits with a locker hooking needle and canvas bundled with recent books on Amazon. Beverly's Crafts: Locker Hooking Is Back! Locker Hooking is an obscure craft that's making it's way back....
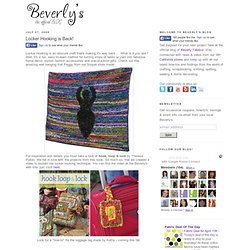
What is it you ask? Well, it's a fun, easy-to-learn method for turning strips of fabric or yarn into fabulous home decor, stylish fashion accessories and one-of-a-kind gifts. Check out this amazing wall hanging that Peggy from our Soquel store made: For inspiration and details you must take a look at hook, loop & lock by Theresa Pulido. We fell in love with the projects from this book. Look for a "how-to" for the luggage tag made by Kathy - coming this fall. Locker Hooking « Save the Stitches! At first glance, you might think this is similar to latch hooking, where a special hook is used to wrap a length of yarn around a thread in a large-count canvas.
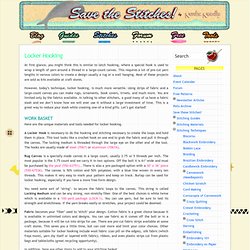
This requires a lot of pre-cut yarn lengths in various colors to create a design usually a rug or a wall hanging. Most of these projects are sold as kits available at craft stores. However, today’s technique, locker hooking, is much more versatile. Using strips of fabric and a large-count canvas you can make rugs, ornaments, book covers, trivets, and much more. You are limited only by the fabrics available. Here are the unique materials and tools needed for locker hooking. A Locker Hook is necessary to do the hooking and stitching necessary to create the loops and hold them in place. Rug Canvas is a specially made canvas in a large count, usually 3.75 or 5 threads per inch.
Locker-Hooked Rug at Joann. Free Locker Hooking Craft Patterns at www.allcrafts.net. Locker Hook Tutorial: Basic Preparation. I fell in love with hook locking after I bought the book Hook, Loop ‘n’ Lock: Create Fun and Easy Locker Hooked Projects written by Theresa Pulido last November.
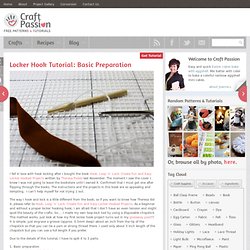
The moment I saw the cover I knew I was not going to leave the bookstore until I owned it. Confirmed that I must get one after flipping through the books. The instructions and the projects in this book are so appealing and tempting, I can’t help myself for not trying 1 out. The way I hook and lock is a little different from the book, so if you want to know how Theresa did it, please refer to Hook, Loop ‘n’ Lock: Create Fun and Easy Locker Hooked Projects . Due to the details of this tutorial, I have to split it to 3 parts: 1. To start off with the basic preparation of locker hooking, you will need to get the following materials: 1. Prepare the Canvas Draw and mark the pattern [click the link to get the free pattern of the coasters] on your hooking rug canvas with permanent marker.
Get all updates via email: Locker Hook Tutorial: Let’s Hook And Lock The Loops!!! Now, you have all the materials ready, let’s hook and lock the loops!!!! I illustrate it with one of the coasters I made for the giveaway. I am currently working on a bigger project for my home, should be able to complete just in-time for the Chinese New Year which falls on the same day as Valentine’s day this year, yes, double celebration on 14 Feb 2010!!!! As I mentioned in my basic preparation post, my method is a little different since I am using my own locking chopstick. Pro – this is suitable for beginners and for those who can’t find a locker hook, Con – slower in process. If you are able to find a locker hook, Theresa is more than happy to share with you how to locker hook with the hook. Get all your materials ready: 1.
Sew A Border First, sew a border at the 4 edges of the project. You will need to pass through the square twice when you reach the corner. Adjust the fabric so that it covers nicely by overlapping each fabric a little before tightening the stitch. Locker Hook Tutorial: Finishing Touch. Now you have seen my Locker Hook tutorial on the Basic Preparation and Hook-Loop-Lock, and probably finishing a project up to this point (pattern here).

I am going to show you how to tidy up the project by hiding away all the ends (fabric strips and locking yarn) and cover up the back of the work. I am so proud of myself to come out with these coasters which I am giving them away! I brought them to Starbucks one afternoon when I needed a coffee kick to get my brains going. Took some photos of them with the coffee mug for the keepsake as I am going to mail this to Diana, the lucky winner who won them in my January Giveaway Draw. Well, I can always reproduce them, but the feeling will be different. Hiding The Ends Turn to the back, bring all the ends to front by using a tapestry needle. The back of the coaster is so tidy… The front is full of “ends”. After all ends are hidden! Handling The Back Iron on a piece of interfacing with the size smaller than the border. Stitching on the lining.
Free Locker Hooking Patterns. How To Make A Locker Hook Rug: eHow.