
Program an ATtiny with Arduino. Programming an ATtiny w/ Arduino. This tutorial shows you how to program an ATtiny45 or ATtiny85 microcontroller using the Arduino software and hardware. The ATtiny45 and ATtiny85 are small (8-leg), cheap ($2-3) microcontrollers that are convenient for running simple programs. This tutorial is obsolete! See the updated version of this tutorial (with support for Arduino 1.0). They are almost identical, except that the ATtiny85 has twice the memory of the ATtiny45 and can therefore hold more complex programs.
We like to use both of them with paper circuits and other craft electronics. Materials and Tools For this tutorial, you’ll need: Arduino Uno or Duemilanove (w/ an ATmega328, not an older board with an ATmega168) ATtiny45 or ATtiny85 (8-pin DIP package) a 10 uF capacitor (e.g. from Sparkfun or from Digi-Key ) a breadboard jumper wires For more information, see our list of materials and parts and our list of prototyping supplies . Software Download: Arduino software , attiny45_85.zip. Using Arduino with ATTiny's. I really like the Arduino IDE.
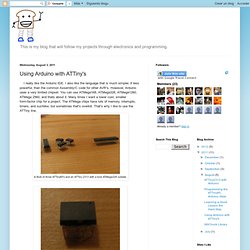
I also like the language that is much simpler, if less powerful, than the common Assembly/C code for other AVR's. However, Arduino uses a very limited chipset. You can use ATMega168, ATMega328, ATMega1260, ATMega 2560, and thats about it. Many times I want a lower cost, smaller form-factor chip for a project. The ATMega chips have lots of memory, interrupts, timers, and suchlike, but sometimes that's overkill. You have already realized that you can't use the ATTiny chips in Arduino. So first, download this core file: attiny45_85.zip (I got it here. Now, navigate to that folder. Hmmm... no hardware folder. Reopen Arduino and look in the boards menu. EDIT: I just found the comment from Maverick informing me of an important oversight: Arduino 1.0 is a lot different file-wise than the older versions.
. - Go to you sketchbook folder (mine's called 'arduinosketchbook', easier to remember) - Navigate to the /hardware/attiny45_85/cores/attiny45_85/ folder. Programming the ATTiny85, Arduino Style. This is a sort of a continuation of the last post.
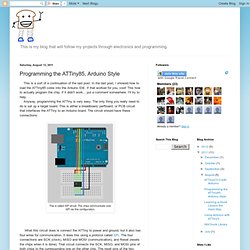
In the last post, I showed how to load the ATTiny85 cores into the Arduino IDE. If that worked for you, cool! This how to actually program the chip. If it didn't work... put a comment somewhere. I'll try to help. What this circuit does is connect the ATTiny to power and ground, but it also has four wires for communication.
The breadboard programmer above isn't the only way making a target board. It is is the same circuit as the breadboard, only more permanent. Actually Programming the Chip Once you have one of these target boards, either on a breadboard or perfboard (or something else), we can actually program it. So connect your target board, make sure everything is connected, and (IMPORTANT!) That should do it. If another set of text appeared, something is wrong. Arduino IDE and ATtiny45 - Elettronica Arduino Esperimenti. ****Upgraded 01-03-2010 ***** Now it works also in Arduino 0018 IDE attention to the new position of cores ******** ****Upgraded ***** found an error on the schematic, corrected ******* not for newbies ****** you MUST have experience with AVR chips and a good relationship with soldering iron ****** Few weeks ago out of curiosity (and by the way the need to have a simple way to program ATTiny45 for simple tasks) I started to look into adding ATtiny45 as processor into Arduino IDE.
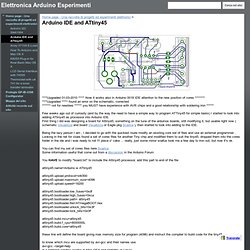
First thing I did was designing a board for Attiny45, something on the tune of the arduinos boards, still modifying it, but usable right now ( schematic Visualizza and board Visualizza or Eagle pkg Scarica ), then started to look into adding to the IDE. Being the lazy person I am , I decided to go with the quickest route modify an existing core set of files and use an external programmer .
You can find my set of cores files here Scarica Some information useful that come out from a discussion in the Arduino Forum.