
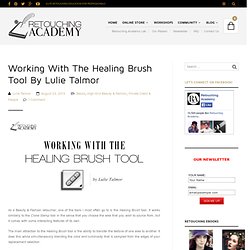
Posing Guide: 21 Sample Poses to Get You Started with Photographing Women – Part I. This is the first in a series of Posing Guide posts by Kaspars Grinvalds from Posing App See below for links to the full series of posing guides including for kids, men, couples, weddings and more.

Check out our new Portrait Posing eBook and Portrait Posing Printables for more advice and posing ideas. If you ever run out of ideas, get stuck in creativity or simply need some guidance when shooting female subjects, you may use following posing samples as a “posing cheat sheet”. Many pro photographers use such a technique when preparing for and during the photo shoot. The poses in this article are selected as initial reference.
I would advise to look at the poses together with your subject, especially if she’s inexperienced. OK, let’s start, one by one. 1. 2. 3. 4. 5. 6. 7. 8. 9. 10. 11. Tony Kuyper Photography—Luminosity Painting. ©2008 Tony Kuyper NOTE: This tutorial builds on the concepts and techniques first discussed in the Luminosity Masks tutorial .
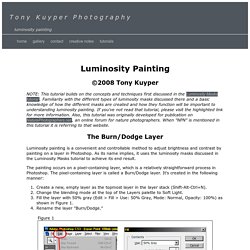
Familiarity with the different types of luminosity masks discussed there and a basic knowledge of how the different masks are created and how they function will be important to understanding luminosity painting. If you've not read that tutorial, please visit the highlighted link for more information. Also, this tutorial was originally developed for publication on NaturePhotographers.net , an online forum for nature photographers. Photoshop Plugins, Presets & Actions. Photoshop Plugins, Presets & Actions. Tiffen: Filters. Enhance Texture and Detail with Intelligent High Pass Sharpening.
Photoshop Black and White Conversions - Lab Color Mode Tutorial. How to Retouch Lips in Photoshop. In this video tutorial I’ll show you some tips and tricks for retouching lips in portraits or beauty shots.
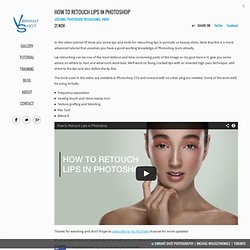
Note that this is a more advanced tutorial that assumes you have a good working knowledge of Photoshop tools already. Mastering Dodging and Burning in Photoshop. In this in-depth video I’ll be taking a somewhat different approach to demonstrating dodging and burning.
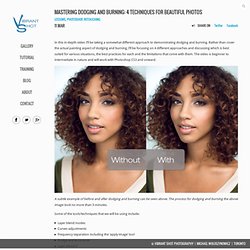
Rather than cover the actual painting aspect of dodging and burning, I’ll be focusing on 4 different approaches and discussing which is best suited for various situations, the best practices for each and the limitations that come with them. The video is beginner to intermediate in nature and will work with Photoshop CS3 and onward.
A subtle example of before and after dodging and burning can be seen above. The High Pass / Imagenomic Portraiture Link. Julian Marsalis wrote: Rule of IHP 1/3????
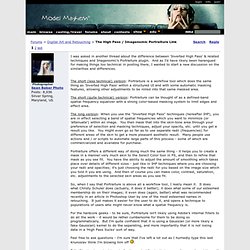
Can I get some clarity on the subject? Break the face up into zones and selectively mask each from the other? Now I am curious of this work flow. I may do multiple frequency separation on an image but never always lol. Working With The Healing Brush Tool By Lulie Talmor. As a Beauty & Fashion retoucher, one of the tools I most often go to is the Healing Brush tool.
It works similarly to the Clone Stamp tool in the sense that you choose the area that you wish to source from, but it comes with some interesting features of its own. The main attraction to the Healing Brush tool is the ability to transfer the texture of one area to another. It does this while simultaneously blending the color and luminosity that is sampled from the edges of your replacement selection. Take these two sample swatches as a demonstration. Generally you should source from similar texture to the one you are replacing, but I am using both different texture and colors to better illustrate how the Healing Brush tool works. The square on the left is filled with yellow high contrast large grain texture, while the one on the right is with lower contrast small grain texture.
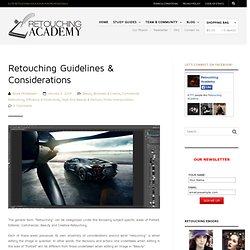
How to Work Smart With Quick Mask in Adobe Photoshop. Working with Layer Blend If Sliders in Adobe Photoshop. Everything You Need To Know To Love The Pen Tool. Practical Use Of Clipping Masks in Adobe Photoshop. Essential Retouching Tools for Face & Hair. In this video we’ll be covering commonly used retouching tools for fixing blemishes on a subject’s face and stray hairs.
As always, our aim is not only to show you the basics of the tools but also best practices for using them and where they have their uses and limitations. Related The Making It Up Beauty Series & Retouching Details I recently published an article on Fstoppers about one of the Retouching Academy community group members Juan Sánchez Castillo from Spain and his beautiful series "Making It Up". Concepts of Beauty, Biology & Aesthetics For Visual Artists. There are thousands of video tutorials on how to retouch skin, hair, etc., but nobody talks about what it is that needs to be retouched to make a female face more attractive in a photo.

In this video I’ve attempted to put in words and illustrate what I’ve learned ever since I started applying my own makeup as a teenager, by observing other women, reading beauty tips in magazines, and watching makeup tutorials. I share more of my own examples and further explore this topic in my upcoming From Amateur to Pro video book . Physical Attractiveness according to Wikipedia: The images I have included in this video are there for illustrational purposes only.
Their copyright belongs to their respective owners. The following aged celebrities’ images can be found here: What 12 Celebrities Might Look Like as Senior Citizens — Photoshop Magic! Watch Danielle video by Anthony Cerniello from 2:28 to see live aging: Retouching Guidelines & Considerations. The general term “Retouching” can be categorized under the following subject-specific areas of Portrait, Editorial, Commercial, Beauty and Creative Retouching.
Each of these areas possesses its own assembly of considerations around what “retouching” is when editing the image in question. In other words, the decisions and actions one undertakes when editing in the area of “Portrait” will be different from those undertaken when editing an image in “Beauty”. So how do we determine the category (its implicit techniques and time allocations) to be applied to an image? The following questions can help you evaluate which category your image falls under and how much time typically required to retouch one image. 1. 2. Automate Your Workflow Using Actions, Batches and Droplets. Actions are simply recorded tasks in Photoshop that create automated steps or parameters, which once executed, produce desired results depending on the pre-recorded steps they contain.
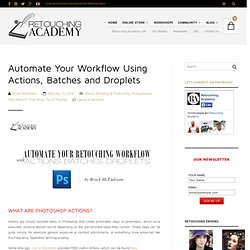
These steps can be quite simple, for example general exposure or contrast adjustments, or something more advanced like the Frequency Separation technique setup. Some time ago Conny Wallström provided FREE Useful Actions, which can be found here. These Actions are designed to simply speed up your workflow and make your processing and retouching images more efficient. They give you specific options of what you would like to edit. When you first open the Actions panel, there is a default set of Actions already installed in Photoshop. To remove your default set of Actions and start creating your own custom actions, just drag the Default Actions folder onto the Trash Can at the bottom of the Actions palette. To create a new Action simply click the Create New Action icon at the bottom of the Action palette.
How to Use Apply Image Function to Effectively Retain Detail In Shadows And Highlights. A typical issue that photographers face when capturing digital images is limited dynamic range of DSLR cameras. We always have to choose between which detail we would like to keep, and which detail will unfortunately be lost. If you choose to expose for the highlights – the shadow detail may be compromised. Likewise, if you choose to expose for the shadows – the highlights may get overexposed and you’ll end up capturing no detail in the brightest parts of the image. This is a quick tip that will show you how you can enhance and retain the light and dark information within an image. Typically this is used for landscape photography, however can be applied to any type of image.