
Empire Cut Blouse. Empire cut Blouse, T-Shirt reconstruction with Tutorial I’ve been fascinated with all the T shirt reconstruction I’ve seen around, so yesterday, I was bored and decided to make my own reconstruction..
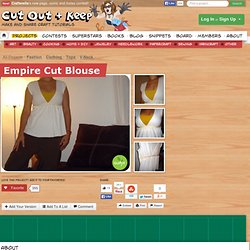
I had a big t shirt (it was my mom’s) I trace it and start cutting… This is how it looks like, I can’t wear tight T-shirts, very often I get stomach inflammation because thanks to digestive problems, and sometimes I look like I’m 4 months pregnant, so this blouse is perfect for those days. Of course I need to perfection it but it wasn’t that bad for my first attempt, what do you think? Well I thought I made a tutorial of how I made it.. please bear with me since English is not my first language, and if something needs corrections or do you need more explanation please let me know, this will also be my first tutorial. Fabric.com Exlcusive Free Hot Patterns Cool, Calm and Cowl Necked Top Pattern Download. Spring Sewing ~ Spring Ruffle Top Tutorial. From Rae: This spring top is perfect for layering under cardigans in cool spring weather and can be worn right into summer!
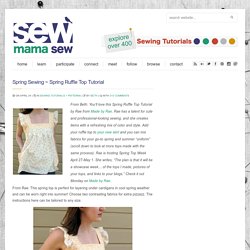
Choose two contrasting fabrics for extra pizzazz. The instructions here can be tailored to any size. Side view with pockets. Step 1: Take your chest and hip measurements. Measure around your chest, with the measuring tape under your armpits and above your bustline (this is NOT the fullest part of your chest). Example: My chest measurement is just over 35 inches. Here is the formula for you to use: ____ + 1” = _____ / 2 = _____ + 1” = ________ inches Next measure around your hips at their fullest point.
Example: My hip measurement is 41 inches. 41” / 2 = 20.5” + 1” (seam allowances) = 21.5” (we will call this “Y”) Back detail. Step 8: Attach straps to chest band. Step 9: Shaping (optional) and finish hem. Step 11: Stand back, admire, take a picture and put it in the SMS Flickr Pool! Green top variation with contrasting fabrics. Yellow top variation (minus ruffle details). Sew,Mama,Sew! Blog » » Spring Sewing ~ Spring Ruffle Top Tutorial. Sew,Mama,Sew! Blog » » Spring Sewing ~ Spring Ruffle Top Tutorial. 40+ Free Apron Patterns & Tutorials.
[Updated 2012] Whether you’re looking for something frilly, fancy or just plain practical, this apron collection has you covered!

I’ve handpicked dozens of free patterns from around the web and organized them here in one handy spot for you to browse through. You’ll find simple, easy designs that are ideal for beginner sewers as well as more advanced projects suitable for those with more experience. Purses and totes. SEWING 101: Patterns are your Friends. I think many people are intimidated by patterns and somehow feel it is easier to sew w/ out them.I am here today to try and convince you that it is actually way easier to sew with a pattern.
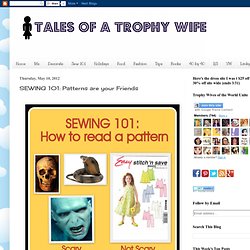
Pattern makers already figured out all the quirks and did the hard part. Patterns are not scary-they are your friends, and they are super cheap friends. You can usually by them for $.99-$1.99 at the fabric store. For this post, I'm going to pretend that I am making view B. Here's a couple of hints:Choosing a Pattern:1. Reading the Back of the Pattern:There's a lot of good stuff back here so don't skip it1. Cutting Layouts: Are you still w/ me?
Inside the pattern envelope there will be pages of step-by-step directions. HINT: I always iron all my pieces and all my fabric. Other Info: There will be lots of other info included w/ your patterns-sewing terms, special directions etc. Do-it-Yourself DIY String Wedding Lanterns Yarn Chandeliers. Jessica of Wednesday Inc shows us how to make those gorgeous twine chandeliers from the inspiration shoot she shared with us this morning.

Using balloons, glue and twine, you can also make these lanterns for your wedding – and then bring it home and use it as your very own mid century lampshade. What you will need are: balloons, glue, yarn, tray for glue, corn starch 1/2 cup of Corn starch, 1/4 cup of Warm water, clear fast drying spray paint, hanging lamp cord or fishing line (depending on your desired final product), and a lighting kit if you’re looking for a fully functional lantern. Jessica recommends using a sharpie to mark on the inflated balloon how much room you need to leave for the lighting cord. She also recommends coating the balloon with vaseline prior to wrapping the yarn coated with glue so it doesn’t stick on the balloon once it’s dry.
You can see all the details on Jessica’s blog. Are you getting excited to try to do this at home as much I am? Instructions: 1. Sewing.