
How to Draw a Square: 9 Steps (with Pictures. Curve stitching templates. Curve stitching was created by Mary Boole as a method to teach children visually how angles and spaces worked in geometry.
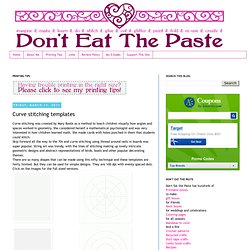
She considered herself a mathematical psychologist and was very interested in how children learned math. She made cards with holes punched in them that students could stitch. Skip forward all the way to the 70s and curve stitching using thread around nails in boards was super popular. String art was trendy, with the lines of stitching making up lovely intricate geometric designs and abstract representations of birds, boats and other popular decorating themes. There are so many shapes that can be made using this nifty technique and these templates are fairly limited. Using these is fairly easy.
Using the square grids, you can do corners, diamonds and other shapes on a right angle. As you can see, with this one the inner star is spaced so it's every 4th dot marked and the lines are made so they intersect fairly close to the middle to make a star shape. AliStauffer20132014 (1).JPG (2048×1536) Math extensions: Curve Stitching Projects 2013-14. Curve Stitching. Curve Stitching, also known as String Art, was first introduced by Mary Boole, a self-taught mathematician and wife of George Boole (the father of Boolean Algebra to which Mary also contributed quite a bit).
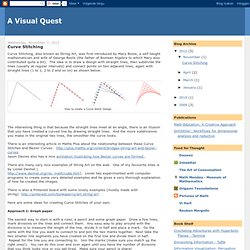
The idea is to draw a design with straight lines, then subdivide the lines (usually at regular intervals) and connect points on two adjacent lines, again with straight lines (1 to 1, 2 to 2 and so on) as shown below: The interesting thing is that because the straight lines meet at an angle, there is an illusion that you have created a curved line by drawing straight lines. And the more subdivisions you make in the original two lines, the smoother the curve looks. There is an interesting article in Maths Plus about the relationship between these Curve Stitches and Bezier Curves: Jason Davies also has a nice animation illustrating how Bezier curves are formed..
There are many very nice examples of String Art on the web. Here are some ideas for creating Curve Stitches of your own. Curve Stitching. Curve Stitching. Making Maths: Curve Stitching. Challenge Level: If you think that sewing isn't for you, think again.
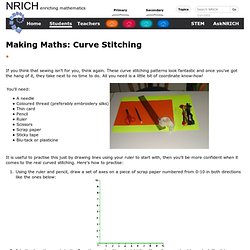
These curve stitching patterns look fantastic and once you've got the hang of it, they take next to no time to do. All you need is a little bit of coordinate know-how! It is useful to practise this just by drawing lines using your ruler to start with, then you'll be more confident when it comes to the real curved stitching. Here's how to practise: Using the ruler and pencil, draw a set of axes on a piece of scrap paper numbered from 0-10 in both directions like the ones below: Join the 1 on the x-axis to the 9 on the y-axis with a straight line.
Now that you've had a go on paper, you're ready to stitch! There are lots of variations on this curve stitching idea. Curve stitching forget-me-not printables. Curve stitching is interesting, and I always forget how fun until I run across something about it.
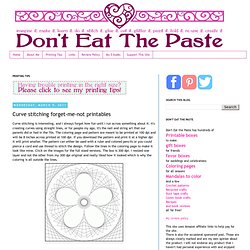
It's creating curves using straight lines, or for people my age, it's the nail and string art that our parents did or had in the 70s. The coloring page and pattern are meant to be printed at 100 dpi and will be 8 inches across printed at 100 dpi. If you download the pattern and print it at a higher dpi it will print smaller. The pattern can either be used with a ruler and colored pencils or you could pierce a card and use thread to stitch the design. Follow the lines in the coloring page to make it look like mine. Curve stitching templates.