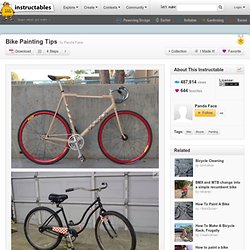

Bike Painting Tips. - To strip bike frames completely I use brush–on (not aerosol) Aircraft Stripper.

With the brush on variety you can load it on, let it dry and get almost all the paint off in an hour or so. Be careful though, this stuff is EXTREMELY TOXIC! - If you only want to sand down the current paint, my favorite method is to use 180grit wet/dry sandpaper. I keep a bucket next to me and rinse off the paper when its starts to clog with old paint. The wet sanding cuts through the paint pretty quick but it still takes awhile. - I tape off all the holes and trim the excess with an exacto. . - If you can, wait for a warm, dry day. DIY Design Community « Keywords: DIY, nails, house numbers.
Plastic Cup Lamp. Now that my university is closed for winter holidays, I finally have more free time to do all the crafty things I’ve been wanting to.

One of these is a lamp made from plastic cups I’ve seen at taf, the art foundation, in the Monastiraki region in the center of Athens. When I first saw it at taf, I was amazed; I looked closely and I couldn’t believe my eyes! The object itself is so peculiar, modern and alien-like it could be in any design exhibition. With my best friend’s birthday coming up, I decided to make it myself and give it to her as a gift. It turns out it was the easiest craft I’ve even done, the epitome of DIY objects! Disclaimer: There have been some concerns about the safety of this construction (see the comment of user “when” below for example). I only needed a couple of things: 200-250 large plastic cups (recyclable, at least )600-700 staplesa staplera lamp socket, lamp cord and plug – mine came from a broken IKEA lamp! That’s all you will need.
…to this! You might also like: Resolution Subway Art – Tutorial. This was my submission from the SYTYC “New Year’s” Challenge….I finally won a challenge!

That puts Dana and I into the final two this coming week! I haven’t made resolutions for the past few new years because I usually forget about them after a few weeks. This year as a family we came up with a short list of things we wanted to focus on everyday and I made the list into a large piece of art. I love that this large 3 foot high wood piece is reminiscent of an early 20th century subway sign.
It is durable enough to hang in an outside eating area: It is simple enough to rest on a side table: And it is bold enough to display on a mantle as the focus of a room: Here is how I made it: Step 1: I bought a ready cut 2′ x 4′ piece of wood from my hardware store and had them shorten it to 2′ x 3.’ Step 2: I also bought long wood molding strips that were 1/2″ wide and 1 1/2″ deep. Step 9: I printed out my resolutions on regular sized paper.
Visit the following tutorial too! DIY Design Community « Keywords: chair, suitcase, vintage, recycle. Remember Big Cat's adorable vintage suitcase cum bed?

Well...Kate's chair is giving that kitty cozy a run for its money. Besides the fact that it's as cute as a button, she also assures us that the chair is super comfy. For those of us already planning a trip to Good Will, here's our supply list, which is surprisingly minimal: a vintage suitcase4 legs4 screw-on leg attachments1 piece of thin plywoodfoam or pillows (to fit inside the suitcase)fabric To see how it all comes together, visit See Kate Sew.
Tagged : chair, suitcase, vintage, recycle, How-To, DIY.