
Le pool Instructables - Make, How To, and DIY. Le pool Lifehacker Tip Testers. Le pool DIY Projects. Sunday DIY - Floppy Disk Pen Holder - 4/5. Galerie de dam. Galerie de rintakumpu. CuBox ARM Mini-Computer: Two Raspberry Pis Stuffed Inside A Cube. Hello Linux Geeksters.
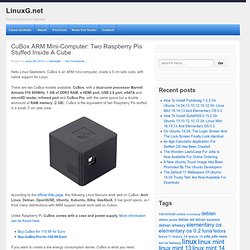
CuBox is an ARM mini-computer, inside a 5 cm side cube, with native support for Linux. There are two CuBox models available, CuBox, with a dual-core processor Marvell Armada 510 800MHz, 1 GB of DDR3 RAM, a HDMI port, USB 2.0 port, eSATA and microSD reader, infrared port and CuBox Pro, with the same specs but a double ammount of RAM memory (2 GB). CuBox is the equivalent of two Raspberry Pis stuffed in a small, 5 cm side cube. According to the official Wiki page, this following Linux flavours work well on CuBox: Arch Linux, Debian, OpenSUSE, Ubuntu, Xubuntu, Xilka, GeeXboX. It has good specs, so I think many distributions with ARM support would work well on Cubox. Unlike Raspberry Pi, CuBox comes with a case and power supply. If you want to create a low energy consumption server, CuBox is what you need.
Share and Enjoy. CuBox. The SolidRun CuBox is is the world's smallest desktop computer.
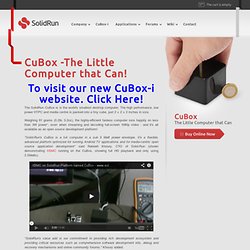
The high performance, low power HTPC and media centre is packed into a tiny cube, just 2 × 2 × 2 inches in size. Weighing 91 grams (0.2lb, 3.2oz), the highly-efficient fanless computer runs happily on less than 3W power*, even when streaming and decoding full-screen 1080p video - and it's all available as an open source development platform! "Solid-Run's CuBox is a full computer in a sub 3 Watt power envelope. It's a flexible, advanced platform optimized for running Android TV applications and for media-centric open source application development" said Rabeeh Khoury, CTO of Solid-Run (shown demonstrating XBMC running on the CuBox, showing full HD playback and only using 2.5Watts). "SolidRun's value add is our commitment to providing rich development ecosystem and providing critical resources such as comprehensive software development kits, debug and recovery mechanisms and online community forums," Khoury added.
Raspberry Pi Owncloud (dropbox clone) Now we have download the software we need to configor it. First off we need to install PHP apc $ sudo pecl install apc After that is done we need to create the apc.ini $ sudo nano /etc/php5/cgi/conf.d/apc.ini In to that file we need to add the following extension=apc.so apc.enabled=1 apc.shm_size=30 Once added the file needs saving Next up we have to change the PHP.ini to change the max upload file so we can add large file and add the APC externsion to PHP $ sudo nano /etc/php5/apache2/php.ini In this file we need to find upload_max_filesize and then change the value to 1024M which will allow files of upto 1GB to be uploaded The we need to find post_max_size and then chaged the value to 1200m which will allow files to upto 1 gb to be uploaded.
Consommation electrique d'un serveur web. Avant d’héberger mon site Internet sur ma ligne ADSL, j’ai réalisé une petite étude du coût.
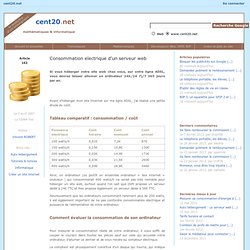
Tableau comparatif : consommation / coût Ainsi, un ordinateur (ou plutôt un ensemble ordinateur + box internet + onduleur ) qui consommerait 400 watts/h ne serait pas très rentable pour héberger un site web, surtout quand l’on sait que OVH propose un serveur dédié à 24€ TTC et free propose également un serveur dédié à 36€ TTC. Heureusement que les ordinateurs consomment rarement plus de 200 watts, il est également important de ne pas confondre consommation électrique et puissance de l’alimentation de votre ordinateur.
Comment évaluer la consommation de son ordinateur Pour mesurer la consommation réelle de votre ordinateur, il vous suffit de couper le courant dans toutes les pièces sauf sur celle qui accueille votre ordinateur, d’allumer ce dernier et de vous rendre au compteur électrique. Le compteur est physiquement constitué d’un disque qui tourne, qui indique la consommation électrique. Macro filming and photography with the camera board. Although the lens on the Raspberry Pi camera board is nominally fixed-focus, we’ve found that with a bit of hackery, you can gently unscrew it from its mount and change the focal depth.
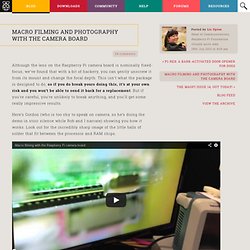
This isn’t what the package is designed to do, so if you do break yours doing this, it’s at your own risk and you won’t be able to send it back for a replacement. But if you’re careful, you’re unlikely to break anything, and you’ll get some really impressive results. Here’s Gordon (who is too shy to speak on camera, so he’s doing the demo in stoic silence while Rob and I narrate) showing you how it works.
Look out for the incredibly sharp image of the little balls of solder that fit between the processor and RAM chips. The lens is attached to the rest of the unit by a screw thread, and glue is applied to the thread in the factory that makes the lens/sensor package to keep it in place. An ARM GNU/Linux box for $25. Take a byte!