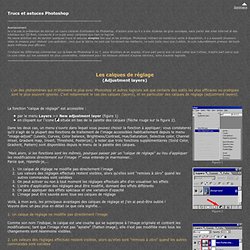

G. Desroches - Cours photo - Tutoriel Photoshop - Calques de réglage. La fonction "calque de réglage" est accessible : par le menu Layers => New adjustment layer (figure 1) en cliquant sur l'icone située en bas de la palette des calques (flèche rouge sur la figure 2).

Dans les deux cas, un menu s'ouvre dans lequel vous pouvez choisir la fonction à appliquer; vous constaterez qu'il s'agit de la plupart des fonctions de traitement de l'image accessibles habituellement depuis le menu "image-adjust" (Levels, Curves, Color balance, Brightness/Contrast, Hue/Saturation, Selective color, Channel mixer, Gradient map, Invert, Threshold, Posterize); à noter que trois fonctions supplémentaires (Solid Color, Gradient, Pattern) sont disponibles depuis le menu de la palette des calques.
"Mais alors, si les fonctions sont les mêmes, pourquoi passer par un "calque de réglage" au lieu d'appliquer les modifications directement sur l'image ? " vous entends-je marmonner... Parce que, réponds-je,... 1. 2. 3. 4. 5. 6. How to Use Light and Shadow to Create a Dramatic Photo Effect with Photoshop. How to Use Light and Shadow to Create a Dramatic Photo Effect with PhotoshopReviewed by Jarka Hrnčárková on Jul 4Rating: Preview of Final Results How to Use Light and Shadow to Create a Dramatic Photo Effect Photoshop Tutorial Resources Step 1 – Preparing the Picture Open the photo of a girl in Photoshop.

Step 2 – Blurring the Sky Right now the sky is not blended with the rest of the picture. Below you can see how the image looks so far. Step 3 – Blending the Sky Before you’ll start to adjusting contrast and colors of the sky let’s focus on blending. Then lower the Opacity on 80% to get even better result. Photo Retouching. Contrast LayersReviewed by Denny Tang on Sep 11Rating: In this page, we’ll create the two contrast adjustment layers.

One will be for the highlights of the image and the other for the shadows. Step 1. Amazing Landscapes using Adobe Camera Raw and Adobe Photoshop. Multiply With Layer Mask. Retouching a Studio Portrait. Retouching a Studio PortraitReviewed by Denny Tang on Oct 17Rating: Before and After Retouching a Studio Portrait Photoshop Tutorial Retouching the background Here is the original image.

Photoshop Ghost Effect Tutorial. Written by Steve Patterson.

In this Photoshop effects tutorial, we’re going to look at a way to give a photo a more “ghostly” appearance. I’m a fan of horror films, but I admit I’m a bit shallow in that I usually just watch them for the special effects. I’m usually sitting there thinking to myself, “I wonder how they did that”. So while playing around in Photoshop one night, I came up with this little technique for taking a living, breathing person and making them appear more like a ghost, which is why I called it”ghosting an image”. It’s a simple effect with only a few steps involved and they’re easy to do. Of course, as with most photo effects, it helps if you start with the right type of image. Applying a Realistic Tattoo. Creating That Dave Hill Look. Nick Wheeler, one of my all times Flickr favorites, just uploaded a new picture to DIYP pool.

(And yes, it is the same Nick who brought you The DIY Strip Light and the Floor Lit Table Top Studio). The posing on this picture is great, but the first eye catcher of this image is the Dave Hill post processing look it has. If you don’t know Dave Hill, please, sit back and treat yourself to an hour of fine photography. Dave is known for two things: You can not forget his portraits ones you’ve seen them – the visual impact is very strong. And you can not ignore his unique post processing look, what has become to be known as “The Dave Hill Look”.
Incruster de la texture sur une photo. Beauty of Selective Color. In this post I want to say you few words about one adjustment tool which Photoshop offers.

It´s Selective Color. 3 Fantastic Uses of the Photoshop High Pass Filter. Photoshop CS's high pass filter is very versatile.

There are three ways you can put it to use. One, it's a great sharpening tool. Two, contradictory as it sounds, you can use it to soften portraits and other photos. Three, you can use it to create a high contrast portrait effect. In this tutorial, I'll show you how to do all three. Step 1. This is the image that I want to sharpen. Sharpening is always the last step in post-processing. Right click on the Background layer and choose Duplicate layer. Go to Filter > Other > High Pass... Set the Radius. Go to Image > Adjustments > Hue/Saturation... and set the Saturation to zero.
Change the Blending Mode to Overlay. Here you can see the difference after sharpening. Step 2. People And Beauty - Olivier Chauvignat - Stages Photo - Cours Photo - High-Key - High Key Lighting - Low Key - Photo Beauté - Photographe Mode Beauty Fashion Photographer.