
Thésaurus Lightroom spécial Paris : l'outil idéal des photographes parisiens. Quand on commence à avoir une somme importante de photos, il devient difficile de s’y retrouver avec seulement l’organisation par dossiers ou dates.

Il est alors indispensable de bien taguer ses photos en utilisant des mots-clés. Mais cette opération peut vite se révéler fastidieuse : chaque photos peut nécessiter plusieurs mots-clés, et outre le temps que ça prends de les rentrer un à un, il faut avoir l’imagination nécessaire pour penser à tous les mots définissant une photo. Heureusement, il est possible de créer ce qu’on appelle des thésaurus, c’est à dire ni plus ni moins qu’une liste de mot-clés qui peut être importer dans Lightroom. Un thésaurus de 8300 mots-clés dédié à la photographie Parisienne Ayant découvert cette fonctionnalité de thésaurus lors d’une formation Lightroom chez regart.net j’ai tout de suite vu l’énorme potentiel que je pouvais tirer de cette méthode dans ma pratique quotidienne.
Et c’est là que l’on devine la puissance de la chose. Contenu non exhaustif : The Portrait Photographer. Aide : Laissez-passer. What is a Guest Pass?

You can share public photos in your photostream by copying the URL in your browser's address bar and pasting it an email. Anyone can see your public photos anytime, whether they're a Flickr member or not. But! If you want to share private photos with people, use a Guest Pass. You can grant anyone access to the entire contents of one of your sets, including any private photos it contains. Go to the set or photo you want to share and click the "Share this" button. Or if you want to give someone a link to see everything in your photostream including friends and family photos... Permalink | Top How long do Guest Passes last? Guest Passes last until you choose to expire them. MacandPHOTO.com - Photographie et Mac. Get Greater Depth of Field with the Brenizer Method.
Do you dream of faster lenses, larger apertures, and ice cream?

We do too! Too bad, brand new lenses don’t drop into our laps everyday. Fortunately, photographer Ryan Brenizer has developed a way to get specular results from your thrifty fifty or a basic kit zoom lens. By stitching together multiple shots, Ryan makes impossibly shallow depths of field, possible. Follow a few easy steps and you too can take photos with the look of a faster more pricy lens. (And when you spend less on new lenses, there’s more money for sundaes!) How to Apply Brenizer Method A million thanks to Ryan for letting us feature a few of his photos. What’s the Big Idea? Everyone loves the look of photos shot with a thrifty fifty (fixed 50mm lens) or a zoom lens that allows for a really shallow depth of field.
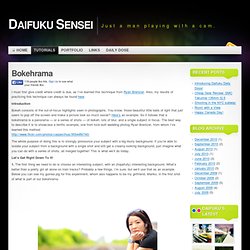
Unfortunately, these lenses don’t give you a very wide angle. This is where the Brenizer method comes to the rescue! What You’ll Need Step One: Set Camera to Stun And by stun, we mean manual mode. « Bokehrama. I must first give credit where credit is due, as I’ve learned this technique from Ryan Brenizer.

Also, my results of practicing this technique can always be found here. Introduction.
Focus stacking technique using Adobe Photoshop CS5: re-post on my blog. While I working on a new articles from the shots we have done in 2011, I’d like to re-post the full article form my guest post for LearnMyShot.com (great educational source for beginners).

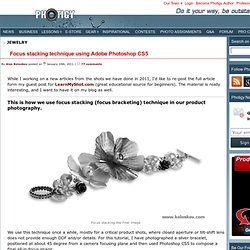
The material is really interesting, and I want to have it on my blog as well. This is how we use focus stacking (focus bracketing) technique in our product photography. Focus stacking the final image We use this technique once a while, mostly for a critical product shots, where closed aperture or tilt-shift lens does not provide enough DOF and/or details. For this tutorial, I have photographed a silver bracelet, positioned at about 45 degree from a camera focusing plane and then used Photoshop CS5 to compose a final all-in-focus image.
First, the lighting setup. even though it is not related to the focus stacking technique, I think it will be cool if I explain it here. Because the bright bracelet has black cast on some of its pieces, I wanted to make sure it will be correctly shown on the final image. Tuto : High Key, Réduire la latitude de contraste d'une photo - v2 - People And Beauty. PictureCorrect - Photography Tips and Techniques. Cambridge in Colour - Photography Tutorials & Learning Community. How to do Levitation Photography. Pro photo life professional photography blog - digital photography tips for amateur and aspiring professional photographers. Photoshoot: How to Create Lighting for Cinematic Portraits.
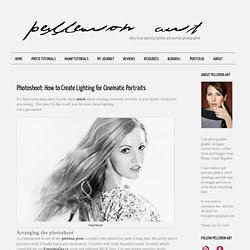
It´s been quite long since I wrote short article about creating cinematic portraits.

It was mostly about post processing. This time I´d like to tell you bit more about lighting. Let´s get started! Arranging the photoshoot As I mentioned in one of my previous posts I couldn´t take photos for quite a long time. It took almost two long months till all three of us were available for shooting. Something always goes wrong I´ve already get used to the fact that during every photoshoot something goes wrong and you have to use your improvization skills to save the situation.
This photoshoot was full of little glimpses. It started already at the station. Luckily we found each other after few confused phone calls and headed to the studio to wait on MUA. First backdrop was too short, it didn´t even reach the floor. I wanted to create "movie poster look" I had planned to shoot with soft box as main light source. Right now I´m very grateful that the soft box was broken. And here is the light diagram.
Comprendre la photo » 35 photographes de l’agence Magnum donnent leurs conseils aux débutants !